It's fun to just do a classic every now and then. This recipe is really unremarkable. The only reason I am updating it on the blog is for a general reminder. Sometimes the best dinners are simple and the ones that your kids get to help you make. My 5 year old twins really loved assembling this pizza. And when I say assemble, I really do mean assemble. I bought the whole wheat, pre-made dough, jarred pizza sauce, shredded cheese and toppings. I did get nutty and buy salami slices, instead of pepperoni...but that difference was negligible. However, the assembly part was what put this pizza over the top . Helping mommy in the kitchen and us spending time together doing something fun was where all the magic was in this meal. I will say that the kids swore up and down that this pizza tasted better than any pizza they've ever had. Actually, I agree with them on that point. It did taste better than any other pizza. Not because it was a super-fantastic culinary taste sensation, but because it was made with precious little hands and they lit up like Christmas trees in being tasked with dinner preparation. It was fun to make and fun to watch them delight in something so small. I need to remember to do stuff like that with them more often, that is for sure. We served our pizza with a bagged Ceasars salad kit, and had ice cream with chocolate syrup for dessert. It was one of my top 10 meals of my year.
Whole Wheat Salami Pizza
Ingredients:
1 ball of pre-made whole wheat pizza crust
1 package of shredded mozzarella cheese (I think they are 8 oz bags)
1 package of shredded cheddar cheese
1 jar of your favorite pizza sauce
1 package of salami
cooking spray
cornmeal
Directions:
Follow the directions for the pizza dough printed on the bag. Preheat the oven to whatever degrees. Roll out the dough. Coat a sheet pan with cooking spray and then sprinkle cornmeal on the pan, so the pizza doesn't stick. Make sure your small "assistants" have clean hands that are booger-free. Help your kids maneuver the rolled out dough into the pan. Let them fold the edges over to make the crust. Step away from the pizza. Let your kids do the rest of the work, while you supervise. Let them spread the sauce from the jar with spoons. Let them sprinkle all of the cheese. Let them willy-nilly place salami to and fro over the surface of the pizza. Ignore your anal-rententive urge to rearrange the salami slices to be symmetrical (ok, I may have failed at this step). Bake pizza as directed. When pizza comes out of the oven, let it cool for 5 minutes and then cut it with a pizza wheel into slices (or squares in our case). Sit back and revel in the smiles that your children have while enjoying their creation.
Showing posts with label quick. Show all posts
December 22, 2015
April 15, 2013
Bacon-Wrapped Cod
I've been trying to go back to having more fish in our diet. Trying is the operative word in that sentence. It's funny how, once I get out of the habit of something, it's really hard to get back into it. We used to have fish once or twice a week. Now, not so much. I would say I serve it sporadically, at best. It's sad too, because I LOVE seafood. I'm not sure why, either. I guess maybe it's because it is never on the forefront of my mind when I menu plan (much like vegetarian dinners). Whatever the reason, I need to give myself an open reminder to plan more fish dinners. I don't really remember when we had this cod recipe or in what context, but I do remember it was very tasty and everyone--including children--liked it a lot. I think I found it by doing a search on MarthaStewart.com for cod, since I had bought a bag of frozen at Costco and I needed ideas on how to prepare it. Since we all loved bacon, it was a no-brainer. The recipe is pretty straight-forward and I remember it was pretty easy to put together for a weeknight dinner.
Bacon-Wrapped Cod
Adapted From: marthastewart.com
Ingredients:
1 skinless, boneless cod fillet (1 1/4 pounds and 1 1/2 inches thick)
Coarse salt and ground pepper
12 strips bacon (about 12 ounces total)
Directions:
Cut fish into 4 pieces and season with salt and pepper. On a work surface, arrange 3 slices bacon so they overlap slightly. Place a piece of fish at one short end and tightly wrap with bacon, cutting off any excess bacon. Repeat with remaining fish and bacon.
Heat a large nonstick pan over medium-high. Place fish, seam side down, in pan and cook until bacon is deep golden brown on all sides, about 9 minutes, turning occasionally.
NOTE:
My frozen cod came already portioned into fillets, so I skipped the cutting step and went right to the wrapping step.
March 16, 2013
Italian Chicken Bake
I've been a blog-updating fool lately! It's funny because I will go weeks without trying anything new meal-wise (i.e. no new blog updates), and then all of a sudden, have a bunch of new recipes to post all at once. Granted, it's probably days/weeks in between when we actually have the meals and when I get all the updates finally on here. It's just odd that my blogging has been reduced to completing it in fits and starts. I guess it just depends on my mood or how busy we are, basically. Also, I've noticed that I will go weeks at a time without wanting to try any new recipes. I just want easy, stand-by dinners that I've done a million times and that I can put together from memory; I call it auto-pilot cooking. That's my standard when I'm overly extended or stressed out and discovering new meals is just one more thing to worry about or check off the to-do list. For now, life has settled into a rhythm and I'm up for trying new dinners and updating posts. Hooray!
This was a Pinterest find that wasn't actually a recipe, more like a photo and a loose guideline. The "recipe" didn't even have an official name or really a source, so I creatively dubbed it "Italian Chicken Bake". Really original, I know! I tweaked it from the original suggestion and made it my own. The result was really tasty and satisfying, so my version is a keeper. I think we had our chicken with some steamed mixed veggies and called it dinner.
Italian Chicken Bake
Ingredients:
cooking spray
1-2 tablespoons of olive oil (I really didn't measure)
1-2 tablespoons of balsamic vinegar (again, I really didn't measure)
4-6 chicken breasts (depending on how many portions you'd like)
2 containers of cherry tomatoes, halved
1 red onion, sliced thin
1 container of sliced crimini or white button mushrooms
4-6 cloves of garilc, minced
1-2 cups of shredded mozzarella cheese
1/4 cup of water
salt and pepper, to taste
chopped fresh basil, for garnish
Directions:
Spray glass casserole dish with cooking spray and preheat the oven to 350 degrees.
Place chicken in dish and sprinkle with salt, pepper. and then drizzle with a little bit of olive oil.
Add chopped tomatoes, sliced mushrooms, sliced red onion, and minced garlic to the dish, covering the chicken.
Drizzle the balsamic vinegar and water over top of the veggies.
Sprinkle shredded cheese over top of chicken and veggies.
Bake for 30-40 minutes at 350 degrees.
Remove from the oven and let rest for 5 minutes.
Sprinkle the fresh basil over the top, as a garnish.
Once plated, spoon a tablespoon or so of the pan juices over top of your serving of chicken/veggies.
March 14, 2013
Beef and Snow Peas with Garlic Quinoa
I've really paired my cooking show viewing down in the last couple of years. I used to be addicted to cooking TV, and I've slowly weaned my way off of it. It might have something to do with having an almost 7 year old, and 3 year old twins. My television time is seriously limited, so I have to be pretty choosy.
Once in a while, I'll flip to either Food Network or the Cooking Channel, but I don't have any type of steady viewership anymore. Well, with the exception of one... I've gotten down to only recording one show, and that is The Pioneer Woman. I've followed her website religiously for years, went to a book signing for her first cookbook, and was so excited when she finally came out with her own show (it's really not so new anymore; I think it's actually in it's second or third season??). Needless to say, I LOVE PW! I have tested so many of her recipes and I think I've always received rave reviews for her stuff. She knows what she is doing, that's for sure.
Anyway, this recipe was demonstrated on one of her TV episodes entitled "16 minute dinners". She put together some fast, go-to weeknight recipes for when there was a time crunch. (READ: every night for us.) They all looked tasty, but this one stood out for me. I made it a few nights ago for dinner, and as promised, it was fast and delicious! PW has never steered me wrong!
Beef and Snow Peas with Garlic Quinoa
Adapted From: The Pioneer Woman cooking show
Ingredients:
1/2 cup low-sodium soy sauce
3 tablespoons sherry or cooking sherry
2 tablespoons cornstarch
2 tablespoons brown sugar
1 tablespoon peeled and minced fresh ginger
1 1/2 pounds flank steak, trimmed of fat and sliced very thin against the grain
3 tablespoons canola or peanut oil
8 ounces fresh snow peas, trimmed
5 whole scallions, cut into 1/2-inch pieces on the diagonal
Crushed red pepper
Salt, as needed (I didn't use any salt, so this is totally optional-use sparingly.)
Garlic quinoa (see below) or serve over cooked rice of your choice
Directions:
In a bowl, mix together the soy sauce, sherry, cornstarch, brown sugar and ginger. Add the beef to a separate bowl and pour one-third of the liquid over the top. Save the rest of the liquid. Toss the beef and set aside.
Heat the oil in a heavy skillet (iron is best) over high heat. Add the snow peas and stir for 45 seconds and get as much color on them as possible. Remove to a plate.
Allow the skillet to get very hot again. With tongs, add half the meat mixture, leaving most of the marinade still in the bowl. Spread out the meat as you add it to skillet, but do not stir for a good minute. (You want the meat to get as brown as possible in as short amount a time as possible.) Sprinkle half the scallions over the meat. Flip the meat to the other side and cook for another 30 seconds. Remove to a clean plate.
Repeat with the other half of the meat, allowing the skillet to get very hot again first. After flipping, add the first plateful of meat, the reserved liquid, the crushed red pepper and snow peas. Stir over high heat for 30 seconds, and then turn off the heat. Check seasonings and add salt only if it needs it. The mixture will thicken as it sits. Serve immediately over quinoa or rice.
NOTE: I didn't separate the marinade into two different bowls. I just added to the pan and made sure it boiled, rather than separating and using half and then discarding half. It's better probably to separate and be better safe than sorry, but I've never had an issue doing it my way. It's your choice, man.
Garlic Quinoa
Ingredients:
1 1/2 cups quinoa, rinsed and drained in a colander
water to cover by 1/2 inch or so (Usually it's about equal parts quinoa/water, but I don't measure.)
2 tablespoons butter
5 cloves minced garlic cloves
pinch of salt
Directions:
Rinse quinoa thoroughly in a colander, under running water, until it runs clear. Shake any excess moisture off of quinoa and set aside. I just place the colander on a kitchen towel until I'm ready to start cooking it.
Meanwhile, melt the butter in a medium sauce pan over medium-high heat. Add garlic and cook for 30 seconds to 1 minute; until garlic starts to get fragrant and just a tiny bit of color on it. Add prepared quinoa to sauce pan and toast it for 2 minutes, or until some of the quinoa bits get slightly browned. Add water, a pinch of salt, and bring to a boil. Cover and turn heat down to low. Let quinoa steep in water until all the water is absorbed. Fluff with a fork and serve as a base for the Beef and Snow Peas.
August 29, 2012
Chewy Caramel Popcorn and Pretzel Bars
(Cutting my pan of pressed caramel/popcorn/pretzel goodness into ooey-gooey bars...)
(Then, I wrapped each one in foil and stored in a zip top bag in the pantry. It makes it easy to just grab one and throw it in the boy's lunch box in the morning.)
I made and packaged these bars up in foil so my son could take them to school in his lunch. I will admit, I probably ate about three of them in the process! They are so tasty. It's like a salty, sweet, pretzel-y, popcorn-y, Rice Krispie treat...without the Rice Krispies. Does that make sense? No??? Well, you'll have to try 'em to understand what I mean, I guess.
Chewy Caramel Popcorn and Pretzel Bars
From: Martha Stewart, Everyday Food October 2010
Ingredients:
Nonstick cooking spray
12 cups plain popped popcorn (from 1/2 cup kernels or 2 microwave packages)
4 cups coarsely chopped small salted pretzels (7.5 ounces)
2 cups sugar
Coarse salt
2/3 cup heavy cream
2 cups miniature marshmallows
Directions:
Coat a 9-by-13-inch baking dish with cooking spray. In a large bowl, toss together popcorn and pretzels. In a medium saucepan, bring sugar, 1/2 teaspoon salt, and 1/2 cup water to a boil over medium-high. Boil, undisturbed, until mixture is amber in color, 8 to 12 minutes. Remove pan from heat and slowly pour in cream (mixture will sputter). Immediately add marshmallows; stir until melted.
Pour caramel mixture over popcorn and pretzels and quickly stir with a rubber spatula to coat. Transfer mixture to dish and use a piece of plastic wrap coated with cooking spray to press evenly into dish. Sprinkle with coarse salt if desired. Let cool completely before cutting into 12 bars.
(Then, I wrapped each one in foil and stored in a zip top bag in the pantry. It makes it easy to just grab one and throw it in the boy's lunch box in the morning.)
I made and packaged these bars up in foil so my son could take them to school in his lunch. I will admit, I probably ate about three of them in the process! They are so tasty. It's like a salty, sweet, pretzel-y, popcorn-y, Rice Krispie treat...without the Rice Krispies. Does that make sense? No??? Well, you'll have to try 'em to understand what I mean, I guess.
Chewy Caramel Popcorn and Pretzel Bars
From: Martha Stewart, Everyday Food October 2010
Ingredients:
Nonstick cooking spray
12 cups plain popped popcorn (from 1/2 cup kernels or 2 microwave packages)
4 cups coarsely chopped small salted pretzels (7.5 ounces)
2 cups sugar
Coarse salt
2/3 cup heavy cream
2 cups miniature marshmallows
Directions:
Coat a 9-by-13-inch baking dish with cooking spray. In a large bowl, toss together popcorn and pretzels. In a medium saucepan, bring sugar, 1/2 teaspoon salt, and 1/2 cup water to a boil over medium-high. Boil, undisturbed, until mixture is amber in color, 8 to 12 minutes. Remove pan from heat and slowly pour in cream (mixture will sputter). Immediately add marshmallows; stir until melted.
Pour caramel mixture over popcorn and pretzels and quickly stir with a rubber spatula to coat. Transfer mixture to dish and use a piece of plastic wrap coated with cooking spray to press evenly into dish. Sprinkle with coarse salt if desired. Let cool completely before cutting into 12 bars.
August 27, 2012
Turkey Pesto Burgers
I'm always on the lookout for a new and interesting twist on a turkey burger. It's funny because there seems to be no in-between when it comes to turkey burgers. If it's bad, it's really bad. However, if it's good, it's fantastic. I find that there is no middle ground whatsoever. (The spectrum is from "flavorless cardboard" to "it's delicious and I don't miss the beef at all".) Thankfully, these Turkey Pesto Burgers were on the delicious meter. They were moist and flavorful. The pesto really added some zip to them. Also, I only had to use a wee bit of the mayo mixture on each bun, since the burgers already were seasoned with the pesto. All in all, this was one of the fantastic versions of the often unpredictable turkey burger.
Turkey Pesto Burger
Adapted From: Confessions of a Foodie Bride via Pinterest
Ingredients:
1 lb. package of extra-lean ground turkey
4 Tbsp pesto (purchased or homemade)
Salt and pepper to taste
For serving:
4 slices of fresh mozzarella
4 Burger buns (whole wheat buns or whole wheat Sandwich Thins preferred)
Pesto mayo (stir together equal parts mayo and pesto with a couple drops of Balsamic)
Tomato slices
Basil leaves
Balsamic vinegar
Directions:
Heat your grill to high.
Break apart the ground turkey into a bowl and season with salt and pepper.
Add basil pesto. If your pesto is very thin, consider using the low end of the range. If it's thick, you can add more. Lightly mix with your hands to distribute the pesto and then form 4 patties.
Cook ~4 minutes each side (to desired doneness or internal temp) and then top with slices of cheese during the last minute so it has time to melt.
Serve the turkey pesto burgers on buns with pesto mayo, fresh basil leaves, sliced tomato, and a drizzle of good balsamic vinegar.
Labels:
easy,
fan-freakin'-tastic,
grilled,
hamburgers,
healthy,
italian,
pesto,
quick,
turkey
August 22, 2012
Cheesy Black Bean and Chicken Quesadillas
I have no idea what made me think of this recipe, but I do remember seeing something similar somewhere on the web. I follow a lot of websites and blogs, and try to "pin" interesting recipe I find on my Pinterest boards, but sometimes I forget. When I tried to track down the exact recipe source for this dish, I couldn't find it and I couldn't remember where I originally found it. Yeesh. So, I did what I normally do and just improvised my own version.
Thankfully, these quesadillas were delicious and paired well with my leftover Roasted Pineapple Habenero Salsa. Best of all, they were quick to get on the table. Over the weekend, I had prepped some chicken breasts by marinating/baking/slicing them up to have over salads during the week. I cooked 5 whole breasts and had quite a bit of chicken stored in our fridge. (I probably used 3 sliced breasts for this recipe.) I wanted to simplify this dinner, so I used my pre-cooked chicken to make it easier to put together. I had my first PTO meeting for my son's school last night, and I needed to get dinner on the table fast. Cutting out the chicken-baking step really helped speed this meal up. I was able to relax and have a nice dinner with the family despite the time crunch to make it to the PTO meeting. Some microwaved steamed green beans completed our dinner and made our meal filling and satisfying.
Oh, and did I mention that each quesadilla was only 285 calories??? No??? Well, they were! Amazing, I know. Especially since they did not taste low-cal, and all the ingredients fit my 'clean eating' requirements. Score! Fast, quick, healthy, and tasty...this was a dinner-winner all around.
Cheesy Black Bean and Chicken Quesadillas
Ingredients:
3 cooked & marinated chicken breasts, sliced (SEE NOTE BELOW)
6 wedges of Laughing Cow garlic and herb cheese
1 can of low sodium black beans, rinsed and drained
3-4 slices of reduced fat provolone cheese, halved (or sliced cheese of your choice)
7-8 100% whole wheat tortillas
your favorite salsa for topping
cooking spray
Directions:
Preheat oven to 350 degrees and line a baking sheet with parchment paper, foil, or a silicone baking mat. Set aside.
In a medium sized bowl, add Laughing Cow cheese and mash with a fork. Add black beans and stir to combine until cheese and beans are well incorporated.
To assemble the quesadillas, place a heaping tablespoon of bean mixture onto the left side of a tortilla and spread it around. (You are going to fold the tortilla in half, so only spread the mixture on half of the tortilla leaving the other half plain.) Place 3-4 slices of chicken on top of the bean/cheese mixture. Top with a half a slice of provolone (or sliced cheese of choice) and fold the plain side over the top. Repeat with additional ingredients.
Place folded quesadillas onto lined baking sheet and spray the folded tops lightly with cooking spray. bake for 15-20 minutes on the bottom oven rack, or until cheese is melted. Flip on the broiler for an additional 1-3 minutes to crisp to tops of the quesadillas. (Watch them closely under the broiler so they do not burn.)
Remove cooked quesadillas from the oven to a cutting board and slice with a pizza wheel. Serve with salsa and enjoy!
NOTE: My marinated chicken was just separating and freezing my fresh chicken in a zip top bag with some low cal Italian salad dressing. When I get home from the store, I take some of my chicken and separate it out into bags with whatever marinade I choose. In this case, it was bottled, organic salad dressing. I also put a little salt and pepper in the bag to season the chicken. Then, I just thaw the chicken when I'm ready to use it and throw it on the grill. Cook, slice, and store in the fridge and I'm DONE! It's fast and so easy to do in a pinch.
July 23, 2012
Easy Calzone Rolls
I can't believe it's been a month since I've updated anything! I know I've been MIA for awhile here on the ol' blog. Honestly, I haven't been making anything new lately. I've been pretty lazy in the kitchen and have decided to opt for meals that come together easily and are ones that I pretty much have memorized (i.e. tried and true recipes that are already in the archives). I did make these calzones which were both easy, inexpensive, and kid-friendly. This recipe reminded me of something my mom used to make all the time called 'sausage bread'. My mom's variation is a bit more labor-intensive, so I only make it once in a blue moon; usually for a special occasion. Needless to say, we only get to experience my mom's recipe once or twice a year at most.
I don't remember exactly when we had these...it's been a few weeks. However, I DO remember that this was a hit and we all really liked this fun version of a classic calzone.
Easy Calzone Rolls
Adapted From: DisneyFamily.com
Ingredients:
2 loafs frozen bread dough, thawed
1/2 pound sliced ham (I used prosciutto)
1/2 pound sliced hard salami
2 cups shredded mozzarella cheese (I used 1 cup mozzarella and 1 cup cheddar)
1 cup jarred marinara sauce
Directions:
Roll each loaf of dough into a rectangle about 8 inches by 12 inches.
Layer ham and salami down the center of each rolled loaf lengthwise.
Top meats with 1 cup shredded mozzarella for each roll.
Fold short ends of each loaf in about 1/2 inch and seal. Roll from the long sides and pinch well to seal the entire loaf. You should have 2 long rolls.
Bake, seam side down on a greased baking sheet in a 375 degree F oven for 20 minutes or until golden brown.
Cut each roll into 8 slices and serve with marinara for dipping.
June 4, 2012
Chimichurri
I have several posts to update, but I thought I'd pop on here and give you an easy recipe. I need some uninterrupted time with my laptop, so I can get everything updated; but alas, I'm the mother of three small children and I hardly ever get a block of time where I can do that. (Okay here is an amendment: if I do get some time I'm usually cleaning/picking up the house/controlling chaos/napping/rocking back in forth in a fetal position.)
For right now, here is an easy Chimichurri recipe that I used as topping for some grilled steaks we had recently. I'm going to Maui in October for a wedding and I want to be bikini-ready...or at least tankini-ready. I'm doing a modified low-carb diet until then; it's actually a macro-nutrient cycling diet from the book Crack the Fat Loss Code by Wendy Chant. Anyway, I'm in the first week which is low-carb. This chimichurri (which if you don't know what that is, it's similar to a pesto sauce) was easy to whip up and would go well with any protein (chicken, fish, steak, etc.) main ingredient. It fits the low-carb profile and was really, really tasty. Even if you are not doing a low-carb diet, I would recommend this topping for a twist on grilled meats/poultry/fish. YUM!
Chimichurri
Adapted From: food.com, recipe #21151
Ingredients:
1 bunch of parsley (flat leaf or curly is fine)
1/2 bunch of cilantro
8 cloves garlic, smashed & peeled
3/4 cup extra virgin olive oil
1/4 cup red wine vinegar
1-2 Tablespoons lemon juice
1 tablespoon diced onion
1 teaspoon black pepper
1/2 teaspoon salt
Directions:
Pulse parsley and cilantro in a food processor to chop. Add remaining ingredients and blend. Separate sauce into equal parts.
(Use half for basting or marinade and use other half for table service).
For right now, here is an easy Chimichurri recipe that I used as topping for some grilled steaks we had recently. I'm going to Maui in October for a wedding and I want to be bikini-ready...or at least tankini-ready. I'm doing a modified low-carb diet until then; it's actually a macro-nutrient cycling diet from the book Crack the Fat Loss Code by Wendy Chant. Anyway, I'm in the first week which is low-carb. This chimichurri (which if you don't know what that is, it's similar to a pesto sauce) was easy to whip up and would go well with any protein (chicken, fish, steak, etc.) main ingredient. It fits the low-carb profile and was really, really tasty. Even if you are not doing a low-carb diet, I would recommend this topping for a twist on grilled meats/poultry/fish. YUM!
Chimichurri
Adapted From: food.com, recipe #21151
Ingredients:
1 bunch of parsley (flat leaf or curly is fine)
1/2 bunch of cilantro
8 cloves garlic, smashed & peeled
3/4 cup extra virgin olive oil
1/4 cup red wine vinegar
1-2 Tablespoons lemon juice
1 tablespoon diced onion
1 teaspoon black pepper
1/2 teaspoon salt
Directions:
Pulse parsley and cilantro in a food processor to chop. Add remaining ingredients and blend. Separate sauce into equal parts.
(Use half for basting or marinade and use other half for table service).
May 7, 2012
Grilled Chile-Lime Chicken
My weight has been slowly creeping back up by a few pounds here and there. It's gotten to be about 15 lb. gain so far, and it's enough to make me say ENOUGH! I've really not been paying much attention to what or how I've been eating, so it really is understandable. Also, I've been starving since this whole swim/bike/run thing has taken over my life. Luckily, this is the last week before my triathlon and my training is officially over. I can start to focus again on building muscle/weight training and eating smaller portions. To kickstart my efforts, I worked a few low-carb, healthy meals into the rotation this week. (I can't go totally no carb, because it ends up doing more harm than good for me.) This chicken marinade recipe was really tasty and easy to put together. This is a great summertime recipe, as well--not too heavy. All in all, I would put this down in the 'win' column. This was the perfect dinner to get me headed in the right direction.
Grilled Chile-Lime Chicken
From: bettycrocker.com via Pinterest
Ingredients:
2 teaspoons grated lime peel
1/4 cup lime juice
1/4 cup olive or vegetable oil
2 tablespoons chopped fresh cilantro
1/2 teaspoon sugar
1/2 teaspoon salt
1 small jalapeño chile, seeded, finely chopped
1 clove garlic, finely chopped
4 boneless skinless chicken breasts (1 1/4 lb)
Directions:
1.To make marinade, in shallow glass or plastic dish, or resealable food-storage plastic bag, mix all ingredients except chicken.
2.Between pieces of plastic wrap or waxed paper, place each chicken breast smooth side down; gently pound with flat side of meat mallet or rolling pin until about 1/4 inch thick. Add chicken to marinade; turn to coat. Cover dish or seal bag; refrigerate at least 30 minutes but no longer than 24 hours.
3.Heat coals or gas grill for direct heat. Remove chicken from marinade; discard marinade. Cover and grill chicken over medium heat 8 to 10 minutes, turning once, until juice of chicken is clear when center of thickest part is cut (170°F).
February 21, 2012
Easy Taco Melts
I like to call this recipe, "Empanadas for Dummies". These little pocket taco melts have all the great features of an empanada, without all the muss and fuss (albeit not very traditional).
Seriously, these babies were so easy and quick to put together it was almost ridiculous; and the recipe itself has very few ingredients. Perfect for those of us--ahem!--who seem to be budget & time challenged lately. Affordable, family-friendly, and supremely tasty...need I say more????
Easy Taco Melts
Adapted From: pillsbury.com via Pinterest
Ingredients:
1 lb lean ground beef, cooked, drained
1 jar of your favorite salsa
1 can of jumbo refrigerated biscuits
1 cup shredded cheese (I used cheddar)
Directions:
In 10-inch nonstick skillet, mix cooked beef and jar of salsa. Cook over medium-high heat, stirring occasionally, until hot and liquid from salsa reduces down.
Press each biscuit into 6-inch round. Spoon some meat mixture and a good pinch of cheese onto the center of each round.
Fold dough in half over filling; press to seal. Place on greased (or lined) cookie sheet.
Bake at 375°F 9 to 14 minutes or until golden brown.
Here is a photo of some of the finished ones on the baking sheet. One taco melt is a good serving size for an adult. Yum!
February 12, 2012
Easy Oven Roasted Potatoes
I needed an easy side dish to go along with some grilled steaks for our Saturday night dinner. We were short on time, since my troops were hungry and we did not start cooking until well after 5 o'clock. I found this potato recipe on Pinterest that promised a relatively quick, easy, and delicious side dish. SOLD!
Easy Oven Roasted Potatoes
From: plainchicken.com via Pinterest
Ingredients:
2 large potatoes, scrubbed
3 Tbsp olive oil
1 Tbsp dried Italian Seasoning
1 tsp salt
4 Tbsp Parmesan cheese, grated
Directions:
Slice potatoes into very thin slices (1/4 inch). big ziploc bag to coat the potatoes. Toss potatoes with olive oil, Italian seasoning and salt in a ziplock bag to coat. Place in a single layer on a baking sheet lined with foil. Bake at 450 for 15 -20 minutes, until lightly brown. Top with Parmesan cheese and bake an additional 5 minutes.

The Result:
These potatoes were as advertised...crispy, easy, and delicious. In the time it took to grill our steaks, these potatoes were done perfectly. YUM!
Easy Oven Roasted Potatoes
From: plainchicken.com via Pinterest
Ingredients:
2 large potatoes, scrubbed
3 Tbsp olive oil
1 Tbsp dried Italian Seasoning
1 tsp salt
4 Tbsp Parmesan cheese, grated
Directions:
Slice potatoes into very thin slices (1/4 inch). big ziploc bag to coat the potatoes. Toss potatoes with olive oil, Italian seasoning and salt in a ziplock bag to coat. Place in a single layer on a baking sheet lined with foil. Bake at 450 for 15 -20 minutes, until lightly brown. Top with Parmesan cheese and bake an additional 5 minutes.
The Result:
These potatoes were as advertised...crispy, easy, and delicious. In the time it took to grill our steaks, these potatoes were done perfectly. YUM!
January 24, 2012
Cheese and Pesto Chicken
Yes, there has been a serious lack of recipes on here lately. I need to check the photos on my camera, because it's been so long since I've cooked anything new I can't even remember what new stuff I have made in the recent (or maybe not-so-recent) past. So in the interim of me getting my act together and uploading some new recipes and photos, I decided to pop on the old blog and at least post this easy, yummy dinner. I threw this dish together the other night out of necessity (I was missing some main ingredients for what I had planned to make originally...duh) and it turned out great. I didn't take a photo, but this was one tasty dish!
Cheese and Pesto Chicken
Ingredients:
cooking spray
4 chicken breasts
salt and pepper to taste
1/2 container of herbed soft cheese (I used Allouette brand)
1/2 jar of pesto
1 cup of shredded mozzarella cheese
Directions:
Spray baking dish with cooking spray. Place chicken breasts in bottom of dish and sprinkle with salt and pepper to taste. With a spatula, spread the herbed cheese over the seasoned breasts. Then top with pesto and cover dish with foil. Bake at 375 degrees for 20-25 minutes or until breasts are cooked through. When time is up, remove foil and sprinkle mozzarella cheese over top of cooked pesto chicken mixture. Switch oven over to broil and cook uncovered for another 2 minutes, or until cheese is melted, slightly browned and bubbly. Serve and enjoy!
The Result:
This was easy, fast, and delish! Also, we've started Phase 1 of South Beach Diet over again to lose some extra holiday pounds. This chicken recipe fits in nicely with the SBD repertoire; especially with our sides of salad and roasted asparagus. Yum!
Cheese and Pesto Chicken
Ingredients:
cooking spray
4 chicken breasts
salt and pepper to taste
1/2 container of herbed soft cheese (I used Allouette brand)
1/2 jar of pesto
1 cup of shredded mozzarella cheese
Directions:
Spray baking dish with cooking spray. Place chicken breasts in bottom of dish and sprinkle with salt and pepper to taste. With a spatula, spread the herbed cheese over the seasoned breasts. Then top with pesto and cover dish with foil. Bake at 375 degrees for 20-25 minutes or until breasts are cooked through. When time is up, remove foil and sprinkle mozzarella cheese over top of cooked pesto chicken mixture. Switch oven over to broil and cook uncovered for another 2 minutes, or until cheese is melted, slightly browned and bubbly. Serve and enjoy!
The Result:
This was easy, fast, and delish! Also, we've started Phase 1 of South Beach Diet over again to lose some extra holiday pounds. This chicken recipe fits in nicely with the SBD repertoire; especially with our sides of salad and roasted asparagus. Yum!
November 19, 2011
Hummus Melts
I've been on a vegetarian kick lately; making some new recipes and revisiting some old favorites. I would like to pretend that my renewed obsession with vegetarian meals is due to the fact that I'm being super-health conscious, but that's not it. Really, it boils down to time. It seems that we have had a lot going on in the evenings, and most vegetarian meals are just faster to prepare and get on the table. I don't have to mess around with thawing out a protein, so that saves me some prep time and most dinners can be put together in under a half an hour. Also, I've found a bevy of new vegetarian recipes lately that I've been itching to try out.
This recipe is one of the new ones that I found on Pinterest . We had a family night at my son's school and a "Mom's Night Out" event for my group of mommy friends, so we needed to get out the door in a hurry last night. A lengthy dinner just wasn't an option for us, so I thought these open-faced sandwiches would be a good choice. I was right...this recipe was super-easy and fast to put together. I had dinner on the table in about 20 minutes from start to finish. Not to mention, it was really, really healthy and tasty...we all gobbled it up. Thanks Pinterest for another simple and efficient vegetarian winner!
Hummus Melts
Adapted From: the (Never home)maker blog via Pinterest
Ingredients:
4-6 whole wheat English muffins
a large container of your favorite store-bought (or homemade) hummus
1 bag of washed baby spinach (I used a bag of an arugula/spinach salad blend)
1 Tablespoon of olive oil
1/2 white onion, diced
2 garlic cloves, minced
1 teaspoon of lemon juice
salt and pepper to taste
1-2 cups of shredded mozzarella cheese
Directions:
Preheat broiler on high. Place halved English muffins on large baking sheet, cut side up and toast under the broiler for a few minutes. Remove from oven and set aside.
In large skillet, heat olive oil over medium-high heat until shimmering. Saute onions in the oil, with a pinch of salt, until soft and translucent (about 5 minutes). Add minced garlic and saute for another minute, or until the garlic is fragrant. Add entire bag of washed baby spinach. Using a pair of tongs, toss spinach in onion mixture until wilted. Add lemon juice and salt and pepper to taste. Toss again to combine and remove from the heat.
Place a large spoonful of hummus on each toasted English muffin half. Then, using your tongs, evenly place a small pile of the spinach mixture on top of each half, over the hummus. Sprinkle each muffin half with a handful of shredded cheese. Place back under the broiler and cook until cheese is melted, starting to brown, and bubble. Remove from oven and serve immediately.
The Result:
So good! Our serving size was 2 halves per adult, and 1 half per kid at our table. I think I made a total of 5 English muffins, so there were 10 halves all together. There were plenty for us for dinner and we still had some leftover. These little sandwiches were so filling and satisfying...everyone loved them! Also, I had another one for lunch today and they reheat nicely. Another thought just occurred to me about this recipe...it is really economical! I fed our entire family of 5 (more or less; not including some of the other ingredients that I had on hand) with 1 bag of spinach, 1 container of hummus, 1 bar of cheese, and a package of English muffins. It breaks down to less than $2.00 per person for dinner; less if you factor in the leftovers. I love that!
This recipe is one of the new ones that I found on Pinterest . We had a family night at my son's school and a "Mom's Night Out" event for my group of mommy friends, so we needed to get out the door in a hurry last night. A lengthy dinner just wasn't an option for us, so I thought these open-faced sandwiches would be a good choice. I was right...this recipe was super-easy and fast to put together. I had dinner on the table in about 20 minutes from start to finish. Not to mention, it was really, really healthy and tasty...we all gobbled it up. Thanks Pinterest for another simple and efficient vegetarian winner!
Hummus Melts
Adapted From: the (Never home)maker blog via Pinterest
Ingredients:
4-6 whole wheat English muffins
a large container of your favorite store-bought (or homemade) hummus
1 bag of washed baby spinach (I used a bag of an arugula/spinach salad blend)
1 Tablespoon of olive oil
1/2 white onion, diced
2 garlic cloves, minced
1 teaspoon of lemon juice
salt and pepper to taste
1-2 cups of shredded mozzarella cheese
Directions:
Preheat broiler on high. Place halved English muffins on large baking sheet, cut side up and toast under the broiler for a few minutes. Remove from oven and set aside.
In large skillet, heat olive oil over medium-high heat until shimmering. Saute onions in the oil, with a pinch of salt, until soft and translucent (about 5 minutes). Add minced garlic and saute for another minute, or until the garlic is fragrant. Add entire bag of washed baby spinach. Using a pair of tongs, toss spinach in onion mixture until wilted. Add lemon juice and salt and pepper to taste. Toss again to combine and remove from the heat.
Place a large spoonful of hummus on each toasted English muffin half. Then, using your tongs, evenly place a small pile of the spinach mixture on top of each half, over the hummus. Sprinkle each muffin half with a handful of shredded cheese. Place back under the broiler and cook until cheese is melted, starting to brown, and bubble. Remove from oven and serve immediately.
The Result:
So good! Our serving size was 2 halves per adult, and 1 half per kid at our table. I think I made a total of 5 English muffins, so there were 10 halves all together. There were plenty for us for dinner and we still had some leftover. These little sandwiches were so filling and satisfying...everyone loved them! Also, I had another one for lunch today and they reheat nicely. Another thought just occurred to me about this recipe...it is really economical! I fed our entire family of 5 (more or less; not including some of the other ingredients that I had on hand) with 1 bag of spinach, 1 container of hummus, 1 bar of cheese, and a package of English muffins. It breaks down to less than $2.00 per person for dinner; less if you factor in the leftovers. I love that!
November 11, 2011
Favorite Turkey Burger
So, still no photos. My camera battery STILL needs to be charged...and now I can't find the charger. Yeesh. Moving has really screwed up my sense of organization! On the up side, we haven't had any new recipes (aside from this one). You see, you're really not missing anything exciting.
I needed a fast, easy, and yummy turkey burger recipe so I turned to the Martha Stewart website for inspiration. As expected, Martha came through for me and we had these totally delicious burgers for dinner one night last week.
Favorite Turkey Burger
From: marthastewart.com, Everyday Food May/June 2003
Ingredients:
1 1/2 pounds ground turkey (93 percent lean)
1/2 cup finely grated Gruyere cheese
4 scallions, thinly sliced
1/4 cup dried breadcrumbs
1/4 cup Dijon mustard
1 garlic clove, minced
Coarse salt and ground pepper
Oil (for grill grates or grill pan)
Directions:
Heat grill to high. In a medium bowl, use a fork to gently combine ground turkey with Gruyere, scallions, breadcrumbs, mustard, and garlic; season generously with salt and pepper. Gently form mixture into four 1-inch-thick patties.
Lightly oil grill (or grill pan). Place patties on hottest part of grill; sear until browned, 1 to 2 minutes per side. Move patties to cooler part of grill; continue grilling until cooked through, 5 to 10 minutes per side.
The Result:
Easy and delicious. A great twist on a classic!
I needed a fast, easy, and yummy turkey burger recipe so I turned to the Martha Stewart website for inspiration. As expected, Martha came through for me and we had these totally delicious burgers for dinner one night last week.
Favorite Turkey Burger
From: marthastewart.com, Everyday Food May/June 2003
Ingredients:
1 1/2 pounds ground turkey (93 percent lean)
1/2 cup finely grated Gruyere cheese
4 scallions, thinly sliced
1/4 cup dried breadcrumbs
1/4 cup Dijon mustard
1 garlic clove, minced
Coarse salt and ground pepper
Oil (for grill grates or grill pan)
Directions:
Heat grill to high. In a medium bowl, use a fork to gently combine ground turkey with Gruyere, scallions, breadcrumbs, mustard, and garlic; season generously with salt and pepper. Gently form mixture into four 1-inch-thick patties.
Lightly oil grill (or grill pan). Place patties on hottest part of grill; sear until browned, 1 to 2 minutes per side. Move patties to cooler part of grill; continue grilling until cooked through, 5 to 10 minutes per side.
The Result:
Easy and delicious. A great twist on a classic!
Labels:
easy,
fan-freakin'-tastic,
hamburgers,
Martha Stewart,
quick,
sandwich,
turkey
August 19, 2011
Cliantro Almond Pesto
This is a quick and easy "no cook" recipe that will compliment either beef, chicken, or fish. We had it last night as a condiment for grilled steaks and it was darn tasty! Once again, thanks Gertrude.
Cilantro Almond Pesto
From: myrecipes.com via the Cooking Claire blog
Ingredients:
3/4 cup fresh cilantro
2 tablespoons slivered almonds, toasted
1 tablespoon chopped seeded jalapeno pepper
1/8 teaspoon salt
1/8 teaspoon black pepper
1 garlic clove, chopped
3 tablespoons plain fat-free yogurt
1 1/2 teaspoons fresh lime juice
Directions:
Combine first 6 ingredients in a blender; process until finely chopped (about 15 seconds). Add yogurt and juice; process until smooth.
The Result:
See???? Totally easy!!! All you need is a blender and a smile to whip up this yummy pesto topping.
Cilantro Almond Pesto
From: myrecipes.com via the Cooking Claire blog
Ingredients:
3/4 cup fresh cilantro
2 tablespoons slivered almonds, toasted
1 tablespoon chopped seeded jalapeno pepper
1/8 teaspoon salt
1/8 teaspoon black pepper
1 garlic clove, chopped
3 tablespoons plain fat-free yogurt
1 1/2 teaspoons fresh lime juice
Directions:
Combine first 6 ingredients in a blender; process until finely chopped (about 15 seconds). Add yogurt and juice; process until smooth.
The Result:
See???? Totally easy!!! All you need is a blender and a smile to whip up this yummy pesto topping.
August 12, 2011
Pesto Smoked Salmon Sandwich
Gertrude and I went up to northern Arizona to complete a 12 mile run last weekend. Well, that was the goal anyway...it turned out a little different than we anticipated. Originally, we thought we were being sooooo clever by getting out of ridiculously hot Phoenix for a morning, and traveling up to cooler weather to do our long training run. In theory, it was a good idea. It turned out to be the run from hell. We never anticipated that it would still be hot (there is really no escaping the heat anywhere in an Arizona summer) AND that running at a higher elevation, with hills, would be more of an--ahem--challenge. Needless to say, we did not run 12 miles. We ran 4.75 miles. Disappointing, I know.
On the drive back from our craptastically bad running fail we decided to stop somewhere fun for lunch. We chose one of my favorite spots, Postino Winecafe, since Gertrude had never been there before. It was a good choice, let me tell you. We had yummy bruschetta, wine (duh), split a sandwich/salad combo, and split dessert. All courses were phenomenal and we were happy, happy ladies. The good lunch took some of the sting out of the bad run.
One of our brushettas was a pesto smoked salmon creation that I modeled this sandwich after. It was fantastic, and I knew I needed to recreate it at home. My sandwich turned out just as tasty as the original bruschetta offering, albeit a little heartier. It totally hit the spot and eased my craving for Postino Winecafe. Yum! All in all, our delicious lunch made up for our sucky run and I got a new sandwich idea out of the whole excursion.
Pesto Smoked Salmon Sandwich
Ingredients:
olive oil
1 ciabiatta loaf
2 packages of smoked salmon (about 8 ounces total)
1/2 package of softened cream cheese
3-4 tablespoons of pesto (store-bought or homemade)
1/4 red onion, minced finely
1/2 small jar of capers
1 large beefsteak tomato,sliced
salt and pepper to taste
Directions:
Preheat the oven to 350 degrees. Place the whole ciabiatta loaf directly on the oven rack for 6 minutes, so the crust may get crisp and the inside may get warm. Remove from oven with tongs and let cool slightly on a cutting board.
Once bread is cool enough to handle, slice the entire loaf lengthwise and brush some olive oil on both the top and bottom halves. Spread 1/4 cup of softened cream cheese on each half. On the bottom half, sprinkle capers and red onions over the cream cheese. Layer the smoked salmon on next. Place tomato slices on top of the smoked salmon and sprinkle on salt and pepper to taste. On the top half of the bread, slather pesto sauce over the cream cheese layer. Place top and bottom halves of the loaf together to assemble one large sandwich. Cut into individual sandwich servings and serve immediately.
The Result:
This was sooooo great! Seriously, delicious. It was virtually no-cook, with the exception of heating up the bread. I love it when that happens!!! Also, it kept well in the fridge as leftovers for the next day. SO GOOD!
On the drive back from our craptastically bad running fail we decided to stop somewhere fun for lunch. We chose one of my favorite spots, Postino Winecafe, since Gertrude had never been there before. It was a good choice, let me tell you. We had yummy bruschetta, wine (duh), split a sandwich/salad combo, and split dessert. All courses were phenomenal and we were happy, happy ladies. The good lunch took some of the sting out of the bad run.
One of our brushettas was a pesto smoked salmon creation that I modeled this sandwich after. It was fantastic, and I knew I needed to recreate it at home. My sandwich turned out just as tasty as the original bruschetta offering, albeit a little heartier. It totally hit the spot and eased my craving for Postino Winecafe. Yum! All in all, our delicious lunch made up for our sucky run and I got a new sandwich idea out of the whole excursion.
Pesto Smoked Salmon Sandwich
Ingredients:
olive oil
1 ciabiatta loaf
2 packages of smoked salmon (about 8 ounces total)
1/2 package of softened cream cheese
3-4 tablespoons of pesto (store-bought or homemade)
1/4 red onion, minced finely
1/2 small jar of capers
1 large beefsteak tomato,sliced
salt and pepper to taste
Directions:
Preheat the oven to 350 degrees. Place the whole ciabiatta loaf directly on the oven rack for 6 minutes, so the crust may get crisp and the inside may get warm. Remove from oven with tongs and let cool slightly on a cutting board.
Once bread is cool enough to handle, slice the entire loaf lengthwise and brush some olive oil on both the top and bottom halves. Spread 1/4 cup of softened cream cheese on each half. On the bottom half, sprinkle capers and red onions over the cream cheese. Layer the smoked salmon on next. Place tomato slices on top of the smoked salmon and sprinkle on salt and pepper to taste. On the top half of the bread, slather pesto sauce over the cream cheese layer. Place top and bottom halves of the loaf together to assemble one large sandwich. Cut into individual sandwich servings and serve immediately.
The Result:
This was sooooo great! Seriously, delicious. It was virtually no-cook, with the exception of heating up the bread. I love it when that happens!!! Also, it kept well in the fridge as leftovers for the next day. SO GOOD!
August 10, 2011
Portobello Goat Cheese Pitas
It seems that we have really been on a meat-spree lately. I feel like we are just consuming mass quantities of beef, chicken, and pork. What is that all about???? Once upon a time ago, I was pretty diligent about having 2-3 vegetarian meals every week. I'm not sure why that fell apart, but I think it had something to do with us just getting tired of the vegetarian options out there (especially since we are not fans of tofu). Anyway, my hope was restored in vegetarian meals when I found this recipe in Cooking Light magazine. This was virtually no-cook, and it was flavorful and fast to put together...a perfect choice for getting me back on the vegetarian band wagon.
Portobello Goat Cheese Pitas
Adapted From: Cooking Light magazine, August 2004, Alison Lewis
Ingredients:
1 1/2 teaspoons bottled minced garlic (I used minced fresh garlic)
1 teaspoon olive oil
4 (6-inch) pita rounds (I used naan bread)
1/2 teaspoon salt, divided
1/4 teaspoon black pepper, divided
4-6 whole portobello mushroom caps, sliced
2 medium tomatoes, cut into 1/4-inch-thick slices
1/3 cup (3 ounces) goat cheese
1/2 cup chopped fresh basil
balsamic vinegar, to drizzle
Directions:
Preheat oven to 375 degrees. Place sliced portobellos on large cookie sheet and drizzle with olive oil salt and pepper. Toss with clean hands. Roast in the oven for 15 minutes. Remove from oven and sprinkle the minced garlic onto the cooked mushrooms. Return the sheet to the oven and bake for an additional 5 minutes. Remove from oven, drizzle a little bit of balsamic vinegar evenly over mushrooms, and set aside.
Soften goat cheese at room temperature. (This can also be done in the microwave for a few seconds. Just be careful and watch it closely or your goat cheese will turn to liquid.) When goat cheese is at desired texture (i.e. easily spreadable) spread on pita rounds or on naan bread. Sprinkle chopped fresh basil over goat cheese layer. Add fresh sliced tomatoes and a few portobello slices. Fold and serve as a sandwich.
The Result:
Yet another gem to add to my vegetarian repertoire. The original recipe called for grilled portobellos, but I didn't feel like messing with the grill or a grill pan for that matter. I think it was just easier to stick the mushrooms in the oven and let them do their thing. I did link the original recipe above, just in case you would like to see the original method. Also, I thought it needed a boost so I added in the balsamic drizzle (not in the original recipe). Either way, these pitas were easy and delicious!
Portobello Goat Cheese Pitas
Adapted From: Cooking Light magazine, August 2004, Alison Lewis
Ingredients:
1 1/2 teaspoons bottled minced garlic (I used minced fresh garlic)
1 teaspoon olive oil
4 (6-inch) pita rounds (I used naan bread)
1/2 teaspoon salt, divided
1/4 teaspoon black pepper, divided
4-6 whole portobello mushroom caps, sliced
2 medium tomatoes, cut into 1/4-inch-thick slices
1/3 cup (3 ounces) goat cheese
1/2 cup chopped fresh basil
balsamic vinegar, to drizzle
Directions:
Preheat oven to 375 degrees. Place sliced portobellos on large cookie sheet and drizzle with olive oil salt and pepper. Toss with clean hands. Roast in the oven for 15 minutes. Remove from oven and sprinkle the minced garlic onto the cooked mushrooms. Return the sheet to the oven and bake for an additional 5 minutes. Remove from oven, drizzle a little bit of balsamic vinegar evenly over mushrooms, and set aside.
Soften goat cheese at room temperature. (This can also be done in the microwave for a few seconds. Just be careful and watch it closely or your goat cheese will turn to liquid.) When goat cheese is at desired texture (i.e. easily spreadable) spread on pita rounds or on naan bread. Sprinkle chopped fresh basil over goat cheese layer. Add fresh sliced tomatoes and a few portobello slices. Fold and serve as a sandwich.
The Result:
Yet another gem to add to my vegetarian repertoire. The original recipe called for grilled portobellos, but I didn't feel like messing with the grill or a grill pan for that matter. I think it was just easier to stick the mushrooms in the oven and let them do their thing. I did link the original recipe above, just in case you would like to see the original method. Also, I thought it needed a boost so I added in the balsamic drizzle (not in the original recipe). Either way, these pitas were easy and delicious!
Labels:
cheese,
Cooking Light,
easy,
healthy,
mushrooms,
pita,
quick,
vegetarian
August 7, 2011
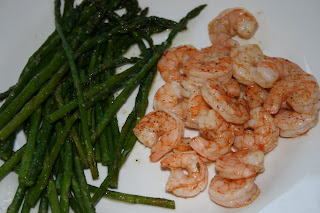
Quick and Easy Spicy Broiled Shrimp
My son is starting Kindergarten tomorrow, and I am waaaaayyyy more nervous about it than he is. I feel like it's my first day of school or something. We have everything all ready to go, but I'm still anxious/weepy/excited/happy/sad/hormonal about the whole situation. I can't believe my baby is so grown up!!! Where did the time go??? He was just born, wasn't he???? I'm a mess. Anyway, we are trying to have a relaxing last weekend before the school year kicks into full gear. We had this really easy shrimp dinner the other night; right smack-dab in the middle of all the back to school chaos. As the title promises, it really is a quick and easy shrimp recipe. What the title doesn't tell you is that it's also darn tasty. A perfect meal to put together if your mind is, oh say, preoccupied on things like Kindergarten; but you still would like a yummy, fuss-free dinner on the table.
Quick and Easy Spicy Broiled Shrimp
From: Kalyn's Kitchen website
Ingredients:
1/2 lb. frozen shrimp peeled and deveined with tails left on, thawed overnight in refrigerator
2 tsp. extra virgin olive oil (use your best olive oil for this)
1 lemon, cut in half
2 tsp. Worcestershire sauce
1/2 - 1 tsp. Tony Chachere's Creole Seasoning (or make your own Creole Seasoning Blend)
salt and fresh ground pepper to taste (NOTE: don't add salt if you're using Tony Chachere's seasoning that has salt)
Directions:
Thaw shrimp overnight in the refrigerator (or thaw in the bag in lukewarm water if you forget to plan ahead.) I used 31-40 count shrimp, so if you're lucky enough to find larger shrimp, increase the cooking time a tiny bit.
When you're ready to cook, remove shrimp from the refrigerator and drain in a colander placed in the sink, then use a paper towel to pat shrimp dry if they still seem wet. Preheat broiler and put the rack so it's as close to the broiler as possible.
Arrange the shrimp in a single layer on a baking sheet (or in two individual casserole dishes if you want to get a bit fancier.) I sprayed the casserole dishes with non-stick spray but it's probably not essential.
Once shrimp are arranged in a single layer, add seasonings in this order:
~drizzle shrimp with olive oil
~squeeze lemon juice over the shrimp (I used a squeezer that catches the seeds)
~sprinkle Worcestershire sauce over the shrimp
~sprinkle Creole Seasoning over the shrimp
~season with salt and fresh ground black pepper (skip the salt if you use Tony Chachere's Creole Seasoning which has salt)
Put shrimp under the broiler and cook for 7-8 minutes, or just until the shrimp turn pink and feel barely firm to the touch. Don't overcook. If your shrimp are larger than 31-40 count they may take a minute or two longer to cook, but not much.
Serve hot, with 100% whole wheat bread to mop up the juices if desired.

The Result:
I ended up making 2 lbs. of shrimp, since we had 5 people eating and I wanted some for leftover lunches the next day. I really love the Kalyn's Kitchen website...it really has some great recipes on it. This dish made the shrimp lovers in my house happy campers!
Quick and Easy Spicy Broiled Shrimp
From: Kalyn's Kitchen website
Ingredients:
1/2 lb. frozen shrimp peeled and deveined with tails left on, thawed overnight in refrigerator
2 tsp. extra virgin olive oil (use your best olive oil for this)
1 lemon, cut in half
2 tsp. Worcestershire sauce
1/2 - 1 tsp. Tony Chachere's Creole Seasoning (or make your own Creole Seasoning Blend)
salt and fresh ground pepper to taste (NOTE: don't add salt if you're using Tony Chachere's seasoning that has salt)
Directions:
Thaw shrimp overnight in the refrigerator (or thaw in the bag in lukewarm water if you forget to plan ahead.) I used 31-40 count shrimp, so if you're lucky enough to find larger shrimp, increase the cooking time a tiny bit.
When you're ready to cook, remove shrimp from the refrigerator and drain in a colander placed in the sink, then use a paper towel to pat shrimp dry if they still seem wet. Preheat broiler and put the rack so it's as close to the broiler as possible.
Arrange the shrimp in a single layer on a baking sheet (or in two individual casserole dishes if you want to get a bit fancier.) I sprayed the casserole dishes with non-stick spray but it's probably not essential.
Once shrimp are arranged in a single layer, add seasonings in this order:
~drizzle shrimp with olive oil
~squeeze lemon juice over the shrimp (I used a squeezer that catches the seeds)
~sprinkle Worcestershire sauce over the shrimp
~sprinkle Creole Seasoning over the shrimp
~season with salt and fresh ground black pepper (skip the salt if you use Tony Chachere's Creole Seasoning which has salt)
Put shrimp under the broiler and cook for 7-8 minutes, or just until the shrimp turn pink and feel barely firm to the touch. Don't overcook. If your shrimp are larger than 31-40 count they may take a minute or two longer to cook, but not much.
Serve hot, with 100% whole wheat bread to mop up the juices if desired.
The Result:
I ended up making 2 lbs. of shrimp, since we had 5 people eating and I wanted some for leftover lunches the next day. I really love the Kalyn's Kitchen website...it really has some great recipes on it. This dish made the shrimp lovers in my house happy campers!
May 27, 2011
Jessica's Greek Pasta Salad
I belong to a fantastic MOMS Club that really pulls together and champions one another. For example, when one of our members brings a new baby home (or in my case, babies) we all pitch in and bring meals to the new parents for two weeks. This "meal support" is such a blessing, because it gives the new parents one less thing to worry about during a huge time of transition in that respective household. Over a year ago, my friend Jessica brought this meal to us when I had our girls. It was a perfect summertime dish, that is easy to make and everyone loved. I didn't forget about it, and stored the meal idea in my recipe folder. When I was looking for easy dinners this week, this pasta salad jumped out and reminded me what a great community of friends I have in my area.
Jessica's Greek Pasta Salad
Ingredients:
1-2 cooked/grilled chicken breast, sliced into bite-size pieces
1 box cooked pasta (I've done lots of shapes - bows, penne or large macaroni work well)
1/2 red pepper, chopped
1-2 stalks celery, sliced
1/3 c. red onion, chopped or sliced thin
1 tomato, diced
1 doz. kalamata olives, sliced (or really as many as you like)
1/2 c. crumbled feta cheese
1/3 - 2/3 c. Greek salad dressing (however dressing-y you like it)
Directions:
Mix all of the above in a large bowl and salt/pepper to taste. Serve at room temperature and enjoy!

The Result:
See!!!! I told you this was easy! This salad is so yummy and light. I used rotini whole wheat pasta and my kids especially loved it. The baby girls actually cried for more. The beauty of this dish is that it can be prepared ahead of time, and the longer it rests the more the flavors marry and intermingle. It makes quite a bit, so there is plenty leftover for lunches the next day. Hooray!!!
Jessica's Greek Pasta Salad
Ingredients:
1-2 cooked/grilled chicken breast, sliced into bite-size pieces
1 box cooked pasta (I've done lots of shapes - bows, penne or large macaroni work well)
1/2 red pepper, chopped
1-2 stalks celery, sliced
1/3 c. red onion, chopped or sliced thin
1 tomato, diced
1 doz. kalamata olives, sliced (or really as many as you like)
1/2 c. crumbled feta cheese
1/3 - 2/3 c. Greek salad dressing (however dressing-y you like it)
Directions:
Mix all of the above in a large bowl and salt/pepper to taste. Serve at room temperature and enjoy!
The Result:
See!!!! I told you this was easy! This salad is so yummy and light. I used rotini whole wheat pasta and my kids especially loved it. The baby girls actually cried for more. The beauty of this dish is that it can be prepared ahead of time, and the longer it rests the more the flavors marry and intermingle. It makes quite a bit, so there is plenty leftover for lunches the next day. Hooray!!!
Subscribe to:
Posts (Atom)