Showing posts with label vegetarian. Show all posts

March 8, 2013

Grilled Veggie and Hummus Wraps


We used to have vegetarian recipes 2 to 3 times per week, when my kids were smaller and couldn't really complain about eating all vegetables for our main meal. I say "used to" because this practice has sadly become a thing of the past. I don't remember why we stopped eating more vegetarian selections, but I really wished we wouldn't have. Now, if I put anything out of the norm in front of them, the picky little buggers stage a revolt. I know if I would have been diligent about having vegetarian dinners in the regular rotation, then it wouldn't be such a struggle now. ::SIGH::

Needless to say, all three of my precious offspring poo-poo'd this dinner. Yeesh. The tears and hunger strike that was staged at my house on this particular night made dinner especially heinous. It really was a shame that my kids didn't like it, because my husband and I really loved these wraps. The recipe was really good, but in the interest of honest disclosure, I wanted to give you the low-down on what I like to call "the kid factor". Maybe your kids will be more open-minded??? Or maybe you don't have kids and don't care about catering to picky little eaters??? Either way, don't let "the kid factor" deter you from trying these wraps. They are very good, and as much complaining as my little darlings did about this dinner, it won't stop me from serving this meal again.

Grilled Veggie and Hummus Wraps
Adapted From: Cooking Light, April 2012

Ingredients:
2 large portobello mushroom caps, cleaned and stems removed
4 (1/2-inch-thick) slices red onion
1 red bell pepper, seeded and quartered
1 (12-ounce) eggplant, cut into 1/2-inch-thick slices
2 tablespoons olive oil, divided
1/4 cup chopped fresh flat-leaf parsley
1/8 teaspoon kosher salt
1 (8-ounce) container plain hummus
4 (1.9-ounce) whole-grain flatbreads (such as Flatout Light)
1/2 cup crumbled feta cheese

Directions:
Heat a large grill pan over medium-high heat. Brush mushrooms, onion, bell pepper, and eggplant with 1 tablespoon oil. Add mushrooms, onion and bell pepper to pan; cook 3 minutes on each side or until grill marks appear. Remove from pan. Add eggplant to pan; cook 3 minutes on each side or until grill marks appear. Remove from pan; coarsely chop vegetables. Combine vegetables, remaining 1 tablespoon oil, parsley, and salt; toss to combine.

Spread 1/4 cup hummus over each flatbread, leaving a 1/2-inch border around edges. Divide vegetables over each flatbread; top each serving with 2 tablespoons cheese. Roll up wraps, and cut diagonally in half.

September 17, 2012

Cheese and Spinach Stuffed Portobellos


I'm in a bit of a hurry this afternoon, since I'm trying to get my blog updates done while my twins are napping. I'm gonna keep this short and sweet, since I really need to finish this month's book selection for my book club. I typically prefer laying on the couch reading a book better than blog updating anyway (just keepin' it real, folks!).

This was a very tasty vegetarian dinner that we had a few weeks ago. I don't remember any details, other than it was solid and pleasing to the adults at my house. I seem to recall the kids...eh, not so much. We served this dinner with a side salad and some whole wheat spaghetti with garlic and olive oil. Yum! It was a light, Italian feast for sure.

Cheese and Spinach Stuffed Portobellos
From: EatingWell magazine, March/April 2009

Ingredients:
4 large portobello mushroom caps
1/4 teaspoon salt
1/4 teaspoon freshly ground pepper, divided
1 cup part-skim ricotta cheese
1 cup finely chopped fresh spinach
1/2 cup finely shredded Parmesan cheese, divided
2 tablespoons finely chopped kalamata olives
1/2 teaspoon Italian seasoning
3/4 cup prepared marinara sauce


Directions:
Preheat oven to 450°F. Coat a rimmed baking sheet with cooking spray

Place mushroom caps, gill-side up, on the prepared pan. Sprinkle with salt and 1/8 teaspoon pepper. Roast until tender, 20 to 25 minutes.

Meanwhile, mash ricotta, spinach, 1/4 cup Parmesan, olives, Italian seasoning and the remaining 1/8 teaspoon pepper in a medium bowl. Place marinara sauce in a small bowl, cover and microwave on High until hot, 30 seconds to 1 1/2 minutes.

When the mushrooms are tender, carefully pour out any liquid accumulated in the caps. Return the caps to the pan gill-side up. Spread 1 tablespoon marinara into each cap; cover the remaining sauce to keep warm. Mound a generous 1/3 cup ricotta filling into each cap and sprinkle with the remaining 1/4 cup Parmesan. Bake until hot, about 10 minutes. Serve with the remaining marinara sauce.

April 3, 2012

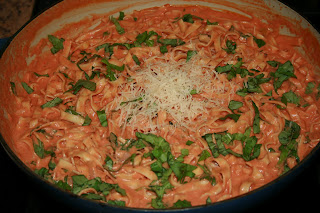
Pasta with Tomato Cream Sauce


I used to plan a lot more vegetarian meals, and I'm not sure why I got away from it. After all, vegetarian-focused dinners are usually quick, cheap, and healthy. (Well, assuming they are not doused in heavy cream, cheese, and/or butter--ahem.) This PW pasta recipe was a good reminder for getting me to go back to more vegetarian fare. After thinking about how much our family likes meatless meals, I decided to proactively incorporate more veg. dinners, and try to plan at least a couple a week. I can say that this pasta was not only tasty; but it also helped me remember the joy of vegetarian cooking (and eating). Thanks, P-Dub!

Pasta with Tomato Cream Sauce
From: The Pioneer Woman's Food From My Frontier cookbook, by Ree Drummond

Ingredients:
2 Tablespoons Olive Oil
2 Tablespoons Butter
1 whole Medium Onion, Finely Diced
4 cloves Garlic, Minced
2 cans (15 Ounce Each) Tomato Sauce Or Marinara Sauce
Salt And Pepper, to taste
Dash Of Sugar (more To Taste)
1 cup Heavy Cream
Grated Parmesan Or Romano Cheese, To Taste
Fresh Basil, Chopped
1-1/2 pound Fettuccine

Directions:
Cook pasta according to package directions. Drain, reserving 1 cup of pasta water.

Heat butter and oil over medium heat. Add onions and garlic and saute for a minute or so. Pour in tomato sauce and add salt, pepper, and sugar to taste. Stir and cook over low heat for 25 to 30 minutes, stirring occasionally.

Remove from heat and stir in cream. Add cheese to taste, then check seasonings. Stir in pasta and chopped basil and serve immediately. (Thin with pasta water before adding basil if needed.)

February 8, 2012

Mexican Layer Dip

I almost forgot about my bean dip! I had a plethora of leftover beans from burritos, so I decided to make this dip to go on my football food party table. I had all the ingredients on hand, so it was easy to just assemble. Again, Pioneer Woman did not advise poorly...this bean dip was even better than the one my mom used to make in the 80's!

Mexican Layer Dip
From: The Pioneer Woman, via thepioneerwoman.com
Link: http://thepioneerwoman.com/cooking/2009/01/mexican-layer-dip/

Ingredients:
1 can refried Beans
Tabasco Sauce, To Taste
1 can Diced Green Chilies
Ground Cumin, to taste
3/4 cups Grated Sharp Cheddar Cheese
1 cup Sour Cream
1 cup Guacamole
3/4 cups Monterey Jack Cheese
1 can Black Olives
1 cup Pico De Gallo

Directions:
Begin by throwing the refried beans into a small pan over medium-low heat. Add several dashes of Tabasco sauce and a small can of (undrained) diced green chiles. Stir well. Next, sprinkle a little bit of ground Cumin.

Spread the beans on the bottom of a glass bowl or high-sided dish. Over this sprinkle the sharp cheddar. Next, plop your sour cream. And spread it into a single layer, being careful not to disturb the cheese underneath.

The next layer is the guacamole. Spread it over the sour cream. Follow this with a layer of Monterey Jack Cheese and a nice sprinkling of chopped black olives.

Lastly, place a generous layer of Pico de Gallo. You can also, if you have the gumption for it, sprinkle some diced jalapenos over top.

The Result:
This was snarfed down all to quickly, so no photo. I actually served this over chips for dinner the next evening to my family. I know, I know...bean dip for dinner???? I called it vegetarian nachos, thank you very much. (Please submit your "Mother of the Year" accolades here...)

November 25, 2011

Gruyere & Caramelized Onions Panini

I've been wracking my brain for a few days now on what I was going to write about this sandwich. The beginning of the holiday season has already gotten me into a tailspin. Busy, busy, busy! I can't think of anything super-creative or any special circumstances surrounding our meal on this particular night, so I think I'll just give you the facts. This was a really delicious version of a ramped-up grilled cheese. The onions were a bit labor-intensive, but totally worth the time and effort. The combination of flavors hit the mark, especially for the adults at my house. We served our paninis with a green side salad and our meal was pretty darn satisfying. Hmmmm...I think that's about it, except to say that this grilled sandwich did not disappoint!

Gruyere & Caramelized Onions Panini
Adapted From: ‘wichcraft: Craft a sandwich into a meal–and a meal into a sandwich cookbook via the Panini Happy website

Ingredients:
4 tablespoons extra-virgin olive oil
4 medium yellow onions, halved and cut lengthwise into 1/8″ slices
2 tablespoons chopped fresh oregano, or 1 tablespoon dried Sicilian oregano
Kosher salt and freshly ground black pepper
8 oz. Gruyere cheese, grated
8 slices rye bread

Directions:
In a skillet over medium-high heat, add the olive oil and onions and stir vigorously to avoid scorching. Add the oregano and season with salt and pepper. Continue stirring until the onions have a deep brown color. Reduce the heat and continue to cook until the onions are soft, 30 to 45 minutes. Set aside.*

Preheat the panini grill to medium-high heat (375°F).

For each sandwich: Place 1/4 of the cheese on a slice of bread. Follow with a generous amount of onions. Close the sandwich and place on the panini grill. Grill for 4-5 minutes until the cheese is completely melted and the bread is toasted with golden grill marks. Serve immediately and enjoy!

(***Either use the onions immediately to make the panini or refrigerate them for up to 1 week.***)


The Result:
These were really good. I liked the melding of flavors with the rye bread, gooey cheese, and syrupy onions...it was pretty spectacular. I ended up using my surplus onions (I think I had about a cup leftover) in my Thanksgiving green bean casserole (recipe to come). Yum! They were a welcome addition to both this sandwich and our holiday veggie side dish.

November 19, 2011

Hummus Melts

I've been on a vegetarian kick lately; making some new recipes and revisiting some old favorites. I would like to pretend that my renewed obsession with vegetarian meals is due to the fact that I'm being super-health conscious, but that's not it. Really, it boils down to time. It seems that we have had a lot going on in the evenings, and most vegetarian meals are just faster to prepare and get on the table. I don't have to mess around with thawing out a protein, so that saves me some prep time and most dinners can be put together in under a half an hour. Also, I've found a bevy of new vegetarian recipes lately that I've been itching to try out.

This recipe is one of the new ones that I found on Pinterest . We had a family night at my son's school and a "Mom's Night Out" event for my group of mommy friends, so we needed to get out the door in a hurry last night. A lengthy dinner just wasn't an option for us, so I thought these open-faced sandwiches would be a good choice. I was right...this recipe was super-easy and fast to put together. I had dinner on the table in about 20 minutes from start to finish. Not to mention, it was really, really healthy and tasty...we all gobbled it up. Thanks Pinterest for another simple and efficient vegetarian winner!

Hummus Melts
Adapted From: the (Never home)maker blog via Pinterest

Ingredients:
4-6 whole wheat English muffins
a large container of your favorite store-bought (or homemade) hummus
1 bag of washed baby spinach (I used a bag of an arugula/spinach salad blend)
1 Tablespoon of olive oil
1/2 white onion, diced
2 garlic cloves, minced
1 teaspoon of lemon juice
salt and pepper to taste
1-2 cups of shredded mozzarella cheese

Directions:
Preheat broiler on high. Place halved English muffins on large baking sheet, cut side up and toast under the broiler for a few minutes. Remove from oven and set aside.

In large skillet, heat olive oil over medium-high heat until shimmering. Saute onions in the oil, with a pinch of salt, until soft and translucent (about 5 minutes). Add minced garlic and saute for another minute, or until the garlic is fragrant. Add entire bag of washed baby spinach. Using a pair of tongs, toss spinach in onion mixture until wilted. Add lemon juice and salt and pepper to taste. Toss again to combine and remove from the heat.

Place a large spoonful of hummus on each toasted English muffin half. Then, using your tongs, evenly place a small pile of the spinach mixture on top of each half, over the hummus. Sprinkle each muffin half with a handful of shredded cheese. Place back under the broiler and cook until cheese is melted, starting to brown, and bubble. Remove from oven and serve immediately.


The Result:
So good! Our serving size was 2 halves per adult, and 1 half per kid at our table. I think I made a total of 5 English muffins, so there were 10 halves all together. There were plenty for us for dinner and we still had some leftover. These little sandwiches were so filling and satisfying...everyone loved them! Also, I had another one for lunch today and they reheat nicely. Another thought just occurred to me about this recipe...it is really economical! I fed our entire family of 5 (more or less; not including some of the other ingredients that I had on hand) with 1 bag of spinach, 1 container of hummus, 1 bar of cheese, and a package of English muffins. It breaks down to less than $2.00 per person for dinner; less if you factor in the leftovers. I love that!

November 16, 2011

Portobello, Broccoli,and Red-Pepper Melts

This is another Martha Stewart recipe that I found while exploring her website the other day. Truly, this was a fantastic open-faced sandwich...one of the best that we've tried. Martha sure knows her food, that's for sure! If you dig a hearty, vegetarian sandwich this dish is for you.

In other news...

You'll be happy to know that the husband found the camera battery charger and plugged it in. Hooray! The good news doesn't stop there...I also remembered to take a photo of our dinner last night with my iphone. Eureka! Why didn't I think of that before??? I don't know. Thankfully, my normal camera should be up and running the next time I have to take a blog pic. In the meantime, try this recipe and enjoy my shaky iphone photography skills.

Portobello, Broccoli, and Red-Pepper Melts
From: Everyday Food, March 2008

Ingredients:
1 small head broccoli, cut into small florets (stalk discarded)
1 tablespoon olive oil
Coarse salt and ground pepper
4 portobello mushrooms (stems removed), sliced 1/2 inch thick
2 red bell peppers (ribs and seeds removed), sliced 1/2 inch thick
1/4 cup light mayonnaise
1 small garlic clove, crushed through a press
4 thick slices country bread (or 1 loaf of French bread, cut horizontally)
4 ounces Gouda cheese, thinly sliced (or Gruyere, if you like)

Directions:
Heat broiler, with rack set 4 inches from heat. On a rimmed baking sheet lined with aluminum foil, toss broccoli with oil; season with salt and pepper. Broil, tossing once or twice, until broccoli begins to char, 4 to 6 minutes.

Add mushrooms and bell peppers to sheet; season with salt and pepper, and toss to combine. Broil, tossing once or twice, until vegetables are tender, 8 to 10 minutes more; set aside.

Meanwhile, in a small bowl, combine mayonnaise and garlic; season with salt and pepper. Place bread on a work surface. Dividing evenly, spread with mayonnaise mixture, and top with vegetables, then cheese. Place on baking sheet, and broil until cheese is melted and lightly browned, 2 to 4 minutes.


The Result:
These were fantastic! Delicious and satisfying. I goofed and used Gruyere instead of Gouda cheese. Duh. Next time I should read the ingredients list a bit more carefully. Honestly, it didn't really matter; it was still an amazing veggie sandwich.

There were a lot of filling, so I decided to cut my French bread loaf in half horizontally, and hollow out (and discard) some of the bread in the middle. This allowed more room for the yummy, roasted veggies. I thought this would be more efficient than just doing the slices, and this method was reminiscent of the Eggplant Mozzarella Melts recipe that we LOVE. Then, when the cook time was over, I removed the long, loaf halves to a cutting board and just cut the portion sizes we needed (smaller pieces for the kids, etc.). It worked out perfectly, and now we have a new favorite Martha Stewart open-faced "melt" sandwich to make for dinner.

October 18, 2011

Cauliflower Crust Veggie Pizza

This recipe is another Pinterest find that my whole family l-o-v-e-d. I am always on the lookout for both new pizza ideas and new vegetarian meals, and this fit both requirements. My kids didn't even realize that all that they were eating was copious amounts of vegetables and cheese. Ha ha! I love sneaking in healthy foods when they are none the wiser. Score!

I made our pizza larger than the original directions indicated, so I adapted all the ingredient quantities to reflect in my recipe below.

Cauliflower Crust Veggie Pizza
Adapted From: Eat. Drink. Smile. website via Pinterest.com

Ingredients:
For crust:
1 head of chopped cauliflower florets, stalks discarded
cooking spray
3 eggs, beaten
3 cups low-fat cheese, shredded (I used a combo of sharp cheddar and mozzarella)
1 tsp garlic powder
1 tsp oregano
1 tsp of salt
1/2 tsp black pepper

For toppings:
1 tablespoon of olive oil
1 zucchini, cut into 1/2 inch diced pieces
1 bell pepper, cut into strips
1 onion, sliced thinly
1 package (6 oz.) of sliced button mushrooms
2 garlic cloves, minced
salt and pepper to taste
1/2 to 1 cup of jarred marinara sauce (depending on how saucy you like your pizza)
2 fresh tomatoes, sliced
2 cups of shredded mozzarella cheese
Parmesan cheese, grated for topping

Directions:
For crust:
In a food processor "rice" the raw cauliflower florets by pulsing several times. You may have to do a couple of batches, depending on the capacity of the food processor. Also, make sure to not pulse too much; otherwise the cauliflower will be more of a puree instead of small pieces that are "riced". One head of cauliflower should yield about 3 cups of "riced" cauliflower.

Place "riced" cauliflower in a microwave safe container and cook on high in the microwave for 8 minutes. Remove to a bowl and let the cooked cauliflower cool a bit.

Once cauliflower is cool enough to handle, mix in beaten eggs, spices, and 3 cups of cheese. Season to taste with salt and pepper. Combine thoroghly and set aside.

For toppings:
Heat olive oil on in a skillet over medium-high heat. Saute onions, zucchini, peppers, and mushrooms until browned and caramelized. Add garlic and saute for 1 additional minute. Season with salt and pepper to taste. Remove from heat and set aside.

For pizza:
Spray large rimmed baking sheet with cooking spray and preheat oven to 450 degrees. Press cauliflower mixture into prepared baking sheet, using your hands or the back of a spoon. Make sure there are no holes or thin spots in the pressed crust. Bake in the oven for 15 minutes.

At the end of the cook time, remove from oven and spray top of crust with cooking spray.

Switch the oven over to broil on "high". Return cauliflower back to the oven, by placing on the top rack closest to the broiler. Broil on high for 2-5 minutes, or until crust is slightly browned. Remove from oven.

Top pizza crust with marinara sauce by spreading with a spoon or a spatula. Top sauce with cooked vegetables. Sprinkle cheese over veggies and sauce. Place fresh tomato slices on top of cheese layer. Return sheet pan to the top rack of the oven and broil until cheese is melted, slightly browned, and bubbly. Remove the pizza from the oven. Sprinkle grated Parmesan cheese over the entire pizza. Cut it into squares and serve immediately.


The Result:
As you have probably guessed, I found my camera again. Hooray! I had to do quite a bit of digging through some moving boxes, but I'm so happy I finally found it. I can now start taking blog pics again...this is really good news.

This was soooo yummy! Seriously delicious; as I said, we all really loved it. The original website mentions that this will not be the same texture or taste as traditional pizza crust, which I found to be true. It wasn't firm enough to pick up and eat with our hands, but it was totally fine to just eat it with a fork. With that said, it was still pretty darn fantastic and it will be something I wiggle into our regular pizza rotation. Yum!!!!

October 12, 2011

Roasted Brussels Sprouts with Garlic, Red Pepper Flakes, and Parmesan

We are big Brussels sprouts fans at my house. It is the husband's favorite vegetable, and the kiddos and I gobble 'em up, too. I usually just cut them in halves, and roast them with olive oil, salt and pepper. Not terribly inventive, but tasty. Well, I found a new spin on roasted Brussels sprouts in the current issue of Cook's Illustrated magazine. The method is very similar to mine, but with a twist. Also, Cook's came up with a delicious garlic oil drizzle that put these Brussels sprouts over the top. They were pretty awesome! My husband said that he did not think that Brussels sprouts could get any better until he tried this version. I agree...these were easy and spectacular. Thanks Cook's Illustrated!

Roasted Brussels Sprouts with Garlic, Red Pepper Flakes, and Parmesan
From: Cook's Illustrated magazine, Nov. & Dec. 2011 issue, by: Andrea Geary

Ingredients:
2 1/4 pounds Brussels sprouts, trimmed and halved
3 tablespoons of olive oil
1 tablespoon water
salt and pepper to taste

For garlic oil:
3 tablespoons olive oil
2 minced garlic cloves
1/2 teaspoon of red pepper flakes
1/4 cup Parmesan, grated

Directions:
Adjust oven rack to upper-middle position and heat to 500 degrees. Toss Brussels sprouts, oil, water, 3/4 teaspoons of salt, and 1/4 teaspoons of black pepper in a large bowl until sprouts are coated. Transfer sprouts to a rimmed baking sheet and arrange so cut sides are facing down. Cover tightly with foil and roast for 10 minutes. Remove foil and continue to cook and additional 10-12 minutes, or until sprouts are browned and tender. Toss with prepared garlic oil and grated Parmesan. Transfer to a serving platter, season with additional salt and pepper if needed, and serve.

For garlic oil:
While Brussels sprouts are cooking, heat additional olive oil in a small sauce pan or skillet, over medium high heat or until oil is shimmering. Add minced garlic and red pepper flakes. Cook until garlic is golden and fragrant, about 1 minute. Remove from heat. Toss with Brussels sprouts and cheese, according to above directions.

October 5, 2011

Spinach Feta Quesadillas

We had mixed reviews on this dish. I loved it, but the husband and kids were "meh" about it. I think it was the feta...feta is hotly contested at my house. I think I will save this recipe as a solo lunch idea for myself, instead of a family dinner. I figure it's my blog and I really liked it, so I'm gonna post it. Ha!

Spinach Feta Quesadillas
From: ClosetCooking.com via Cooking Claire blog

Ingredients:
1/2 cup spinach (steamed and squeezed to drain)
1 tablespoon herbs (chopped, I used mint and parsley)
1 green onion (sliced)
1 handful feta (crumbled)
salt and pepper to taste
2 (8 inch) tortillas
2 handfuls kasseri or mozzarella or jack (grated)

Directions:
1. Mix the spinach, herbs, green onions, feta, salt and pepper in a bowl.
2. Melt a touch of butter in a pan.
3. Place a tortilla into the pan, swirl it around in the butter and repeat with the second tortilla.
4. Sprinkle some cheese on the tortilla followed by the filling and then more cheese and finally the other tortilla.
5. Cook until the quesadilla is golden brown on both sides and the cheese is melted. (I placed a plate onto the quesadilla and flipped it from the pan to the plate and then slid it back into the pan.)

The Result:
I say yum! Note that the quantities listed for the ingredients yield only 1 quesadilla. Increase your quantities as needed for as many as you are putting together.

September 19, 2011

Hominy-Pinto Burgers with Roasted Green Chiles

I have a lot of blog recipes to catch up on, so I think I will just get down to the "nitty gritty" by posting meals that we recently tried and liked. These vegetarian burgers were a hit with the adults, but not so much for the kids in my family. All in all, we liked them...the kids will just have to deal with it!

Hominy-Pinto Burgers with Roasted Green Chiles
From: Lorrie Hulston Corvin, Cooking Light August 2006

Ingredients:
2 poblano chiles (I used my roasted Hatch chiles)
Cooking spray
1 cup chopped onion
2 garlic cloves, minced
1/4 teaspoon salt
1 (15.5-ounce) can pinto beans, rinsed and drained
1 (15-ounce) can hominy, rinsed and drained
3/4 cup masa harina, divided
1 tablespoon canola oil
3/4 cup (3 ounces) shredded Monterey Jack cheese with jalapeño peppers
2 tablespoons reduced-fat sour cream
2 tablespoons low-sodium salsa
4 (1 1/2-ounce) whole wheat hamburger buns, toasted

Directions:
Preheat broiler. Place chiles on a foil-lined baking sheet; broil 3 inches from heat 8 minutes or until blackened and charred, turning after 6 minutes. Place in a heavy-duty plastic bag; seal. Let stand 15 minutes. Peel and discard skins. Cut each chile lengthwise into 4 strips; discard seeds.

Heat a large nonstick skillet over medium-high heat. Coat pan with cooking spray. Add onion and garlic; sauté 5 minutes. Place onion mixture, salt, beans, and hominy in a food processor; pulse until coarsely ground. Combine bean mixture and 1/2 cup masa in a medium bowl. Divide bean mixture into 4 equal portions, shaping each into a 1/2-inch-thick patty. Place remaining 1/4 cup masa in a shallow dish; dredge patties in masa.

Heat oil in skillet over medium heat. Add patties to pan; cook 4 minutes. Turn patties over. Top each patty with 3 tablespoons cheese; cook 4 minutes.

Combine sour cream and salsa in a small bowl. Spread 1 tablespoon sour cream mixture on top half of each bun. Place patties on bottom halves of buns; top each serving with 2 pepper strips. Cover with tops of buns.


The Result:
Easy and good. I used some roasted hatch green chiles, so ours were spicy. (I omitted the chiles for my little rugrats.) Baked sweet potato fries were a quick and yummy side dish that went well with these burgers. This was a solid recipe for vegetarian bean burgers with an interesting twist.

September 15, 2011

Jalapeno Popper Grilled Cheese Sandwich

I love when I find a phenomenal grilled cheese recipe! As the title promises, this sandwich had all the yummy goodness of jalapeno poppers, plus a little extra. This was soooo tasty; and because I removed the seeds, stem, and ribs from the peppers, it was not that spicy either. My 5 year old declared it was the best grilled cheese ever!

The original website that this recipe was published on had shaky directions. So, I'm just going to adapt the recipe from that and tell you what I did below. Enjoy!

Jalapeno Popper Grilled Cheese Sandwich
Adapted From: closetcooking.com via Pinterest

Ingredients:
8 slices of sour dough bread
1 stick of butter, softened
8-10 large jalapenos, seeds, stems, and ribs removed; cut in halves
1 package of cream cheese, softened
1 (8oz) bar sharp cheddar cheese, sliced
1 bag of your favorite tortilla chips

Directions:
Preheat broiler. Place jalapeno halves on a baking sheet, cut side down. Place baking sheet on the top rack of the oven, close to the heating element. Broil peppers for 8-14 minutes, or until skin turns black and charred. Place peppers in a gallon zip top bag and seal. Let stand for 5-10 minutes, or until peppers are cool enough to be handled. Peel peppers, discard the plastic-like skin. Set aside peppers.

Spread cream cheese on both inside halves of the bread. Top both sides with crushed tortilla chips. On one side, place cheddar cheese slices over the chips and cream cheese. On the other side, place 4-5 pepper strips on top of the chips/cream cheese. Assemble the sandwich. Butter the top slice of bread. Warm a large non-stick skillet over medium-high heat. Place sandwich, butter side down into skillet. While sandwich is cooking, butter the other side of the sandwich bread (the naked slice should be facing up in the skillet). Flip once bottom slice is golden browned and cheese is melted. Remove from skillet once other side is golden browned. Assemble and repeat cooking with additional sandwiches. Cut in half and serve immediately.

NOTE: Recipe should yield 4 grilled cheese sandwiches.


The Result:
Fantastic and pretty easy to put together. Hooray for yummy grilled cheese sandwiches!

August 15, 2011

Sesame Tofu Noodle Bowl with Peanut Sauce

I don't like tofu. Well, let me amend that...I didn't like tofu before this recipe. I thought that the flavor and texture were--in a word--yucky. (I know, I know...not very mature.) On a whim, I decided to give tofu one more shot before chalking it off forever. Aggie from Aggie's Kitchen admitted her own aversion to tofu that sounded similar to mine. Then, she recommended this dish. Since Aggie is a trusted recipe source, I went for it. Oh man, I'm glad I did. This was really, really good. I LIKED the tofu in this recipe. I'm talkin' LIKE liked. Yeah, crazy right???? This may be the start of a beautiful friendship between tofu and me. Only time will tell...

Sesame Tofu Noodle Bowl with Peanut Sauce
From: Family Kitchen on babble.com By:Aggie's Kitchen (via Eat, Live, Run)

Ingredients:

For tofu:
1 package of extra firm tofu (see below for instructions on how to drain properly)
1 tablespoon sesame oil
a couple splashes soy sauce
2 tablespoons sesame seeds
1 tablespoons canola oil

For sauce:
1/2 cup peanut butter
2 tablespoons rice vinegar
1/3 cup low sodium soy sauce
1/3 cup warm water
2 teaspoons sesame oil
2 teaspoons honey or agave
pinch of red pepper flakes
2 tablespoons minced ginger

For noodles:
1 package soba noodles
2 large red bell peppers, sliced thin
1 large bok choy, sliced thin (I used 3 baby bok choy)
handful of chopped fresh cilantro, for serving

Directions:

TO PROPERLY DRAIN TOFU:
Take tofu out of package and place on a plate lined with paper towel. Place additional paper towels on top of the tofu. Add another plate to sandwich the tofu. Place a heavy weight (like a heavy skillet, heavy can, etc.; I used the top of my cast iron panini press) on the top plate to press the tofu. Let the tofu drain for 1/2 hour, then change the paper towels, flip the tofu over, and let it drain for an additional half hour (1 hour of total draining time).

Once draining process is complete, pat tofu to dry well. Slice longways into rectangles, about 1/2 inch thick, then smaller into cubes. Place in a bowl and gently toss with sesame oil, soy sauce and sesame seeds.

Heat canola oil up a large non stick skillet over medium-high heat. Add tofu to pan and cook until bottom sides are browned. Flip over and continue to cook till all sides are browned and crisp, about 5-7 minutes. Set aside.

While tofu is cooking, make peanut sauce by adding all the ingredients to a blender and combining until smooth, about 30 seconds.

In the meantime, bring pot of salted water to a boil and add soba noodles. Cook according to instructions.

Place red pepper strips and bok choy in a colander. When noodles are ready, pour over vegetables in colander and drain water, while rinsing with cold water at the same time. Doing this blanches the veggies quickly and easily. Transfer noodles and veggies to a large bowl and add peanut sauce. Gently toss and combine together. Add tofu and cilantro and serve into bowls.


The Result:
Dealing with the tofu was a bit of a pain. However, I must say, it was worth it. I really enjoyed this recipe...AND the tofu was pretty darn yummy. (I honestly thought that I would never say that about tofu.) I think the more I prepare tofu, the easier it will get (i.e. I will become more efficient at dealing with it). The key is to properly drain the tofu. Eureka!!!! What a revelation!!! Tofu can actually be delicious!

All in all, this is a great one to try if you are apprehensive about tofu. I think this recipe can be served as a gateway tofu dish...good for those of us who think that they are tofu-adverse. (A tofu ambassador, if you please.) The texture and flavor of all the components worked really well together. My kids even ate it without complaint. Hooray! I now have a "go-to" tofu recipe.

August 10, 2011

Creamy Caprese Pasta

I am on roll with vegetarian keeper recipes...if you can count two recipes as an official "roll". I don't remember how I came across this dish; I think it popped up in my Facebook feed for a "Meatless Monday" meal idea. Although we had it on a Tuesday night, it was still easy to put together and delicious.

Creamy Caprese Pasta
Adapted from: howsweetitis.com

Ingredients:
1 pound whole wheat penne pasta
1 cup of your favorite pasta/tomato sauce
1/3 cup heavy cream or half and half
1/3 cup freshly grated Parmesan cheese + more for garnish
4 ounces fresh mozzarella, cut into cubes
4 ounces fresh mozzarella, sliced into rounds
6-8 slices of provolone
1 pint of grape tomatoes (I cut some in half and left some whole)
1 bunch of fresh basil leaves, chopped

Directions:

Preheat oven to 350 degrees F. Boil water and cook pasta according to directions.

While pasta is cooking, heat tomato sauce over low heat in a large saucepan. Once warm, stir in heavy cream and grated Parmesan. Once pasta is done cooking, drain and dump into the sauce, mixing to coat and turning off heat. Fold in mozzarella cubes and tomatoes, then chop 3-4 fresh basil leaves and add them in too. Once combined, spray a baking dish with non-stick spray and pour the entire pasta mixture into the dish. Top with fresh mozzarella rounds, provolone slices, and more Parmesan. Bake for 25 minutes, or until cheese is golden and bubbly. Remove from oven and let it cool slightly. Top with additional fresh basil and serve.


The Result:
This pasta dish was both fresh tasting and homey. My family loved it and polished off the whole pan. I consider this a perfect summertime pasta dish!

Portobello Goat Cheese Pitas

It seems that we have really been on a meat-spree lately. I feel like we are just consuming mass quantities of beef, chicken, and pork. What is that all about???? Once upon a time ago, I was pretty diligent about having 2-3 vegetarian meals every week. I'm not sure why that fell apart, but I think it had something to do with us just getting tired of the vegetarian options out there (especially since we are not fans of tofu). Anyway, my hope was restored in vegetarian meals when I found this recipe in Cooking Light magazine. This was virtually no-cook, and it was flavorful and fast to put together...a perfect choice for getting me back on the vegetarian band wagon.

Portobello Goat Cheese Pitas
Adapted From: Cooking Light magazine, August 2004, Alison Lewis

Ingredients:
1 1/2 teaspoons bottled minced garlic (I used minced fresh garlic)
1 teaspoon olive oil
4 (6-inch) pita rounds (I used naan bread)
1/2 teaspoon salt, divided
1/4 teaspoon black pepper, divided
4-6 whole portobello mushroom caps, sliced
2 medium tomatoes, cut into 1/4-inch-thick slices
1/3 cup (3 ounces) goat cheese
1/2 cup chopped fresh basil
balsamic vinegar, to drizzle

Directions:
Preheat oven to 375 degrees. Place sliced portobellos on large cookie sheet and drizzle with olive oil salt and pepper. Toss with clean hands. Roast in the oven for 15 minutes. Remove from oven and sprinkle the minced garlic onto the cooked mushrooms. Return the sheet to the oven and bake for an additional 5 minutes. Remove from oven, drizzle a little bit of balsamic vinegar evenly over mushrooms, and set aside.

Soften goat cheese at room temperature. (This can also be done in the microwave for a few seconds. Just be careful and watch it closely or your goat cheese will turn to liquid.) When goat cheese is at desired texture (i.e. easily spreadable) spread on pita rounds or on naan bread. Sprinkle chopped fresh basil over goat cheese layer. Add fresh sliced tomatoes and a few portobello slices. Fold and serve as a sandwich.


The Result:
Yet another gem to add to my vegetarian repertoire. The original recipe called for grilled portobellos, but I didn't feel like messing with the grill or a grill pan for that matter. I think it was just easier to stick the mushrooms in the oven and let them do their thing. I did link the original recipe above, just in case you would like to see the original method. Also, I thought it needed a boost so I added in the balsamic drizzle (not in the original recipe). Either way, these pitas were easy and delicious!

April 8, 2011

Pasta with Caramelized Onions and White Wine

I am on a new recipe roll this week! I don't think I have cooked this much new stuff in a few months. Go me!!! I guess I go in fits and starts when it comes to cooking. Sometimes, I feel like just making meals that I know how to do and that my family loves without question. Then, it seems that after I do that for awhile, I get antsy and I want to start experimenting with new recipes again. What can I say??? I guess my cooking is a little schizophrenic.

This was a good vegetarian dish that I got from my new April issue of Cooking Light magazine. I needed a fast meal that didn't have a whole lot of main ingredients for our Wednesday night dinner. We have a bible study group that evening, so we have to get dinner finished and be out the door by 6pm. I always look for easy Wednesday night meals, to make the whole process run a little smoother. This recipe was a good choice, and one that I would make again.

Pasta with Caramelized Onions and White Wine
Adapted From: Rori Trovato, Cooking Light magazine, APRIL 2011

Ingredients:
1/2 cup whole wheat panko (Japanese breadcrumbs)
3 tablespoons olive oil, divided
2 teaspoons minced garlic, divided
1/2 teaspoon kosher salt, divided
2 cups thinly sliced vidalia onions (about 1 pound)
1/2 cup dry white wine
1/4 cup fat-free, lower-sodium chicken broth
8 ounces uncooked whole wheat rotini or other short pasta
1 tablespoon kosher salt
1/4 teaspoon freshly ground black pepper

Directions:
1. Preheat oven to 375°.

2. Combine panko, 1 tablespoon oil, 1 teaspoon garlic, and a dash of salt in a small bowl. Spread panko mixture in a single layer on a baking sheet. Bake at 375° for 6 minutes or until golden brown, stirring after 3 minutes. Cool.

3. Heat a large skillet over medium-low heat. Add remaining 2 tablespoons oil to pan, swirling to coat. Add onions to pan; cook 20 minutes or until golden brown, stirring occasionally. Add remaining 1 teaspoon garlic and wine. Increase heat to medium-high; cook 1 minute. Add broth; cook until liquid is reduced to 1/2 cup (about 4 minutes).

4. Cook pasta in boiling water with 1 tablespoon kosher salt according to package directions, omitting additional fat. Drain. Add pasta, remaining salt, and pepper to onion mixture; toss gently. Place about 1 cup pasta in each of 4 shallow bowls; sprinkle each serving with 2 tablespoons panko mixture.


The Result:
This was a really nice, light pasta dish. It was flavorful and had lots of great texture. We all really liked it, and it is a recipe that will go into our vegetarian rotation.

April 5, 2011

Falafel Pitas with Goat Cheese Sauce

I had a can of garbanzo beans in the pantry and a taste for falafel. I usually buy pre-made falafel from Costco, but I couldn't find them the last time I looked. I was really disappointed, since the brand that they carried (I can't remember what it was exactly) was pretty tasty and so convenient. Ugh. So, I decided to try my hand at falafel making. Usually, when I have a hankerin' for something, but not a recipe I automatically turn to Cooking Light for inspiration. It is my favorite resource for healthy recipes, and it rarely disappoints. Once again, it came through for me with this recipe. Hooray Cooking Light!!!

Falafel Pitas with Goat Cheese Sauce
From: Graham Kerr, Cooking Light, JANUARY 2005

Falafel:
1 cup dried chickpeas (garbanzo beans)
1/2 cup chopped green onions
1/2 cup chopped fresh parsley
1 teaspoon baking powder
1 teaspoon ground coriander
1 teaspoon ground cumin
1/2 teaspoon salt
1/4 teaspoon baking soda
1/4 teaspoon freshly ground black pepper
1/4 teaspoon ground red pepper
1 (6-inch) whole wheat pita, torn into large pieces
2 garlic cloves, chopped
3 large egg whites
Cooking spray

Relish:
2 cups chopped seeded plum tomato
1 cup chopped seeded English cucumber
1/4 cup chopped green onions
1 tablespoon chopped fresh parsley
1 tablespoon fresh lemon juice
1 serrano chile, minced

Sauce:
1 cup plain low-fat yogurt
1/4 cup (2 ounces) soft (log-style) goat cheese
1/8 teaspoon salt
1 small garlic clove, minced
Remaining ingredient:
4 (6-inch) whole wheat pitas, halved

Directions:
To prepare falafel, sort and wash chickpeas, and place in a large bowl. Cover with water to 2 inches above beans; cover and let stand 8 hours or overnight. Drain.

Preheat oven to 350º.

Combine chickpeas and next 11 ingredients (through 2 chopped garlic cloves) in a food processor; pulse 8 to 10 times or until finely chopped. Spoon mixture into a bowl. Add egg whites to chickpea mixture, and stir well. Let stand 15 minutes. Divide mixture into 16 equal portions, shaping each into a 1/2-inch-thick patty. Place patties on a baking sheet coated with cooking spray. Bake at 350º for 10 minutes or until lightly browned.

To prepare relish, combine tomato and next 5 ingredients (through chile).

To prepare sauce, combine yogurt, goat cheese, 1/8 teaspoon salt, and 1 minced garlic clove, stirring with a whisk until smooth.

Place 2 falafel patties in each pita half; spoon about 1/3 cup relish and 2 1/2 tablespoons sauce into each pita half. Serve immediately.

Nutritional Information:
Yield: 4 servings (serving size: 2 stuffed pita halves)
Calories:450 (17% from fat)
Fat:8.7g (sat 3.3g,mono 1.8g,poly 2.1g)
Protein:24.9g
Carbohydrate:72.3g
Fiber:14.9g
Cholesterol:10mg
Iron:6.2mg
Sodium:997mg
Calcium:315mg


The Result:
I substituted 1 cup of canned beans, drained/rinsed/dried with a towel. They worked out great, and saved me some prep time. These falafel were awesome! I was pretty skeptical at first, since the batter was really wet after I added the egg whites. However, despite the wet consistency, the falafel baked up light and fluffy...perfectly cooked. My husband proclaimed these falafel to be the best he's ever tasted. I agree, they were soooo good. Bonus: I am happy to have some of the leftover relish to incorporate into my lunchtime salad today.

My only real critique was that this recipe took awhile to put together. We ate our dinner a little later than usual; which resulted in some cranky customers around my table (darn kids expecting to be fed on time). If you allow plenty of time, this recipe was well worth the effort.

December 23, 2010

Grown Up Grilled Cheese Sandwiches and Tomato Soup

Tomato soup and grilled cheese is such a classic pairing; universally adored by many...including my brood. When I found this version on the Aggie's Kitchen website, I knew it would be a hit with my family. This was a super-comforting meal for a chilly, rainy evening.

Grown Up Grilled Cheese
Adapted From: Aggie's Kitchen website

Ingredients:
6 slices of whole wheat bread
3 tablespoons of butter
2 tablespoons of olive oil
1/2 red onion, sliced
1 jalapeno, seeded, deveined and diced
2-4 thick slices of reduced fat mozzarella cheese
1/2 cup of reduced fat Monterrey jack cheese
salt to taste
cooking spray

Directions:
Heat nonstick skillet over medium high heat and coat with olive oil. Saute sliced onions and jalapeno in the skillet with a big pinch of salt, until onions are caramelized. Remove to a bowl and set aside.

Place some shredded jack cheese and a mozzarella slice on 1 slice bread. Spread 1 or 2 tablespoons of caramelized onions and jalapeno mixture on top of cheese and top with another slice of bread. Spread a very thin layer of butter on both outer sides of sandwich. Repeat with other sandwiches.

Spray the same nonstick skillet with cooking spray and heat until hot. Place sandwich on the hot pan. Lower heat to medium-low and grill until underside is a deep brown but not burnt and cheese is partially melted, about 5 to 6 minutes. Carefully flip sandwich and grill other side, an additional 4 to 5 minutes. Slice in half and serve hot. Serve with a bowl of tomato soup (recipe below).

************************

Tomato Soup
From: marthastewart.com, The Martha Stewart Show, January 2008

Ingredients:
6 tablespoons unsalted butter
2 medium yellow onions, chopped
2 cloves garlic, chopped
24 ounces canned whole plum tomatoes
3 cups homemade or low-sodium store-bought chicken stock
2 teaspoons sea salt
1/4 teaspoon freshly ground black pepper
chopped fresh basil, for garnish (optional)

Directions:
1.Melt butter in a large saucepan over medium-low heat. Add onion and garlic; cook, stirring, until onions have softened, about 15 minutes.

2.Add tomatoes, chicken stock, salt, and pepper; bring to a boil. Reduce heat to low and cook until tomatoes, onions, and garlic are soft, 10 to 20 minutes.

3.Working in batches, transfer soup to the jar of a blender and puree until smooth. Return to saucepan and place over medium heat. Cook until soup is heated through. If soup seems too thick, stir in some extra stock to thin. Sprinkle some chopped fresh basil on top and serve immediately.


The Result:
I know I am on a Martha Stewart kick lately, but her recipes are really working out for me. Although, I did inadvertently come to this Martha recipe through Aggie's Kitchen; so it was quite an unintentional find. Anyway, both soup and sandwich were fantastic.

Sadly, I did burn our sandwiches (as you can tell from my photo). While I was using my immersion blender to puree the soup, I kinda forgot about the sandwiches cooking right next to me. Oops! They were definitely a little more toasty than I would have liked; but it really didn't matter, they still turned out great.

I didn't have cheddar cheese on hand, so I made due with what I had and used the jack and mozzarella. I was also quite surprised that these sammies were not spicy, despite the use of jalapenos. The pepper just gave the sandwich a little bit of an interesting tid-bit, but no real heat. We all LOVED this combo and it will be one that I make again.

November 19, 2010

English Onion Soup

This is a great variation on French onion soup from the uber-cutie and healthy food champion, Jamie Oliver. This was a perfect meal for a chilly weeknight!

English Onion Soup
Adapted From: jamieoliver.com

Ingredients:
a good knob of butter (about 3 tablespoons)
olive oil (about 2 tablespoons)
a good handful of fresh sage leaves, chopped (Reserve 8 leaves, chopped and coated in olive oil for the bread garnish)
6 cloves of garlic, peeled and minced
5 red onions, peeled and sliced
3 large white onions, peeled and sliced
3 banana shallots, peeled and sliced
300g leeks, trimmed, washed and sliced
sea salt and freshly ground black pepper
1/2 cup of red wine
2 litres good-quality hot beef, chicken or vegetable stock (I used a combo of beef/chicken stock)
8 slices of good-quality stale bread, 2cm thick
200g freshly grated Cheddar cheese (I used Gruyere cheese)
Worcestershire sauce
a few splashes of red wine vinegar

Directions:
Put the butter, 2 glugs of olive oil, the sage and garlic into a thick-bottomed, non-stick pan. Stir everything round and add the onions, shallots and leeks. Season with salt and pepper. Place a lid on the pan, leaving it slightly ajar, and cook slowly for 50 minutes, without colouring the vegetables too much. Remove the lid for the last 20 minutes – your onions will become soft and golden. Stir occasionally so that nothing catches on the bottom. Having the patience to cook the onions slowly, slowly, gives you an incredible sweetness and an awesome flavour, so don’t be tempted to speed this bit up.

When your onions and leeks are lovely and silky, deglaze the pan with the red wine and scrape up any browned bits on the bottom of the pan with a wooden spoon. Cook until most of the wine is evaporated. Next, add the stock. Bring to the boil, turn the heat down and simmer for 10 to 15 minutes. Add a few splashes of Worcestershire sauce and red wine vinegar. Taste and season with salt and pepper, if needed. You can skim any fat off the surface if you like, but I prefer to leave it because it adds good flavour.

***SEE NOTES***(Preheat the oven or grill to maximum. Toast your bread on both sides. Ladle it into individual heatproof serving bowls and place them on a baking tray. Tear toasted bread over each bowl to fit it like a lid. Feel free to push and dunk the bread into the soup a bit. Sprinkle with some grated Cheddar.)***

Dress your reserved sage leaves with some olive oil and place one on top of each slice of bread. Put the baking tray into the preheated oven or under the grill to melt the cheese until bubbling and golden. Keep an eye on it and make sure it doesn’t burn! When the cheese is bubbling, very carefully lift out the tray and carry it to the table. Enjoy!

Jen's Notes:
I made a few slight variations. First, I halved this recipe. I used 2 leeks, 1 large red onion, 1 large sweet onion, 1 large yellow onion, 4 shallots, and 6 garlic cloves. There was still a lot of soup, so I am happy to have the leftovers.

Next, I used a carton of beef stock and about 3-4 cups of chicken stock, since that is what I had on hand. I didn't have cheddar cheese, so I used Gruyere cheese (which really makes it more like French onion soup).

***I didn't place my soup bowls under the broiler, since my dinnerware is not ovenproof. Instead, I toasted the bread on both sides on a sheet pan under the broiler. Then, once toasted, I sprinkled on the Gruyere cheese and some chopped, fresh sage leaves that were coated in olive oil. Once finished, I took a slice of bread and floated it on top of the soup. The result was amazing, and yielded perfect soup!***


The Result:
Fantastic soup!

November 15, 2010

Ricotta Gnocchi with Browned Butter and Sage Sauce

Gnocchi is one of my favorite pasta variations, although they are a bit temperamental to make from scratch. When done correctly, they are little pillows of joy. When done incorrectly, they are little gut-bombs. Fortunately, this recipe produced perfect gnocchi. I find that for the homemade version, I much prefer the ricotta gnocchi to the potato kind. It seems to me that the ricotta is easier to work with, and a little less labor-intensive. Paired with the browned butter sauce, this dish was absolutely phenomenal. I think it also helped that the husband and I fed the kiddos a separate dinner earlier in the evening then put them to bed, so we could relax and enjoy this meal without distraction.

Our dinnertime has become a little crazy since the twins have been born, so it is nice to take a "time out" now and then. Lately, I have been making an effort to have at least one meal a week where the husband and I can reconnect with dinner by ourselves. It's a trick I picked up from my friend, Claire. She and her husband call it "mini-date night"; and I think it is a good way to get some quality time with the spouse without the expense, fuss, and babysitting dilemma, of a real date night out. (Not that I would ever turn down a night out.) Anyway, this was a great recipe to serve for "mini-date night", and one that I will make again. A glass of white wine and a big green salad are just the right accompaniments to this yummy pasta meal.

Ricotta Gnocchi with Browned Butter and Sage Sauce
From: Cook's Illustrated Italian Favorites special issue, 2010

Ingredients:

Gnocchi:
1 Container Whole-milk Ricotta Cheese (15 – 16 oz.) (**SEE NOTES**)
2 Large Slices White Bread, crusts removed and bread torn into quarters (**SEE NOTES**)
1 Large Egg
2 Tablespoons Minced Fresh Basil
2 Tablespoons Minced Fresh Parsley
Table Salt
1/4 Teaspoon Ground Black Pepper
1/2 Grated Parmesan Cheese
6 Tablespoons All-purpose Flour (**SEE NOTES**)

Sauce:
4 Tablespoons Unsalted Butter, cut into 4 pieces
2 Tablespoons Minced Shallot
2 Teaspoons Minced Fresh Sage
1 Teaspoon Fresh Lemon Juice
1/8 Teaspoon Table Salt

Directions:
1. Line a fine-mesh strainer with 3 layers of paper towels and place over a bowl. Place the ricotta in the strainer and put it in the fridge for an hour to drain.

2. Preheat the oven to 300 F. Take bread pieces and place in a food processor and pulse for about 10 seconds. Spread the crumbs out on a half sheet pan and bake for about 10 minutes, or until golden brown. Let them cool to room temperature.

3. Put the ricotta into the food processor and process for eight, 1-second pulses and then place into a large bowl. Add the egg, basil, parsley, 1/2 teaspoon salt, and pepper to the bowl. Add the flour, Parmesan, and bread crumbs. Stir until combined and then place in the fridge for 15 minutes.

4. If the dough it too sticky, add a little bit of flour. Dust a surface with flour and take a lemon-sized piece of dough and roll it into a 3/4 inch thick rope. Cut the rope into 3/4 inch pieces and transfer to a baking sheet line with parchment paper. Repeat until all the dough is converted to small dumpling shapes.

5. Bring a large pot of water to a boil and the reduce to a SIMMER and start the sauce (see step 6). (If the water is boiling too harshly, then it may break the gnocchi apart). Add half of the gnocchi and cook until the gnocchi floats to the top. Then SIMMER the gnocchi for 2 more minutes longer and then remove with a slotted spoon. Let the water drain and add the gnocchi directly to the sauce.

6. Melt the butter in a 12 inch skillet over medium-high heat, swirling occasionally. Simmer until browned about 1 1/2 minutes and it will release a nice nutty aroma (a burning smell or black specks in the butter is bad, wipe out the pan and start over). Add the sage and shallot off heat and let it cook for a minute. Toss with the cooked gnocchi and serve immediately. Garnish with Parmesan cheese and enjoy!

Jen's Notes:
**I took a few liberties with this recipe. First, I did not make my own breadcrumbs. I omitted steps (1.) and (2.) and eliminated the two slices of white bread from the ingredients list. Instead, I substituted a 1/2 cup of whole wheat Panko bread crumbs. It worked out great, and saved a lot of time.**

**Next, to make the dish a little more healthful, I used 3 tablespoons of AP flour and 3 tablespoons of whole wheat flour for the gnocchi dough. (However, I did use AP flour for dusting the work surface.) Also, I used part-skim ricotta instead of whole milk ricotta. Again, my changes worked out great and will be substitutions I use again.**

This made a lot of gnocchi, so I ended up freezing about half of them for another meal. I just took the parchment-lined sheet pan and stuck it in my freezer. This allowed the gnocchi to flash-freeze individually (not in a big lump). Then, once frozen (I left them overnight), I took the frozen gnocchi pieces and put them in a zip top bag to store in the freezer for another use.
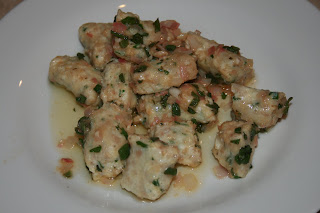


The Result:
This recipe was sinful! So freakin' delicious!!! I am just happy that I got a 4 mile run in before dinner, so I did not have to feel so guilty about basically eating cheese and butter for our evening meal. Yum!