Showing posts with label mushrooms. Show all posts

March 16, 2013

Italian Chicken Bake


I've been a blog-updating fool lately! It's funny because I will go weeks without trying anything new meal-wise (i.e. no new blog updates), and then all of a sudden, have a bunch of new recipes to post all at once. Granted, it's probably days/weeks in between when we actually have the meals and when I get all the updates finally on here. It's just odd that my blogging has been reduced to completing it in fits and starts. I guess it just depends on my mood or how busy we are, basically. Also, I've noticed that I will go weeks at a time without wanting to try any new recipes. I just want easy, stand-by dinners that I've done a million times and that I can put together from memory; I call it auto-pilot cooking. That's my standard when I'm overly extended or stressed out and discovering new meals is just one more thing to worry about or check off the to-do list. For now, life has settled into a rhythm and I'm up for trying new dinners and updating posts. Hooray!

This was a Pinterest find that wasn't actually a recipe, more like a photo and a loose guideline. The "recipe" didn't even have an official name or really a source, so I creatively dubbed it "Italian Chicken Bake". Really original, I know! I tweaked it from the original suggestion and made it my own. The result was really tasty and satisfying, so my version is a keeper. I think we had our chicken with some steamed mixed veggies and called it dinner.

Italian Chicken Bake

Ingredients:
cooking spray
1-2 tablespoons of olive oil (I really didn't measure)
1-2 tablespoons of balsamic vinegar (again, I really didn't measure)
4-6 chicken breasts (depending on how many portions you'd like)
2 containers of cherry tomatoes, halved
1 red onion, sliced thin
1 container of sliced crimini or white button mushrooms
4-6 cloves of garilc, minced
1-2 cups of shredded mozzarella cheese
1/4 cup of water
salt and pepper, to taste
chopped fresh basil, for garnish

Directions:
Spray glass casserole dish with cooking spray and preheat the oven to 350 degrees.
Place chicken in dish and sprinkle with salt, pepper. and then drizzle with a little bit of olive oil.
Add chopped tomatoes, sliced mushrooms, sliced red onion, and minced garlic to the dish, covering the chicken.
Drizzle the balsamic vinegar and water over top of the veggies.
Sprinkle shredded cheese over top of chicken and veggies.
Bake for 30-40 minutes at 350 degrees.
Remove from the oven and let rest for 5 minutes.
Sprinkle the fresh basil over the top, as a garnish.
Once plated, spoon a tablespoon or so of the pan juices over top of your serving of chicken/veggies.

March 8, 2013

Grilled Veggie and Hummus Wraps


We used to have vegetarian recipes 2 to 3 times per week, when my kids were smaller and couldn't really complain about eating all vegetables for our main meal. I say "used to" because this practice has sadly become a thing of the past. I don't remember why we stopped eating more vegetarian selections, but I really wished we wouldn't have. Now, if I put anything out of the norm in front of them, the picky little buggers stage a revolt. I know if I would have been diligent about having vegetarian dinners in the regular rotation, then it wouldn't be such a struggle now. ::SIGH::

Needless to say, all three of my precious offspring poo-poo'd this dinner. Yeesh. The tears and hunger strike that was staged at my house on this particular night made dinner especially heinous. It really was a shame that my kids didn't like it, because my husband and I really loved these wraps. The recipe was really good, but in the interest of honest disclosure, I wanted to give you the low-down on what I like to call "the kid factor". Maybe your kids will be more open-minded??? Or maybe you don't have kids and don't care about catering to picky little eaters??? Either way, don't let "the kid factor" deter you from trying these wraps. They are very good, and as much complaining as my little darlings did about this dinner, it won't stop me from serving this meal again.

Grilled Veggie and Hummus Wraps
Adapted From: Cooking Light, April 2012

Ingredients:
2 large portobello mushroom caps, cleaned and stems removed
4 (1/2-inch-thick) slices red onion
1 red bell pepper, seeded and quartered
1 (12-ounce) eggplant, cut into 1/2-inch-thick slices
2 tablespoons olive oil, divided
1/4 cup chopped fresh flat-leaf parsley
1/8 teaspoon kosher salt
1 (8-ounce) container plain hummus
4 (1.9-ounce) whole-grain flatbreads (such as Flatout Light)
1/2 cup crumbled feta cheese

Directions:
Heat a large grill pan over medium-high heat. Brush mushrooms, onion, bell pepper, and eggplant with 1 tablespoon oil. Add mushrooms, onion and bell pepper to pan; cook 3 minutes on each side or until grill marks appear. Remove from pan. Add eggplant to pan; cook 3 minutes on each side or until grill marks appear. Remove from pan; coarsely chop vegetables. Combine vegetables, remaining 1 tablespoon oil, parsley, and salt; toss to combine.

Spread 1/4 cup hummus over each flatbread, leaving a 1/2-inch border around edges. Divide vegetables over each flatbread; top each serving with 2 tablespoons cheese. Roll up wraps, and cut diagonally in half.

September 17, 2012

Cheese and Spinach Stuffed Portobellos


I'm in a bit of a hurry this afternoon, since I'm trying to get my blog updates done while my twins are napping. I'm gonna keep this short and sweet, since I really need to finish this month's book selection for my book club. I typically prefer laying on the couch reading a book better than blog updating anyway (just keepin' it real, folks!).

This was a very tasty vegetarian dinner that we had a few weeks ago. I don't remember any details, other than it was solid and pleasing to the adults at my house. I seem to recall the kids...eh, not so much. We served this dinner with a side salad and some whole wheat spaghetti with garlic and olive oil. Yum! It was a light, Italian feast for sure.

Cheese and Spinach Stuffed Portobellos
From: EatingWell magazine, March/April 2009

Ingredients:
4 large portobello mushroom caps
1/4 teaspoon salt
1/4 teaspoon freshly ground pepper, divided
1 cup part-skim ricotta cheese
1 cup finely chopped fresh spinach
1/2 cup finely shredded Parmesan cheese, divided
2 tablespoons finely chopped kalamata olives
1/2 teaspoon Italian seasoning
3/4 cup prepared marinara sauce


Directions:
Preheat oven to 450°F. Coat a rimmed baking sheet with cooking spray

Place mushroom caps, gill-side up, on the prepared pan. Sprinkle with salt and 1/8 teaspoon pepper. Roast until tender, 20 to 25 minutes.

Meanwhile, mash ricotta, spinach, 1/4 cup Parmesan, olives, Italian seasoning and the remaining 1/8 teaspoon pepper in a medium bowl. Place marinara sauce in a small bowl, cover and microwave on High until hot, 30 seconds to 1 1/2 minutes.

When the mushrooms are tender, carefully pour out any liquid accumulated in the caps. Return the caps to the pan gill-side up. Spread 1 tablespoon marinara into each cap; cover the remaining sauce to keep warm. Mound a generous 1/3 cup ricotta filling into each cap and sprinkle with the remaining 1/4 cup Parmesan. Bake until hot, about 10 minutes. Serve with the remaining marinara sauce.

February 13, 2012

Austrailian Chicken

We don't really eat out all that much. Our rationale is that it's not very enjoyable to pack up three kids and eat at a crowded, over-priced, chain restaurant that only has mostly-mediocre food. We can do better at home, for considerably less expense and hassle. When the husband and I do eat out at a restaurant, it's gonna be for a date night and it will someplace that is not inexpensive or --ahem-- kid-friendly. It doesn't happen that often, but when it does we want to relax and make sure it's worth our while from a foodie perspective.

With that said, there are a couple of chain restaurant dishes that I do miss and often think about. For example, I really love the Alice Springs Chicken at Outback Steakhouse. (I don't love it enough to go there and pay for it; but I love it nonetheless.) Imagine how happy I was to find a copycat recipe for said chicken that was just as good, if not better than the original version. Score! I love finding ways to have our favorite restaurant-type meals at home...it makes me feel all savvy and crafty. Kinda like I've found a way to outsmart the system.

Ha! Take that chain restaurants!!! I've even renamed my copycat version, to show you who's boss. Victory is mine!

Australian Chicken
Adapted From: sixsistersstuff.com via Pinterest

Ingredients:
cooking spray
4 boneless skinless chicken breasts, pounded to 1/2 inch thickness
Lawry's seasoning salt to taste
6 slices bacon, cut in half
1 cup of your favorite honey mustard salad dressing
1/2 tablespoon of dried onion flakes
1 cup sliced fresh mushrooms
salt to taste
2 cups shredded sharp cheddar cheese

Directions:
Preheat oven to 350 degrees. Spray a 9 x 13 glass dish with cooking spray and set aside.

Lightly sprinkle seasoned salt on both sides of chicken and set aside.

In a non-stick skillet, cook bacon until crispy. Remove bacon from pan, reserving the bacon grease to a separate bowl. Drain bacon on a plate lined with paper towels and set aside.

In the same non-stick skillet, add about a tablespoon of bacon grease back to the pan. Heat grease over medium-high heat. Saute the mushrooms in the grease with a pinch of salt. Once mushrooms are cooked, remove to separate bowl and set aside (I put mine along side my draining bacon to save on doing dishes later.)

Again, in the same skillet, add another tablespoon of bacon grease back to the pan and heat over medium-high heat. Brown seasoned chicken on both sides, about 3-4 minutes on each side. Place browned chicken in prepared glass dish. Sprinkle the chicken with dried onion flakes. Pour half of the honey mustard salad dressing over the chicken. Top each chicken breast with two halves of bacon and a spoonful of the cooked mushrooms. Drizzle the remaining honey mustard dressing over top of the mushrooms, on each breast. Cover chicken with shredded cheese and bake at 350 for 20-25 minutes, or until chicken is done thoroughly and cheese is melted and bubbly.


The Result:
This satisfied my fix, for sure. My kiddos loved it, and had thirds! The husband said that he thought it was better than the restaurant version, and I think he's right. It was pretty darn spectacular. This is a keeper recipe for sure!

January 10, 2012

Skillet Rosemary Chicken

We had this meal with a simple side salad for dinner last night and we (kids & adults) all gobbled it up. My baby girls actually screamed for more chicken, so I definitely count that as a check in the "win" column. Best of all, this entire meal was basically done in one pan--the cast iron skillet. Okay, so I had to boil some potatoes in a different pot, but that was it! Clean up was pretty easy for this delish all-in-one dinner.

Skillet Rosemary Chicken
Adapted from: Food Network via the Minimally Invasive website

Ingredients:
3/4 pound small red-skinned potatoes, halved, or quartered if large
Kosher salt
2 sprigs fresh rosemary, plus 1 1/2 tablespoons leaves
2 cloves garlic, smashed
Pinch of red pepper flakes
Juice of 2 lemons (squeezed halves reserved)
2 tablespoons extra-virgin olive oil
4-6 skin-on, bone-in chicken thighs (6 to 8 ounces each)
10 ounces cremini mushrooms, halved

Directions:
Preheat the oven to 450. Cover the potatoes with cold water in a saucepan and salt the water. Bring to a boil over medium-high heat and cook until tender, about 8 minutes; drain and set aside.

Pile the rosemary leaves, garlic, 2 teaspoons salt and the red pepper flakes on a cutting board, then mince and mash into a paste using a large knife. Transfer the paste to a bowl. Stir in the juice of 1 lemon and the olive oil. Add the chicken and turn to coat.

Heat a large cast-iron skillet over medium-high heat. Add the chicken, skin-side down, cover and cook until the skin browns, about 5 minutes. Remove chicken from pan; add the mushrooms and potatoes to the skillet, place chicken over mushrooms and potatoes and drizzle with any marinade remaining in the bowl and the juice of the remaining lemon.

Add the rosemary sprigs and the squeezed lemon halves to the skillet; transfer to the oven and roast, uncovered, until the chicken is cooked through and the skin is crisp, 20 to 25 minutes.


The Result:
Um, hello crispy, tasty, chicken skin! I'm normally not a fan of skin, but oh my...this version was awesome. The potatoes and mushrooms were pretty phenomenal, as well. The lemon, garlic, and rosemary flavors all married together to make this dish soooooo yummy. It was just the right amount of tangy, garlicky, chicken-y goodness.

November 16, 2011

Portobello, Broccoli,and Red-Pepper Melts

This is another Martha Stewart recipe that I found while exploring her website the other day. Truly, this was a fantastic open-faced sandwich...one of the best that we've tried. Martha sure knows her food, that's for sure! If you dig a hearty, vegetarian sandwich this dish is for you.

In other news...

You'll be happy to know that the husband found the camera battery charger and plugged it in. Hooray! The good news doesn't stop there...I also remembered to take a photo of our dinner last night with my iphone. Eureka! Why didn't I think of that before??? I don't know. Thankfully, my normal camera should be up and running the next time I have to take a blog pic. In the meantime, try this recipe and enjoy my shaky iphone photography skills.

Portobello, Broccoli, and Red-Pepper Melts
From: Everyday Food, March 2008

Ingredients:
1 small head broccoli, cut into small florets (stalk discarded)
1 tablespoon olive oil
Coarse salt and ground pepper
4 portobello mushrooms (stems removed), sliced 1/2 inch thick
2 red bell peppers (ribs and seeds removed), sliced 1/2 inch thick
1/4 cup light mayonnaise
1 small garlic clove, crushed through a press
4 thick slices country bread (or 1 loaf of French bread, cut horizontally)
4 ounces Gouda cheese, thinly sliced (or Gruyere, if you like)

Directions:
Heat broiler, with rack set 4 inches from heat. On a rimmed baking sheet lined with aluminum foil, toss broccoli with oil; season with salt and pepper. Broil, tossing once or twice, until broccoli begins to char, 4 to 6 minutes.

Add mushrooms and bell peppers to sheet; season with salt and pepper, and toss to combine. Broil, tossing once or twice, until vegetables are tender, 8 to 10 minutes more; set aside.

Meanwhile, in a small bowl, combine mayonnaise and garlic; season with salt and pepper. Place bread on a work surface. Dividing evenly, spread with mayonnaise mixture, and top with vegetables, then cheese. Place on baking sheet, and broil until cheese is melted and lightly browned, 2 to 4 minutes.


The Result:
These were fantastic! Delicious and satisfying. I goofed and used Gruyere instead of Gouda cheese. Duh. Next time I should read the ingredients list a bit more carefully. Honestly, it didn't really matter; it was still an amazing veggie sandwich.

There were a lot of filling, so I decided to cut my French bread loaf in half horizontally, and hollow out (and discard) some of the bread in the middle. This allowed more room for the yummy, roasted veggies. I thought this would be more efficient than just doing the slices, and this method was reminiscent of the Eggplant Mozzarella Melts recipe that we LOVE. Then, when the cook time was over, I removed the long, loaf halves to a cutting board and just cut the portion sizes we needed (smaller pieces for the kids, etc.). It worked out perfectly, and now we have a new favorite Martha Stewart open-faced "melt" sandwich to make for dinner.

October 18, 2011

Cauliflower Crust Veggie Pizza

This recipe is another Pinterest find that my whole family l-o-v-e-d. I am always on the lookout for both new pizza ideas and new vegetarian meals, and this fit both requirements. My kids didn't even realize that all that they were eating was copious amounts of vegetables and cheese. Ha ha! I love sneaking in healthy foods when they are none the wiser. Score!

I made our pizza larger than the original directions indicated, so I adapted all the ingredient quantities to reflect in my recipe below.

Cauliflower Crust Veggie Pizza
Adapted From: Eat. Drink. Smile. website via Pinterest.com

Ingredients:
For crust:
1 head of chopped cauliflower florets, stalks discarded
cooking spray
3 eggs, beaten
3 cups low-fat cheese, shredded (I used a combo of sharp cheddar and mozzarella)
1 tsp garlic powder
1 tsp oregano
1 tsp of salt
1/2 tsp black pepper

For toppings:
1 tablespoon of olive oil
1 zucchini, cut into 1/2 inch diced pieces
1 bell pepper, cut into strips
1 onion, sliced thinly
1 package (6 oz.) of sliced button mushrooms
2 garlic cloves, minced
salt and pepper to taste
1/2 to 1 cup of jarred marinara sauce (depending on how saucy you like your pizza)
2 fresh tomatoes, sliced
2 cups of shredded mozzarella cheese
Parmesan cheese, grated for topping

Directions:
For crust:
In a food processor "rice" the raw cauliflower florets by pulsing several times. You may have to do a couple of batches, depending on the capacity of the food processor. Also, make sure to not pulse too much; otherwise the cauliflower will be more of a puree instead of small pieces that are "riced". One head of cauliflower should yield about 3 cups of "riced" cauliflower.

Place "riced" cauliflower in a microwave safe container and cook on high in the microwave for 8 minutes. Remove to a bowl and let the cooked cauliflower cool a bit.

Once cauliflower is cool enough to handle, mix in beaten eggs, spices, and 3 cups of cheese. Season to taste with salt and pepper. Combine thoroghly and set aside.

For toppings:
Heat olive oil on in a skillet over medium-high heat. Saute onions, zucchini, peppers, and mushrooms until browned and caramelized. Add garlic and saute for 1 additional minute. Season with salt and pepper to taste. Remove from heat and set aside.

For pizza:
Spray large rimmed baking sheet with cooking spray and preheat oven to 450 degrees. Press cauliflower mixture into prepared baking sheet, using your hands or the back of a spoon. Make sure there are no holes or thin spots in the pressed crust. Bake in the oven for 15 minutes.

At the end of the cook time, remove from oven and spray top of crust with cooking spray.

Switch the oven over to broil on "high". Return cauliflower back to the oven, by placing on the top rack closest to the broiler. Broil on high for 2-5 minutes, or until crust is slightly browned. Remove from oven.

Top pizza crust with marinara sauce by spreading with a spoon or a spatula. Top sauce with cooked vegetables. Sprinkle cheese over veggies and sauce. Place fresh tomato slices on top of cheese layer. Return sheet pan to the top rack of the oven and broil until cheese is melted, slightly browned, and bubbly. Remove the pizza from the oven. Sprinkle grated Parmesan cheese over the entire pizza. Cut it into squares and serve immediately.


The Result:
As you have probably guessed, I found my camera again. Hooray! I had to do quite a bit of digging through some moving boxes, but I'm so happy I finally found it. I can now start taking blog pics again...this is really good news.

This was soooo yummy! Seriously delicious; as I said, we all really loved it. The original website mentions that this will not be the same texture or taste as traditional pizza crust, which I found to be true. It wasn't firm enough to pick up and eat with our hands, but it was totally fine to just eat it with a fork. With that said, it was still pretty darn fantastic and it will be something I wiggle into our regular pizza rotation. Yum!!!!

August 10, 2011

Portobello Goat Cheese Pitas

It seems that we have really been on a meat-spree lately. I feel like we are just consuming mass quantities of beef, chicken, and pork. What is that all about???? Once upon a time ago, I was pretty diligent about having 2-3 vegetarian meals every week. I'm not sure why that fell apart, but I think it had something to do with us just getting tired of the vegetarian options out there (especially since we are not fans of tofu). Anyway, my hope was restored in vegetarian meals when I found this recipe in Cooking Light magazine. This was virtually no-cook, and it was flavorful and fast to put together...a perfect choice for getting me back on the vegetarian band wagon.

Portobello Goat Cheese Pitas
Adapted From: Cooking Light magazine, August 2004, Alison Lewis

Ingredients:
1 1/2 teaspoons bottled minced garlic (I used minced fresh garlic)
1 teaspoon olive oil
4 (6-inch) pita rounds (I used naan bread)
1/2 teaspoon salt, divided
1/4 teaspoon black pepper, divided
4-6 whole portobello mushroom caps, sliced
2 medium tomatoes, cut into 1/4-inch-thick slices
1/3 cup (3 ounces) goat cheese
1/2 cup chopped fresh basil
balsamic vinegar, to drizzle

Directions:
Preheat oven to 375 degrees. Place sliced portobellos on large cookie sheet and drizzle with olive oil salt and pepper. Toss with clean hands. Roast in the oven for 15 minutes. Remove from oven and sprinkle the minced garlic onto the cooked mushrooms. Return the sheet to the oven and bake for an additional 5 minutes. Remove from oven, drizzle a little bit of balsamic vinegar evenly over mushrooms, and set aside.

Soften goat cheese at room temperature. (This can also be done in the microwave for a few seconds. Just be careful and watch it closely or your goat cheese will turn to liquid.) When goat cheese is at desired texture (i.e. easily spreadable) spread on pita rounds or on naan bread. Sprinkle chopped fresh basil over goat cheese layer. Add fresh sliced tomatoes and a few portobello slices. Fold and serve as a sandwich.


The Result:
Yet another gem to add to my vegetarian repertoire. The original recipe called for grilled portobellos, but I didn't feel like messing with the grill or a grill pan for that matter. I think it was just easier to stick the mushrooms in the oven and let them do their thing. I did link the original recipe above, just in case you would like to see the original method. Also, I thought it needed a boost so I added in the balsamic drizzle (not in the original recipe). Either way, these pitas were easy and delicious!

May 16, 2011

Grilled Portobello Mushrooms Stuffed with Sausage, Spinach, and Cheese

Well, I am on week two of the South Beach Diet Phase 1. Overall, it has been a fairly easy transition from our normal diet, and not too crazy not having tons of carbs. Although, yesterday my son was eating a whole wheat tortilla at breakfast and I was actually jealous. Maybe the no carb thing is affecting me more than I think. All in all, I think two weeks is my limit for not having fruit and complex carbs and I am going to be glad to move on to Phase 2. So far, I have lost 6 pounds on Phase 1 and I still have most of the week to go. I am hoping to take off another 4 pounds, just so it can be an even 10 pounds lost. I like round numbers.

I found this recipe on a website I love called Kalyn's Kitchen. Her recipes are normally delicious, and I was pleased to find that she had a ton of SBD stuff listed. The site is a great resource to have in your back pocket. These portobellos were fantastic, and I have found yet another recipe I would make with or without the SBD. We served a heaping side of steamed broccoli to complete our meal.

Grilled Portobello Mushrooms Stuffed with Sausage, Spinach, and Cheese
Adapted from: Bobby Flay's Grill It via Kalyn's Kitchen website

Ingredients:
4 large portabello mushrooms
12 oz. mild or hot turkey Italian sausage
1-2 T olive oil (for browning sausage and onions and brushing on mushrooms before grilling)
1 small onion, finely chopped
1 tsp. minced fresh garlic
1/2 cup of dry red wine
1/2 cup marinara sauce (jarred is fine)
pinch red pepper flakes (optional)
8 oz. coarsely chopped spinach leaves
2 T chopped fresh basil
1/2 cup grated part-skim mozzarella, plus 1/2 cup for sprinkling on top

Directions:
Preheat gas or charcoal grill to high heat. Heat a small amount of olive oil in heavy frying pan, then crumble Italian sausage into pan and cook about 5 minutes, breaking apart with back of the turner as it cooks. When sausage is well-browned, remove to bowl.

If needed, add a bit more olive oil, then saute onions until they're starting to soften, about 2 minutes. Add garlic and continue cooking until onions are starting to brown, a few minutes more. Add red wine to de-glaze the pan and let it almost evaporate. Add Italian sausage back into pan, then add red pepper flakes and tomato sauce and simmer 2-3 minutes while you chop the spinach.

Add chopped spinach and let it wilt and cook down, stirring so it's evenly distributed in the sausage/onion mixture. Turn off heat and stir in 1/2 cup mozzarella, and chopped basil.

Remove stems from mushrooms caps, being careful not to break them. Scrape out brown gills from inside mushrooms if desired, then brush both sides of mushrooms with olive oil. Put mushrooms on grill, inside facing down, and cook about 4 minutes, until mushroom is slightly browned and starting to soften.

Remove mushrooms from the grill. Carefully stuff the inside of each mushroom with sausage/spinach/cheese mixture, then top each mushroom with about 2 T grated mozzarella.

Carefully put mushrooms back on grill, stuffing facing up of course! Cover grill and cook about 5 minutes, checking often and removing from grill when mushrooms are cooked through, and cheese is melted and starting to brown, and stuffing mixture is hot. Serve immediately.


The Result:
YUM! I made a whole pound of turkey sausage and a whole jar of marinara sauce. I only used about half of the mixture, so the other half I froze for spaghetti and meat sauce some night. I love when dinner can pull double duty! The meaty texture of the portobello mushrooms was so satisfying, and the flavor combo of these ingredients really hit the spot.

February 15, 2011

Jen's Veal Scallopine with Marsala Portobellos

I bought some veal on clearance the other day without a real plan for it. Since veal is somewhat special and hard to come by, I decided to save it and make something for Valentine's Day dinner with it. I didn't feel like messing around with a recipe, so I thought I would challenge myself with some creative cooking. This is what I came up with; and I must say, it was sooooo good! Some roasted asparagus as a side dish made this a lovely meal that the family and I really enjoyed. My baby girls especially loved it, so I was pretty happy with the result.

Jen's Veal Scallopine with Marsala Portobellos

Ingredients:
1-2 lbs. of thin-cut veal scallopine
1/2 cup of AP flour
1/2 cup of bread crumbs (I used whole wheat)
salt and pepper to taste
1 teaspoon of paprika
1 teaspoon of dried oregano
1/2 teaspoon of garlic powder
2 Tablespoons of butter
1 Tablespoon of olive oil
2 portobello mushroom caps, sliced
1 cup of Marsala wine

Directions:
In a shallow dish, combine bread crumbs, flour, salt, pepper, oregano, paprika, and garlic powder. Dredge both sides of the veal into the flour mixture, shaking off any excess coating.

In a large skillet, melt butter and olive oil together over medium-high heat. Brown veal for 2 minutes on each side.(Veal scallopine is really thin, so it cooks fast. Don't overcook it or it will become tough.) Remove from pan to plate lined with paper towels to blot the excess oil,0.2 and set aside. In the same skillet, add mushrooms to the pan (there should still be oil/butter mixture leftover.) Add a pinch of salt and saute the mushrooms for about 5 minutes or until soft and giving off their liquid. Add Marsala wine to pan and cook until reduced to about 1/3 to 1/4 cup. Place cooked veal on a plate and top with the mushroom and wine mixture. Serve immediately.


The Result:
This was really great, and best of all, fast and easy to put together. I tasted and looked way more complex than it was to prepare. As I said, we all loved this dinner; including my kids. Although, we omitted the wine-soaked mushrooms for the little ones. (That was totally okay with me, because that just meant more wine-soaked mushrooms for myself and the hubs.) ;)

November 16, 2010

Smothered Turkey Burgers

As you may know, I stalk my friend Claire's blog on a daily basis. Sometimes, I just need meal inspiration and she always has interesting stuff on the menu. For example, she concocted these turkey burgers a few weeks ago. They looked so delicious, and I decided needed to branch out a little bit with ground turkey. I didn't follow her recipe exactly; but instead, used her idea as a blueprint and then went from there (mainly because I either had too much, not enough, or different ingredients on hand than what she used). Also, anything smothered in gravy is generally a good thing. I served our smothered turkey-goodness with a side of roasted broccoli and dinner was on the table. Thanks, Claire!

Smothered Turkey Burgers

Ingredients:
2 tablespoons of oil (I used grapeseed oil)
1 package (1.25 lbs.) of lean ground turkey
2 cartons (6 ozs.) of sliced mushrooms (I used button and crimini mushrooms; one carton of each)
1 onion, sliced (I actually used half of a red onion, and half of a white onion)
1 envelope of dry gravy mix (I used an organic variety I found at Whole Foods Market)
1/2 carton of beef broth
1 tsp garlic powder
1 tsp onion powder
2 tsp dried thyme or rosemary, divided
2 tsp paprika, divided
4 slices of low-fat 2% provolone cheese
1 tablespoon of additional oil for meat
salt and pepper to taste

Directions:
In a medium sized bowl, combine turkey, salt, pepper, onion powder, garlic powder, 1 tsp of thyme (or rosemary, if using), 1 tsp of paprika, and 1 tablespoon of oil. Form into 4 patties and set aside.

Heat 2 tablespoons of oil in a large skillet over medium-high heat. Add turkey patties and brown on both sides, about 5 minutes per side (patties do not have to be cooked through). Remove patties to a platter. Top each patty with a slice of cheese and set aside.

In the same skillet, add onions and mushrooms with a big pinch of salt. Use a wooden spoon to stir and scrape up the browned bits on the bottom of the pan as the mushrooms and onions sweat. When onions and mushrooms are slightly browned and softened, sprinkle dry gravy mix, 1 tsp of paprika, 1 tsp of thyme (or rosemary) over the mixture. Stir to combine. Add beef broth and bring to a boil. Reduce to a simmer, stirring every few minutes. Taste and adjust seasoning with salt and pepper, as needed.

Return patties back to skillet and spoon gravy mixture over the top. Cover the skillet with a lid and cook for a few minutes; until patties are cooked through and cheese is melted. Remove cooked patties (topped with mushroom mixture), to a plate and serve immediately.


The Results:
These were really, really yummy. I think Claire's version may be a little easier, since my list of ingredients is a bit longer. Although, I did try to keep mine contained to cooking all in one pan...so I have that going for me. I added the additional spices, because I was going more for the flavors of salisbury steak. The spices were a good idea; the taste turned out exactly how I wanted it. Yum!
This was very easy to put together and so satisfying. All in all, we loved this new use for ground turkey.

November 9, 2010

Mushroom and Swiss Sliders with Spicy Fry Sauce

Here is a fan-freakin'-tastic recipe I copped off of the Pioneer Woman website. Like most of the PW recipes, it was so simple; yet so delicious!!! The husband and I had a quiet dinner after the kids went to bed last night and savored these little beauties. A green spinach salad rounded out our dinner, and made for a great Monday night meal.

Mushroom and Swiss Sliders with Spicy Fry Sauce
From: The Pioneer Woman website

Ingredients:
⅓ cups Mayonnaise
2 Tablespoons Ketchup
1 teaspoon Cayenne Pepper (less If You're Sensitive To Spice!)
4 Tablespoons Butter
½ whole Medium Onion, Finely Diced
8 ounces, weight White Mushrooms, Chopped Finely
½ cups White Or Red Wine (optional)
4 dashes Worcestershire Sauce
Kosher Salt And Freshly Ground Black Pepper
2 pounds Ground Beef
4 Tablespoons Heavy Whipping Cream
4 dashes Worcestershire Sauce
1 teaspoon Kosher Salt
Freshly Ground Black Pepper
4 slices Swiss Cheese, Cut Into Four Squares
8 whole Dinner (or Slider) Rolls, Split

Directions:
In a small bowl, mix mayonnaise, ketchup, and cayenne. Stir together until totally combined. Set aside. (This is the spicy fry sauce.)

Melt butter in a large skillet. Add onions and cook over medium heat for five minutes, stirring frequently. Add mushrooms and toss around, then add wine (if using), Worcestershire, salt and pepper. Cook for several minute over medium heat, or until all liquid has evaporated. Transfer mushroom mixture to a separate bowl, scraping all contents from the skillet.

Mix ground beef, heavy cream, Worcestershire, and salt and pepper in a bowl. Use your hands to thoroughly mix ingredients. Form 1/4 to 1/3 cup of the meat mixture into patties, making an indentation with your thumb to keep the patties from plumping too much when they cook. In the same skillet as the one used to cook the mushrooms, melt 1 tablespoon butter over medium to medium-high heat. Add four patties at a time, indented side face up. Cook for 4 minutes, then flip. Spoon generous portion of mushroom mixture on each patty, then top with one or two squares of Swiss, depending on your preference. Place lid on skillet and cook for an additional 2 to 3 minutes, until burgers are cooked through and cheese is melted. Remove to a place and keep warm while you repeat with the rest of the meat mixture.

Toast halved buns under the oven broiler. Spread generously with spicy fry sauce. Place patties between buns and serve immediately.

The Result:
I forgot to take a photo, but the link above to the PW website has all the shots you would need to make you drool on your keyboard. These were awesome!

November 4, 2010

Creamy Orzo with Chicken, Mushrooms, & Red Peppers

Oh man, I am a sucker for a creamy pasta dish and this one hit all the right spots. This recipe was literally like crack for me; striking in exactly all of my weak spots for creamy, savory, cheesy, mushroomy, and carb-ladened. I could not stop taking bites (even after I was already full). This dish is definitely on the decadent side, but I tried to lighten it up with low-fat cream cheese (yeah..."tried" is the operative word in that sentence). However, sometimes indulgence is necessary and you just gotta go for it. Needless to say, my whole family thought this dish was fantastic; even my ever-so-persnickity 4 1/2 year old boy. Let me tell you, when a child--whom we normally have to beg--eats dinner gleefully, and without a peep of complaint...now that is a recipe's true seal of approval!

Creamy Orzo with Chicken, Mushrooms, & Red Peppers
Adapted From: Food and Wine Quick From Scratch Pasta Cookbook via My Kitchen Cafe blog

Ingredients:
1 tablespoon olive oil
2 average-sized chicken breasts (about 1 to 1 ½ pounds), cut into chunks
2 red bell peppers, cut into ½-inch pieces
8 ounces white button mushrooms, quartered
1 teaspoon dried thyme
3 cloves garlic, finely minced
1 pound orzo pasta
8 ounces low-fat cream cheese, softened
1 cup reserved pasta water
1/2 teaspoon salt
1/2 teaspoon pepper
½ cup freshly grated Parmesan cheese
3 tablespoons chopped fresh flat leaf parsley or fresh basil
Squeeze of fresh lemon juice (from 1 lemon)

Directions:
Bring a large pot of salted water to a boil. Add the orzo and cook according to package directions until tender. When the orzo is ready, reserve 1 cup of the pasta water (ladling it into a small bowl is my method) and then drain the orzo and set aside.

While the orzo cooks, in a large nonstick skillet, heat the olive oil over medium heat. Season the chicken with salt and pepper. Add the chicken to the hot oil and brown on all sides. When nicely browned (but not all the way cooked through), add the peppers, mushrooms and thyme. Stir and let cook for about 5 minutes, until the chicken is cooked through and the mushrooms and peppers have softened and browned and most of the liquid has evaporated. Add the garlic and cook, stirring, until fragrant, about 1 minute.

In the skillet over medium heat, add the softened cream cheese (if you forgot to let the cream cheese soften at room temperature, no worries! Pop it in the microwave for one minute on 40% power) in bite sized chunks and stir so that the cream cheese melts and coats the chicken and vegetables. Add the reserved pasta water and bring to a simmer. Add ½ teaspoon salt and ½ teaspoon pepper. Stir. Add the orzo, Parmesan, lemon juice and fresh parsley. Stir to combine and heat through. Garnish with additional Parmesan and parsley (or basil).

*Note: this pasta is best served immediately as it tends to get less creamy as it sits at room temperature – so serve warm right as it finishes cooking!

(Incidentally, it heated up just fine the next day in the microwave on low power.)

*Serves 4


The Result:
Sooooooo worth the splurge!

September 17, 2010

Mushroom & Provolone Bison Patty Melts

My new issue of Cooking Light magazine just arrived, and this recipe jumped out at me. Originally, it calls for ground sirloin; but I thought the swap of lean, more sustainable, bison meat would be a good choice. It turns out I was right...the bison was delicious! If you haven't tried bison, I would highly recommend it. It just tastes like really high-quality ground beef, and is much more healthful. Trust me, it is really great. These patty melts were a hit with the whole family, and my husband especially loved them. Many thanks Cooking Light for another awesome dinner!

Mushroom & Provolone Bison Patty Melts
Adapted From: Cooking Light magazine, Oct. 2010 issue

Ingredients:
1 pound ground bison
Cooking spray
1 tablespoon olive oil
1/4 cup thinly sliced yellow onion
1/8 teaspoon salt
1/8 teaspoon black pepper
1 (8-ounce) package sliced cremini mushrooms
1 1/2 teaspoons all-purpose flour
1/4 cup beef broth
8 (1.1-ounce) slices of whole wheat bread
4 (3/4-ounce) slices of reduced-fat provolone cheese

Directions:
1. Heat a large nonstick skillet over medium-high heat. Shape bison into 4 (4-inch) patties. Coat pan with cooking spray. Add patties; cook 4 minutes on each side or until done.

2. Heat oil in a separate medium skillet over medium-high heat. Add onion, salt, pepper, and mushrooms; sauté 3 minutes. Sprinkle flour over mushroom mixture; cook 1 minute, stirring constantly. Stir in beef broth; cook 30 seconds or until thick. Remove from heat; keep warm.

3. When patties are done, remove from large skillet. Wipe pan clean; heat over medium-high heat. Coat 1 side of each bread slice with cooking spray. Place 4 bread slices, coated sides down, in pan. Top each with 1 patty, 1 cheese slice, and one-fourth of mushroom mixture. Top with remaining bread slices; coat with cooking spray. Cook 2 minutes on each side or until browned.


The Result:
These sandwiches were so mouth-watering, savory, and satisfying. Seriously, good eats!!! The directions yielded perfectly cooked, medium-rare burgers with a nice brown crust on the top. Yum! I tinkered with the original recipe a bit to suit what we had on hand (i.e. wheat bread, bison, beef broth, etc.), and the end result was really great. A side dish of glazed carrots completed our meal and complimented our patty melts. This recipe is a family-pleasing keeper!

August 30, 2010

Spinach & Mushroom Lasagna

I find spinach lasagna normally pretty heavy and flavorless. I have tried several different attempts and they all tend to turn out the same...very one-dimensional and ho-hum. It is hard to love white, gloppy, overly-creamy sauce, starchy noodles, and boring, blah, frozen spinach(*). The whole dish is usually just a bunch of superfluous calories without packing a true flavor punch.

(*Although, I will add a caveat here. I am not a fan of frozen spinach. While it is convenient, it just tastes very metallic to me.)

The bottom line is that I don't usually like to spend a lot of time on a labor-intensive dish--such as lasagna--and not have it be a totally rewarding dining experience. Until now, I had basically decided to write spinach lasagna off as a dish that was just not worth the effort. Thankfully, this recipe has restored my faith. I have finally found a version of this dish that my whole family loves, and that is everything I had hoped for in the flavor department.

Well, sort of...

I had to do some of my own tweaking to get it the way I wanted it, but the end result was spot-on. I started with America's Test Kitchen Light & Healthy 2010 cookbook's take on spinach lasagna. Then I made so many changes it barely resembled the original published recipe. I, more or less, used the cookbook recipe as a blueprint and then did my own thing. The result was by far my favorite version of a spinach lasagna to date. Finally, a winner!!!!

Spinach & Mushroom Lasagna
Adapted From: America's Test Kitchen Light & Healthy 2010 cookbook

Ingredients:
2 Tablespoons of olive oil
1 onion, diced
4 cloves of garlic, minced
1 package of sliced mushrooms
2 bags of fresh, baby spinach
3 cups of milk
3 Tablespoons of corn starch
salt and pepper to taste
1 teaspoon of fresh nutmeg, grated
2 bay leaves
1 cup of Parmesan cheese, divided
8 ounces of low-fat cottage cheese, small curd
1 egg
1 cup of shredded asiago cheese
1/2 cup of shredded fontina cheese
1/2 cup of shredded mozzarella cheese
1 box of your choice of lasagna noodles, cooked & drained
cooking spray
fresh basil, chiffonade

Directions:
Preheat oven to 425 degrees. Cook and drain the lasagna noodles as needed. Run noodles under cool water to prevent sticking and set aside.

In a large skillet over medium-high heat, saute onions and mushrooms until onions soften and are translucent and mushrooms are cooked. Add salt to taste. Add garlic and cook for another 30 seconds. Add grated nutmeg and bay leaves. Turn heat down to low, and add milk. Sprinkle in corn starch while whisking continuously. Turn heat back up, until milk mixture is simmering but not boiling (keep whisking during this step). When mixture thickens into a sauce, stir in the spinach leaves until they are wilted. Remove from the heat and add 1/2 cup of Parmesan cheese to the mixture. Season with salt and pepper, as needed. Set aside.

In a blender or food processor, combine the egg, cottage cheese, and a pinch of salt until smooth in consistency. Set aside.

To assemble the lasagna: Spray 9 x 13 casserole dish with cooking spray. Layer noodles on the bottom of the pan. Spread half of spinach/mushroom mixture on top of noodles. Sprinkle half of shredded asiago, mozzarella, and fontina cheeses. Add another layer of noodles. Top layer with cottage cheese mixture. Add another layer of noodles. Top with the remaining spinach/mushroom mixture, shredded cheeses, and Parmesan cheese. Bake for 20 minutes. At the end of the cook time, turn on the broiler on high to get the cheese brown and toasty for approximately 3-5 minutes. Remove from oven and let cool for 10 minutes before cutting into squares. Sprinkle with fresh basil. Serve and enjoy!


The Result:
This took a little time to put together, but it was well worth the effort. The husband and I both had seconds, and I could not stop taking bites out of the pan as I put away the leftovers. Needless to say, we all loved this dish, and it will be one that I make again.

August 23, 2010

PW's Portobello-Prosciutto Burgers

I don't know what to say about these burgers other than they were awesome. They were so good, I am literally struck speechless (which does not happen very often). Oh man, every bite was fan-freakin'-tastic! If you love portobello mushrooms, then these babies will be right up your alley. Trust me when I say, this is a great recipe. Pioneer Woman does it again!!!

PW's Portobello-Prosciutto Burgers
Adapted From: The Pioneer Woman Cooks! website

Ingredients:
½ cups Mayonnaise
16 whole Basil Leaves
1 garlic clove
juice from 1/2 a lemon
8 whole Large Portobello Mushrooms
1 cup Red Wine (optional)(I used Pinot Noir)
Olive Oil For Brushing
Salt And Pepper, to taste
4 slices Provolone Cheese
4 slices Prosciutto
4 whole buns, split (I used sandwich thins)
Extra Basil Leaves

Directions:
Clean mushrooms gently by wiping with a wet paper towel to remove excess dirt. Soak mushrooms in red wine for 20 to 30 minutes (this is totally optional). Discard soaking liquid and prepare mushrooms for the grill as instructed below.

Combine mayonnaise, basil, lemon juice, and garlic clove in a food processor or blender. Pulse until basil and the other ingredients are totally mixed in with the mayonnaise. Set aside.

Grill mushrooms in a grill pan or on a charcoal grill, brushing lightly with olive oil and sprinkling with salt and pepper. Melt provolone cheese over the four largest mushrooms. Remove mushrooms from grill and stack the other four mushrooms on top of the cheese-topped mushrooms.

Drizzle griddle with olive oil. Toast buns over medium-low heat until very crispy and toasted.

Spread basil mayonnaise generously on both the top and bottom halves of the kaiser roll. Place the double-decker mushroom on the bottom half, then place the prosciutto slice on top. Finally, top with basil leaves and the other half of the roll. Press lightly so some of the juices from the mushrooms will run into the bottom half of the bun. Serve immediately and enjoy!


The Result:
As I said, these were soooooo good! They were kinda messy, since the juices from the cooked, marinated mushrooms would ooze out at every bite. This was not a bad thing, by any means...just use plenty of napkins! Yum!!!!

August 12, 2010

Grilled Turkey Salisbury Steaks

I love when I find a recipe from an unlikely source. For example, this particular recipe was featured in the August 2010 issue of Runner's World magazine. Contributing chef, Rocco DiSpirito (who is a triathlete himself) is regularly featured in the magazines food section entitled The Athlete's Palate. Although a runner's magazine is probably one of the last place you would think to find a yummy recipe, this dish was a hit! It was sooooo good!!! Ground turkey is normally so boring, but this dish really makes it sing. It was savory, meaty, and satisfying...all things you would expect from a normal Salisbury steak recipe. Best of all, it was healthful without sacrifice! We loved this meal, and it is one to go down in the books as a keeper. I love having something new to do with ground turkey!

Grilled Turkey Salisbury Steaks
Adapted From: Runner's World magazine, August 2010 issue; The Athlete's Palate, by: Rocco DiSpirito
(Serves 4)

Ingredients:
1 1/4 pounds ground turkey breast
1 Tablespoon chopped fresh rosemary
Salt and ground black pepper to taste
Olive oil cooking spray
2 tomatoes, cut into 1/2-inch slices (heirloom are recommended, I used Roma)
1 medium red onion, cut into 1/2-inch slices
1 container (6 oz.) sliced crimini mushrooms (button mushrooms would work, too)
1 cup skim milk
1 Tablespoon AP Flour
1 Tablespoon butter
1/2 cup shredded sharp provolone cheese

Directions:
Preheat a grill pan on high heat.

In a bowl, mix turkey, rosemary, salt and pepper. Divide into four portions and form into one-inch-thick oval patties. Spray with olive oil and place on grill.

Spray tomato slices, onion slices, and mushroom slices with olive oil; season with salt and pepper. Place on grill.

Grill meat and onions for four minutes per side. Grill tomatoes and mushrooms for two minutes per side.

In a saucepan melt butter. Add flour and whisk to combine until paste is formed. Pour in skim milk and bring to a boil, whisking constantly. Reduce heat to low and cook until thickened, about one minute. Whisk cheese into sauce until melted.

Season cheese sauce with salt and pepper. Pile tomato, mushrooms, and onion on patties. Spoon cheese sauce on top. Serve and enjoy!


The Result:
Delicious! This dish was comforting and homey...perfectly suited for a family weeknight dinner. My son especially loved it, and kept making yummy noises while taking bites. Kid-friendly, tasty, and healthy are not always an easy combination to put together; but this dish delivered on all fronts. Also, it was pretty quick and easy to put together. I love recipes that just seem to "click", and this one clearly resonated with us. This dish will become a ground turkey staple in our house, for sure.

August 8, 2010

Lasagna Rolls with Roasted Red Pepper Sauce

Greetings! I found this recipe in one of my favorite resources, Cooking Light's Everyday Favorites cookbook. It was much less labor-intensive than regular lasagna and much more healthful. The sauce reminded me of a yummy twist on a classic romesco sauce. It was very flavorful and balanced, without being too heavy or overpowering. Yum! Easy to put together, satisfying, and mighty tasty. What more can you ask for??? I love finding "keeper" vegetarian recipes, and this one fits the criteria. My whole family loved it!

Lasagna Rolls with Roasted Red Pepper Sauce
Adapted From: Paulette Mitchell, Cooking Light, APRIL 2004 (published in Cooking Light's Everyday Favorites cookbook).

Ingredients:

Lasagna:
1/2 box uncooked whole wheat lasagna noodles (use at least 8 whole noodles minimum)
4 teaspoons olive oil
1/2 cup finely chopped onion
1 (8-ounce) package presliced mushrooms (I used crimini)
1 (6-ounce) package fresh baby spinach
3 garlic cloves, minced
1/2 cup (2 ounces) shredded mozzarella cheese
1/2 cup part-skim ricotta cheese
1/4 cup minced fresh basil, divided
1/2 teaspoon salt
1/2 teaspoon crushed red pepper

Sauce:
1 tablespoon red wine vinegar
1/4 teaspoon salt
1/4 teaspoon freshly ground black pepper
2 garlic cloves, minced
1 (14.5-ounce) can diced tomatoes, undrained
1 (7-ounce) bottle roasted red bell peppers, undrained
1/4 teaspoon crushed red pepper
Parmesan cheese, grated (optional, for topping)

Directions:
Preheat oven to 350 degrees.

To prepare lasagna, cook noodles according to package directions, omitting salt and fat. Drain and rinse under cold water. Drain.

Heat oil in a large nonstick skillet over medium-high heat. Add onion, mushrooms, spinach, and 3 garlic cloves; sauté 5 minutes or until onion and mushrooms are tender. Remove from heat, and stir in cheeses, 2 tablespoons basil, 1/2 teaspoon salt, and 1/2 teaspoon crushed red pepper.

To prepare sauce, place vinegar and remaining ingredients in a blender; process until smooth.

Place cooked noodles on flat surface; spread 1/4 cup cheese mixture over each noodle. Roll up noodles, jelly-roll fashion, starting with short side. Place the rolls, seam sides down, in a shallow 2-quart casserole dish. Pour the sauce over the lasagna rolls. Sprinkle with grated Parmesan cheese to taste (optional) and bake for 10-15 minutes, or until all ingredients are warmed through. Top with 2 Tablespoons of remaining basil. Serve and enjoy!

Nutritional Information:
Yield: 4 servings (serving size: 2 rolls)
Calories: 393 (27% from fat)
Fat:11.7g (sat 4.3g,mono 3.6g,poly 1.5g)
Protein:19.3g
Carbohydrate:58.3g
Fiber:5.9g
Cholesterol:20mg
Iron:3.8mg
Sodium:924mg
Calcium:253mg

NOTE: The nutritional info is not calculated considering the whole wheat noodles and Parmesan cheese. Those were my changes, and not part of the original recipe. If you use these options, the calorie count/nutritional info posted here will not be accurate.


The Result:
This dish was great!!! It was everything I love about a good pasta dish; full of flavor, satisfying, and comforting. I ended up having another half serving, which is something I rarely do these days. It was so good, I just couldn't help myself!!! Best of all, I was surprised at how easy it came together.

The original directions suggest microwave cooking for the final steps, but I just couldn't bring myself to do it. In my experience, pasta gets a little rubbery from the microwave. I just wasn't comfortable with finishing my yummy dish in that manner. (The microwave is for reheating in my house...not cooking.) Instead, I amended the directions for a short cook time in the oven. It turned out great, and I didn't have to worry about botching it up with rubbery pasta.

I ended up making more than the 4 servings, since I cooked a half a box of lasagna noodles. I think my portions ended up working out to about 6-8 servings (of 2 rolls for each person). I am actually glad it happened that way, since I now have lots of leftovers to freeze and/or eat for lunches this week. This is a vegetarian winner!!!

June 2, 2010

Jen's Easy Slow Cooker Beef Stroganoff

I concocted a beef stroganoff of sorts for last night's meal. I needed something easy and fast, that I could throw together and forget about. I didn't have some of the ingredients needed for traditional beef stroganoff; so I pieced together items from my pantry, fridge, and freezer to make a suitable facsimile. Also, rather than make a side dish of green veggies, I threw in some frozen peas and green beans at the end of the cooking time. It worked out well, and this turned out to be a great all-in-one meal in a pot.

Jen's Easy Slow Cooker Beef Stroganoff

Ingredients:
cooking spray
1 lb. of beef stew meat, cut into 1 inch cubes (I used round steak)
1/2 an onion, diced
1 clove of garlic, smashed
1 green pepper, diced
1 can of reduced fat, low-sodium condensed cream of mushroom soup
Lawry's Seasoned Salt to taste
2 dashes of Worcestershire sauce
2 dashes of steak sauce (I used A1)
1 teaspoon of prepared horseradish
1/4 cup of chicken stock
1 container (6 oz.) sliced button mushrooms
salt and pepper to taste
1/2 small bag of frozen green beans
1/2 small bag of frozen peas
1 package of whole wheat, no-yolk wide spiral noodles (I used Healthy Harvest brand)
1/3 cup of plain, Greek-style 2% (or fat-free) yogurt
paprika to taste, for garnish

Directions:
Spray the inside of your slow cooker with cooking spray. Place onions in the bottom of the slow cooker. Place frozen beef stew meat on top and sprinkle with Lawry's Seasoned Salt. Add can of condensed cream of mushroom soup on top of meat. Do not stir. Layer mushrooms, green peppers, garlic clove, steak sauce, horseradish, Worcestershire sauce on top of the meat and soup. Pour chicken stock on the side of the meat, toward the bottom of the slow cooker (not over the top). Cover with the lid and cook on high for 4 hours and then switch to low for 2 hours. At the end of the cooking time, remove the lid and add the yogurt, frozen peas, and green beans Stir to combine. Put the lid back on and let sit for 5 to 10 minutes, until the frozen veggies are thawed and warmed through. Season with salt and pepper to taste and serve over egg noodles. Garnish with a sprinkle of paprika at the table.

The Result:
I forgot to take a photo, but this turned out really good. Best of all it was a no-brainer. Just throw the ingredients in the slow cooker and forget about it until right before the meal is served. We all really liked this simplified take on a classic dish, and I definitely would make this version again.

May 9, 2010

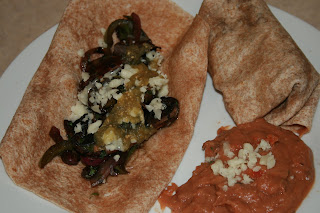
Portobello Mushroom Fajitas

I found this recipe in The Best of Cooking Light Everyday Favorites cookbook that I am holding hostage from the library. I finally broke down and ordered one online yesterday, so I should be getting it in the mail soon and returning my borrowed copy. The Phoenix Public Library system will be thankful, since they won't have to waste precious resources hunting me down and recovering their copy of this book. :)

Oh, and Happy Mothers Day to all the mamas out there!

Portobello Mushroom Fajitas
From: Martha Rose Shulman, Cooking Light, JANUARY 2005

Ingredients:
1 tablespoon olive oil
4 cups (1/2-inch-thick) slices portobello mushrooms (about 8 ounces)
1 cup vertically sliced red onion
1 cup (1/4-inch-thick) green bell pepper strips
2 garlic cloves, minced
3 tablespoons chopped fresh cilantro
1 tablespoon fresh lime juice
1/4 teaspoon salt
1/4 teaspoon freshly ground black pepper
1 serrano chile, minced
12 (6-inch) flour tortillas
1 cup (4 ounces) crumbled queso fresco (I am using Monterrey Jack cheese instead)
3/4 cup salsa verde

Directions:
Heat oil in a large nonstick skillet over medium-high heat. Add mushrooms; sauté 5 minutes or until almost tender. Add onion, bell pepper, and garlic. Reduce heat to medium, and cook for 4 minutes or until bell pepper is crisp-tender, stirring frequently. Remove from heat; stir in cilantro, lime juice, salt, black pepper, and chile.

Warm tortillas according to package directions. Spoon about 1/4 cup mushroom mixture down center of each tortilla; top each tortilla with 4 teaspoons cheese and 1 tablespoon salsa. Roll up.

Nutritional Information:
Yield: 4 servings (serving size: 3 fajitas)
Calories:437 (26% from fat)
Fat:12.7g (sat 3.6g,mono 6.8g,poly 1.5g)
Protein:13.8g
Carbohydrate:65.9g
Fiber:4.9g
Cholesterol:9mg
Iron:3.9mg
Sodium:792mg
Calcium:219mg


The Result:
First, I am not a very good fajita photographer...I just couldn't get a nice pic. However--despite my sucky camera skills--these fajitas were fairly mediocre. Not great, but good. My husband and I thought they tasted like traditional fajita filling, without the main meat component. Basically, fajitas without the fajita. It is a decent enough vegetarian take on the regular steak, shrimp, or chicken versions; but, since we are not strict vegetarians, I think we will stick with the classic meat or shrimp approach. Overall, these were good...no complaints taste-wise...but I just like the non-vegetarian kind much better and I felt like these were a little lacking. I don't think I will make these again; but if they look yummy to you, then try 'em and see for yourself.