Showing posts with label seafood. Show all posts

April 15, 2013

Bacon-Wrapped Cod


I've been trying to go back to having more fish in our diet. Trying is the operative word in that sentence. It's funny how, once I get out of the habit of something, it's really hard to get back into it. We used to have fish once or twice a week. Now, not so much. I would say I serve it sporadically, at best. It's sad too, because I LOVE seafood. I'm not sure why, either. I guess maybe it's because it is never on the forefront of my mind when I menu plan (much like vegetarian dinners). Whatever the reason, I need to give myself an open reminder to plan more fish dinners. I don't really remember when we had this cod recipe or in what context, but I do remember it was very tasty and everyone--including children--liked it a lot. I think I found it by doing a search on MarthaStewart.com for cod, since I had bought a bag of frozen at Costco and I needed ideas on how to prepare it. Since we all loved bacon, it was a no-brainer. The recipe is pretty straight-forward and I remember it was pretty easy to put together for a weeknight dinner.

Bacon-Wrapped Cod
Adapted From: marthastewart.com

Ingredients:
1 skinless, boneless cod fillet (1 1/4 pounds and 1 1/2 inches thick)
Coarse salt and ground pepper
12 strips bacon (about 12 ounces total)

Directions:
Cut fish into 4 pieces and season with salt and pepper. On a work surface, arrange 3 slices bacon so they overlap slightly. Place a piece of fish at one short end and tightly wrap with bacon, cutting off any excess bacon. Repeat with remaining fish and bacon.

Heat a large nonstick pan over medium-high. Place fish, seam side down, in pan and cook until bacon is deep golden brown on all sides, about 9 minutes, turning occasionally.

NOTE:
My frozen cod came already portioned into fillets, so I skipped the cutting step and went right to the wrapping step.

August 23, 2012

Blackened Tilapia Baja Tacos

(I took a bite of taco and then remembered I needed a photo. Oops!)

(Here is a pic of my blackened tilapia. I broke the big fillets up into pieces with a fork to make them more taco-friendly.)

As my bff, Claire pointed out earlier to me, it is Mexican food week at our house. I didn't even realize it until she said something. To be fair, we had turkey BLT sandwiches last night and are having an Italian-inspired dinner tomorrow. I guess it only seems like we are having all-Mexican food/all-the-time, because that is what I keep posting for new recipes.

I love a Baja-style fish taco and these were pretty darn great. I skipped the avocado and lime wedges; opting to use my leftover Pineapple Habenero salsa for topping instead. So far, I have not found any Mexican type meals that this salsa doesn't go with...I've been using on everything. It's so delicious, I just can't help myself! (Also, I made a big batch and I can't waste it.) The only other change I made was adding some fresh shredded green cabbage for a little extra crunch and bulk. One more note, the ingredients list is long...but don't let that intimidate you. Most of the ingredients are spices for the fish rub. My tacos came together quickly and easily. SCORE! These "food truck-esque" tacos are another Cooking Light keeper!

Blackened Tilapia Baja Tacos
From: Cooking Light, David Bonom, March 2011

Ingredients:

1/4 cup reduced-fat sour cream (I substituted non-fat plain Greek yogurt)
2 tablespoons chopped fresh cilantro
2 tablespoons fresh lime juice
1 jalapeño pepper, seeded and chopped
1 cup thinly sliced white onion (I used red onion, because I'm a rebel like that)
1 1/2 teaspoons paprika
1 1/2 teaspoons brown sugar
1 teaspoon dried oregano
3/4 teaspoon garlic powder
1/2 teaspoon salt
1/2 teaspoon ground cumin
1/4 teaspoon ground red pepper
4 (6-ounce) tilapia fillets
1 tablespoon canola oil
8 (6-inch) corn tortillas
1/2 ripe peeled avocado, thinly sliced (I omitted the avocado)
4 lime wedges (I omitted the lime wedges)
your favorite salsa as topping (Optional. I used my Pineapple Habenero salsa)

Directions:

1. Combine first 4 ingredients in a food processor; process until smooth. Combine jalapeño sauce and onion in a small bowl.

2. Combine paprika and next 6 ingredients (through ground red pepper); sprinkle evenly over fish. Heat oil in a large cast-iron skillet over medium-high heat. Add fish to pan; cook 3 minutes on each side or until desired degree of doneness.

3. Warm tortillas according to package directions. Divide fish, onion mixture, and avocado evenly among tortillas. Serve with lime wedges and/or salsa.

August 21, 2012

Grilled Halibut with Roasted Pineapple Habenero Salsa


Our family recently took a day trip up to northern Arizona for a break from the oppressive heat here in Phoenix. We went to a small local zoo and then stopped for dinner on the way home in my husband's old college town, Flagstaff. We had heard good things about a Mexican restaurant called Salsa Brava and decided to try it. Oh man, was it good! They had a unique salsa bar, and all the food that we had was pretty awesome. My favorite menu item by far was their Pineapple Habenero salsa, which blew my mind. I knew I would have to try and duplicate it, because I could not stop thinking about it. We found out when we got to the restaurant that they were featured on a Food Network show called Diners, Drive-Ins, and Dives. I did some investigating and found this recipe based on the original at the restaurant. While it's not identical to what we had at Salsa Brava, it's a pretty close facsimile. I still want to do some more tweaking to see if I can get more of a match, but in the meantime, this will work just fine!

I decided to pair my fruity-spicy salsa with this grilled fish recipe I found on the Cooking Light website. The original recipe has a peach and pepper salsa paired with the halibut, but I thought my pineapple habenero salsa would work just as well. I was right! This. was. fantastic.

Grilled Halibut with Roasted Pineapple Habenero Salsa

For the salsa:

Roasted Pineapple Habenero Salsa
Adapted From: More Diners, Drive-ins, and Dives by Guy Fieri

Ingredients:
4 Roma tomatoes
4 jalapenos, seeded and stems removed
1 habeneros, seeded and stems removed
1/2 medium red onion
1 20 oz can of pineapple tidbits, with juice.
1 cup cilantro
salt to taste

Directions:
1. broil the jalapenos and onion for 5-10 minutes on each side or until skin is blackened. When charred and caramelized on both sides then remove from the oven and let cool for 30 minutes in a bowl with a tight fitting lid.

Add all the roasted veggies, tomatoes,and raw habenero (SEE NOTE BELOW), and pineapple and pulse in the food processor. Add the cilantro and pulse. Add salt to taste. I also added a few tablespoons of olive oil. Let stand for 30 minutes before serving or store in the fridge in an airtight container for up to a week.

NOTE: The habenero pepper is extremely spicy. Start by adding a quarter or a half of the pepper and taste. If your palette can handle it, add the whole thing from there...just taste as you go!

For the fish:

Grilled Halibut
Adapted From: Cooking Light magazine, Jeanne Kelley, JUNE 2010 issue

Ingredients:
4 teaspoons fresh lemon juice $
4 teaspoons olive oil $
1/2 teaspoon paprika
1 garlic clove, minced
4 (6-ounce) skinless halibut fillets
3/8 teaspoon salt
3/8 teaspoon freshly ground black pepper
Cooking spray

Directions:
Prepare grill to medium-high heat.
To prepare fish, combine 4 teaspoons juice, oil, paprika, and 1 garlic clove in a large, shallow glass baking dish, stirring with a whisk (I just combined everything in a large, zip top bag). Add fish to juice mixture; turn to coat. Cover and let stand 15 minutes.

Remove fish from marinade; discard marinade. Sprinkle fish evenly with 3/8 teaspoon salt and black pepper. Place fish on a grill rack coated with cooking spray; grill 3 minutes on each side or until desired degree of doneness.

Serve fish with topped with desired amount of salsa.

August 12, 2011

Pesto Smoked Salmon Sandwich

Gertrude and I went up to northern Arizona to complete a 12 mile run last weekend. Well, that was the goal anyway...it turned out a little different than we anticipated. Originally, we thought we were being sooooo clever by getting out of ridiculously hot Phoenix for a morning, and traveling up to cooler weather to do our long training run. In theory, it was a good idea. It turned out to be the run from hell. We never anticipated that it would still be hot (there is really no escaping the heat anywhere in an Arizona summer) AND that running at a higher elevation, with hills, would be more of an--ahem--challenge. Needless to say, we did not run 12 miles. We ran 4.75 miles. Disappointing, I know.

On the drive back from our craptastically bad running fail we decided to stop somewhere fun for lunch. We chose one of my favorite spots, Postino Winecafe, since Gertrude had never been there before. It was a good choice, let me tell you. We had yummy bruschetta, wine (duh), split a sandwich/salad combo, and split dessert. All courses were phenomenal and we were happy, happy ladies. The good lunch took some of the sting out of the bad run.

One of our brushettas was a pesto smoked salmon creation that I modeled this sandwich after. It was fantastic, and I knew I needed to recreate it at home. My sandwich turned out just as tasty as the original bruschetta offering, albeit a little heartier. It totally hit the spot and eased my craving for Postino Winecafe. Yum! All in all, our delicious lunch made up for our sucky run and I got a new sandwich idea out of the whole excursion.

Pesto Smoked Salmon Sandwich

Ingredients:
olive oil
1 ciabiatta loaf
2 packages of smoked salmon (about 8 ounces total)
1/2 package of softened cream cheese
3-4 tablespoons of pesto (store-bought or homemade)
1/4 red onion, minced finely
1/2 small jar of capers
1 large beefsteak tomato,sliced
salt and pepper to taste

Directions:
Preheat the oven to 350 degrees. Place the whole ciabiatta loaf directly on the oven rack for 6 minutes, so the crust may get crisp and the inside may get warm. Remove from oven with tongs and let cool slightly on a cutting board.

Once bread is cool enough to handle, slice the entire loaf lengthwise and brush some olive oil on both the top and bottom halves. Spread 1/4 cup of softened cream cheese on each half. On the bottom half, sprinkle capers and red onions over the cream cheese. Layer the smoked salmon on next. Place tomato slices on top of the smoked salmon and sprinkle on salt and pepper to taste. On the top half of the bread, slather pesto sauce over the cream cheese layer. Place top and bottom halves of the loaf together to assemble one large sandwich. Cut into individual sandwich servings and serve immediately.


The Result:
This was sooooo great! Seriously, delicious. It was virtually no-cook, with the exception of heating up the bread. I love it when that happens!!! Also, it kept well in the fridge as leftovers for the next day. SO GOOD!

August 7, 2011

Quick and Easy Spicy Broiled Shrimp

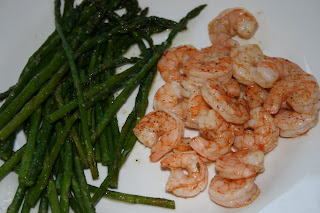
My son is starting Kindergarten tomorrow, and I am waaaaayyyy more nervous about it than he is. I feel like it's my first day of school or something. We have everything all ready to go, but I'm still anxious/weepy/excited/happy/sad/hormonal about the whole situation. I can't believe my baby is so grown up!!! Where did the time go??? He was just born, wasn't he???? I'm a mess. Anyway, we are trying to have a relaxing last weekend before the school year kicks into full gear. We had this really easy shrimp dinner the other night; right smack-dab in the middle of all the back to school chaos. As the title promises, it really is a quick and easy shrimp recipe. What the title doesn't tell you is that it's also darn tasty. A perfect meal to put together if your mind is, oh say, preoccupied on things like Kindergarten; but you still would like a yummy, fuss-free dinner on the table.

Quick and Easy Spicy Broiled Shrimp
From: Kalyn's Kitchen website

Ingredients:
1/2 lb. frozen shrimp peeled and deveined with tails left on, thawed overnight in refrigerator
2 tsp. extra virgin olive oil (use your best olive oil for this)
1 lemon, cut in half
2 tsp. Worcestershire sauce
1/2 - 1 tsp. Tony Chachere's Creole Seasoning (or make your own Creole Seasoning Blend)
salt and fresh ground pepper to taste (NOTE: don't add salt if you're using Tony Chachere's seasoning that has salt)

Directions:
Thaw shrimp overnight in the refrigerator (or thaw in the bag in lukewarm water if you forget to plan ahead.) I used 31-40 count shrimp, so if you're lucky enough to find larger shrimp, increase the cooking time a tiny bit.

When you're ready to cook, remove shrimp from the refrigerator and drain in a colander placed in the sink, then use a paper towel to pat shrimp dry if they still seem wet. Preheat broiler and put the rack so it's as close to the broiler as possible.

Arrange the shrimp in a single layer on a baking sheet (or in two individual casserole dishes if you want to get a bit fancier.) I sprayed the casserole dishes with non-stick spray but it's probably not essential.

Once shrimp are arranged in a single layer, add seasonings in this order:
~drizzle shrimp with olive oil
~squeeze lemon juice over the shrimp (I used a squeezer that catches the seeds)
~sprinkle Worcestershire sauce over the shrimp
~sprinkle Creole Seasoning over the shrimp
~season with salt and fresh ground black pepper (skip the salt if you use Tony Chachere's Creole Seasoning which has salt)

Put shrimp under the broiler and cook for 7-8 minutes, or just until the shrimp turn pink and feel barely firm to the touch. Don't overcook. If your shrimp are larger than 31-40 count they may take a minute or two longer to cook, but not much.

Serve hot, with 100% whole wheat bread to mop up the juices if desired.


The Result:
I ended up making 2 lbs. of shrimp, since we had 5 people eating and I wanted some for leftover lunches the next day. I really love the Kalyn's Kitchen website...it really has some great recipes on it. This dish made the shrimp lovers in my house happy campers!

May 29, 2011

Catfish Po'boy with Hoisin-Peanut Sauce

Here is an unusual take on a Southern standard. Catfish is one of my favorites; but not so much for my husband. This recipe seemed to be a nice compromise on the hotly debated "catfish issue" at my house, since we both really liked this unique version of a classic Po'boy. This is certainly a yummy Asian-inspired twist on these sandwiches.

Catfish Po'boy with Hoisin-Peanut Sauce
From: Cooking Light, David Bonom,JULY 2002

Ingredients:
Sauce:
1 teaspoon dark sesame oil
2 tablespoons chopped onion
1 teaspoon minced peeled fresh ginger
3 tablespoons hoisin sauce
1 tablespoon creamy peanut butter
1 tablespoon fresh lime juice
1/4 teaspoon sugar

Catfish:
1/4 cup Thai chile sauce
2 garlic cloves, minced
4 (6-ounce) farm-raised catfish fillets
Cooking spray
Remaining ingredients:
4 (2 1/2-ounce) hoagie rolls, split and lightly toasted
2 cups shredded napa (Chinese) cabbage

Directions:
To prepare sauce, heat oil in a small saucepan over medium heat. Add onion and ginger; cook 2 minutes, stirring frequently. Reduce heat to low. Add hoisin sauce, peanut butter, lime juice, and sugar; cook 3 minutes, stirring frequently. Remove from heat; set aside.

Prepare grill or broiler.

To prepare catfish, combine chile sauce and garlic in a large zip-top plastic bag. Add catfish; seal and marinate in refrigerator 30 minutes, turning bag occasionally.

Remove fish from marinade; discard marinade. Place fish on a grill rack or broiler pan coated with cooking spray. Cook 10 minutes or until fish flakes easily when tested with a fork.

Spread 1 tablespoon sauce over bottom half of each hoagie roll; top each serving with 1/2 cup cabbage, 1 catfish fillet, and top half of roll. Serve immediately.


The Result:
These were tasty, but a bit too spicy for my little ones. We gave the kids some fish sticks and the husband and I enjoyed these sandwiches by ourselves. We both had seconds, so I would say we really liked these tasty fish sandwiches.

May 20, 2011

Almond and Parmesan Tilapia

My enthusiasm for SBD Phase 1 is pretty much gone. I caved and had some yummy whole wheat toast this morning. I swear after almost two weeks of carb deprivation, I almost felt drunk from the carb high. I think I am just going to progress to Phase 2 and call it good. Phase 2 is simply adding back carbs slowly, at first once a day then so on. I lost 6 pounds total on Phase 1, which is not too shabby. It got me past my plateau, which is what I really wanted. We still had this Phase 1 friendly dinner last night and it was really satisfying. I love tilapia. I will say I have gotten a lot of keeper recipes through this whole experience, which is a reward in itself.

Almond and Parmesan Tilapia
Adapted From: the Kalyn's Kitchen website

Ingredients:
3-4 Tilapia filets, thawed if frozen (This recipe will work best with pieces that are at least 1/2 inch thick.)
1/4 cup melted butter
1/2 cup almond meal (such as Bob's Red Mill Almond Meal) OR ground raw almonds (SEE NOTES)
2 T finely grated Parmesan or Asiago cheese
1 tsp. garlic
1 tsp. lemon pepper
tsp. Old Bay seasoning
salt and pepper to taste
wedges of fresh lemon, for garnish

Directions:
Preheat oven to 425. Place baking rack on half sheet pan and spray with non stick spray. Set aside.

Melt the butter in the microwave for 30 seconds. Mix almond meal (or ground almonds--see notes), cheese, garlic powder, lemon pepper,Old Bay seasoning, and salt and pepper to taste, in a flat dish.

Dip each fish filet in butter, turning to coat both sides, then into almond mixture. Try to get as much of the almond mixture to stick to the fish as you can. (I pressed it down with a fork.) Place each coated fillet on prepared baking rack.

Bake 25 minutes or until fish is firm to the touch and coating is golden brown. The baking time will depend on the thickness of the fish, so watch it carefully. Serve with a squeeze of fresh lemon and enjoy!

NOTES: I could not find almond meal, so I put a handful of raw almonds in the food processor, and ground finely. This worked as a great substitution and gave a nice crunch to the fish.


The Result:
This was really yummy and everyone in my family loved it. My kids breezed through the fish and asked for seconds. I don't know why it didn't occur to me earlier in the whole Phase 1 process to plan more fish items. Oh well...live and learn. This tilapia dish is a keeper that we really enjoyed.

May 9, 2011

Tuna Salad

Here is a different take on tuna salad that my friend, Claire posted on her blog. The idea is to serve it over salad greens for lunch; but I think it would make great sandwich filling, too. I love, love, love tuna salad...so I am excited to have a new twist on an old favorite.

Tuna Salad
Adapted From: the Cooking Claire blog

Ingredients:
2 cans tuna in water, drained
2 tsp Dijon mustard
1/8 cup light mayonnaise
1 tsp lemon pepper
1 green onion, chopped
2 dashes Frank's Red Hot Sauce
1/2 tsp Tony Chachere's seasoning
4 cups spring mix greens
1-2 tsp balsamic vinegar
salad greens
grape tomatoes (optional)
salt and pepper (optional)


Directions:

Combine all ingredients except greens and vinegar. Mix together. Split greens between two plates, divide tuna mixture in half and place on greens. Drizzle with balsamic vinegar.


The Result:
This tuna salad does not disappoint! I think it might be my new favorite way to have tuna salad. Although, that could just be the balsamic vinegar talking. I swear I could drink balsamic vinegar as a beverage (okay, maybe not)...I heart it so much. I topped my salad with a light sprinkle of salt and pepper, some grape tomatoes, and a few splashes of my beloved balsamic. Let me say, YUM. It was great, and something that I am going to put into my permanent lunch repertoire.

February 4, 2011

Linguine with Clam Sauce

This dish was a revelation...but that just might be all the heavy cream talking. The best part was that it was so easy, and came from fairly humble ingredients (i.e. canned clams and dried pasta). I must admit, before cooking this dish, I wouldn't have thought to use canned clams as an ingredient. They just seemed so unappetizing. However, PW has showed me the error of my ways and this fantastic pasta dish can be extrapolated from the lowly tin of canned and chopped clams. As I mentioned, there was heavy cream (and butter) in this recipe; so it wasn't exactly "healthy", but it was sooooo delicious. The list of ingredients is not very long, and a lot of them are pantry staples. That also makes this awesome pasta dish a very budget-friendly meal. My family loved it, and my almost-5 year old son was sad that there were not any leftovers the next day. This is certainly another cookbook project score for us!

Linguine with Clam Sauce
From: The Pioneer Woman Cooks! cookbook, by: Ree Drummond

Ingredients:
2 – 10 oz cans of clams, drained, juice reserved
3 cloves garlic, minced
Chopped parsley
2 tbsp butter
2 tbsp olive oil
¾ c. white wine
¾ c. heavy cream
Juice of ½ lemon
Linguine or spaghetti
Salt and pepper to taste
lemon slices and grated Parmesan for garnish

Directions:
Cook pasta according to package directions, and set aside.

Melt 1 tbsp of the butter with the olive oil in a large skillet over medium-high heat
Add the clams and garlic, cook about 3 minutes.

Add the wine and stir, making sure to scrape up the browned bits on the bottom of the pan to incorporate into the sauce. Let it cook for 3-4 minutes, until wine has reduced a bit and it doesn’t smell so “alcohol-y” and the sauce isn't so watery.

Lower the heat. Add lemon juice and the remaining butter. stir through and cook a few more minutes.

Add cream, parsley, salt and pepper to taste. Cook until heated through, another 3-4 minutes. Add some of the reserved clam juice if the sauce is too thick, then combine with cooked pasta. Toss to combine and serve immediately with fresh lemon slices and grated Parmesan cheese.


The Result:
We couldn't get enough of this delicious pasta dish. It was completely decadent with minimal effort and expense. Do yourself a favor and make this recipe soon. You won't be disappointed!

January 28, 2011

Fish with Zucchini and Toasty Garlic Mojo

So the original fish of choice for this recipe was snapper; however given my limited seafood resources, I could not get my hands on any for a decent price. So, I substituted catfish, but the recipe notes indicate that almost any white fish will work in this dish. This is another Rick Bayless jem from the Mexican Everyday cookbook. It. was. awesome. The garlic mojo sauce was drinkable. Seriously. Bayless does it again!

Fish with Zucchini and Toasty Garlic Mojo
Adapted From: the Mexican Everyday cookbook, by: Rick Bayless

Ingredients:
1/3 cup olive oil
8 garlic cloves, peeled and halved
2/3 cup chicken broth
Salt
1/2 teaspoon black pepper
Four 4- to 5-ounce fish fillets (snapper, halibut, mahimahi, catfish, bass etc)
2 large zucchini, cut into 1/2-inch cubes
1/2 cup chopped cilantro
1 large lime, cut into wedges, for serving

Directions:
Turn on the oven on its lowest setting. In a very large skillet, warm the olive oil over medium heat. Add the garlic and cook until soft, lightly browned and very aromatic, about 4 minutes. With a slotted spoon, scoop the garlic into a food processor or blender jar, leaving as much oil as possible in the skillet. Set the skillet aside.

Add the broth to the processor or blender, along with 1/2 teaspoon salt and the pepper. Blend until smooth.

Return the skillet to medium-heat. Generously season the fish with salt and pepper. When the oil is hot, lay in the fish. When Richly browned underneath, about 2 to 3 minutes, flip and cook until the fish gives slightly under firm pressure from your finger, about 2 minutes. Use a spatula to transfer each piece of fish to an oven-proof dinner plate. Keep warm in the oven.

With the skillet still over medium-high heat, add the zucchini and cook, stirring regularly, until lightly browned but still a little crunchy inside, about 6 minutes. Add the garlic mixture and cilantro. Stir until the sauce comes to a boil and becomes homogeneous. Taste and season with more salt if it needs it.

Spoon the zucchini and sauce over and around the fish and serve right away, with lime wedges for each person to squeeze on.


The Result:
This is probably my favorite new fish recipe. We served our fish and zucchini with brown rice, which soaked up all the yummy pan sauce. My belly is very happy. It was pretty fast to pull together and it was one I may have kept overlooking if it was not for the cookbook project. This is my last Bayless recipe for the week, and I am a little sad about it. I may revisit this book again later in my project, since pretty much everything I have tried from it has been a total hit.

December 22, 2010

Salmon with Hoisin Glaze

My little man is sick with a nasty cold, so we are having a jammie and movie day at my house. It is so pathetic when little ones don't feel good; it's just sad. Anyway, I am going to make this post short today; I just started the boy's favorite flick Cars, and I promised I would watch it with him while the twins are taking their morning nap. Sorry, but a sniffling and coughing 4 year old takes precedence over my blog post.

This is another quick and easy keeper from Martha Stewart. I didn't have the salmon "steaks" that the original recipe called for, but instead used the 6 ounce salmon fillets I had in my freezer. I reduced the cook time, and this fish recipe turned out perfect cooked and totally yummy. A side of Pioneer Woman's Sesame Noodles, mixed with veggies, completed our dinner. This was on our table in a half an hour!

Here is a link to the adapted noodle recipe:
Pioneer Woman's Sesame Noodles (with Asian Veggies)

Salmon with Hoisin Glaze
Adapted From: marthastewart.com

Ingredients:
1 tablespoon fresh orange juice
2 tablespoons hoisin sauce
2 teaspoons honey
4 salmon fillets (6 ounces each)
Coarse salt and ground pepper

Directions:
1.Heat broiler. In a small bowl, whisk together orange juice, hoisin sauce, and honey.

2.Rinse salmon and pat dry. Season both sides with salt and pepper. Place steaks on a rimmed baking sheet. Brush generously with glaze.

3.Broil salmon about 4 inches from the heat source, basting once, until opaque in center, 5-8 minutes.


The Result:
This was easy and delicious! Now back to our movie...

December 17, 2010

Pistachio-Crusted Fish and White Wine-Scented Couscous

I needed a "healthy food" break from all of the holiday food madness. Seriously, the baked goods insanity needs to stop. I think I have eaten my weight in Christmas cookies alone. Then, there's the alcohol. What exactly is it about Christmastime that makes me want to drink like a fish??? Ugh. All of the celebratory events with the decadent food and free-flowin' booze are really nice, but it is easy to get burnt out(*) quickly.

(*Okay, not so much "burnt out", but more like "I stepped on the scale this morning"...yikes!)

Anyway, here is another Martha Stewart gem, that is both simple and freakin' yummy. I think this recipe is my new favorite way to prepare fish. Totally easy and totally delicious; a combo that I l-o-v-e. I served our fish with some whole wheat couscous and steamed green beans, and the entire meal was so satisfying. This dinner was a perfect solution to the holiday food coma situation I have going on. Martha, you sly devil...you did it again!

Pistachio-Crusted Fish
From: marthastewart.com, Everyday Food, December 2008

Ingredients:
4 (6 oz.) cod fillets OR other firm white fish (I used tilapia)
Coarse salt and ground pepper
1/2 cup shelled, unsalted pistachios
1/2 cup packed fresh parsley
1 garlic clove
3 tablespoons olive oil
Lemon wedges, for serving

Directions:
1.Preheat oven to 425 degrees. Line a rimmed baking sheet with aluminum foil. Place fish on sheet; season with salt and pepper, and set aside.

2.In a food processor, pulse pistachios, parsley, and garlic until coarsely chopped, 15 seconds. With machine running, add oil in a steady stream; blend until mixture is finely chopped. Season with salt and pepper.

3.Top fish with pistachio mixture. Roast until fish is opaque throughout, 12 to 14 minutes. Serve with lemon wedges.

***********************************************

Jen's White Wine-Scented Couscous

Ingredients:
1 tablespoon of butter
1/2 small yellow onion
1 garlic clove, minced
1 cup of whole wheat couscous
1/2 cup of dry white wine
1 cup of water
salt and pepper to taste

Directions:
Melt butter over medium heat, in a medium-sized sauce pan. Add onions and a pinch of salt. Stir and cook until the onions are soft and translucent. Add minced garlic and cook for an additional 30 seconds, until garlic is fragrant. Add couscous to pan. Stir occasionally and cook until the couscous slightly toasted, about 5 minutes. Season with salt and pepper to taste. Turn heat up to medium-high, and stir in white wine. Cook until the wine is absorbed/evaporated. Add cup of water and bring to a boil. Place lid on saucepan, turn off heat, and let couscous steep for 5-10 minutes, or until all liquid is absorbed. Adjust seasoning, if needed. Fluff with a fork and serve immediately.


The Result:
Our tilapia was cooked perfectly and sooooo tasty! Also, I am quite pleased with the way the couscous turned out. Historically, I am usually in a "take it, or leave it" mindset when it comes to couscous. Frankly, it is a little bland. However, this couscous recipe that I concocted was quite flavorful and delicious! (It did not escape my notice that I had to use wine to jazz it up...I guess I couldn't go 'cold-turkey' on the no booze thing after all.) Both of these recipes are keepers.

November 21, 2010

Creamy Butternut Squash and Shrimp Pasta Bake

In the interest of full disclosure, we had a split decision on this dish at my house. I really liked it, however my husband (who is not a huge fan of butternut squash) was on the fence about it. I will say that it was an odd combination of flavors...but odd in a good way. I don't know if I will make it again, due to the mixed reviews; but I am happy to have the leftovers all to myself!

Creamy Butternut Squash and Shrimp Pasta Bake
Adapted From: the Aggie's Kitchen website

Ingredients:
1 lb large cooked shrimp, peeled and deveined
2 TB olive oil
3-4 large shallots, chopped
3 garlic cloves, minced
1 large red bell pepper, chopped small
1 32 oz carton Pacific Natural Foods Organic Creamy Butternut Squash Soup
1/2 teaspoon fresh ground nutmeg
1/2 teaspoon dried oregano
1/2 teaspoon dried thyme
2 teaspoons tomato paste
1 container of part-skim milk ricotta
1/2 cup fresh grated Parmesan cheese
1/2 teaspoon fresh ground nutmeg
1/4 teaspoon coarse salt (kosher or sea salt)
fresh ground pepper
1 bag of fresh, baby spinach
1/3 cup fontina cheese, shredded (if you can’t find fontina, mozzarella is fine)
fresh, chopped Italian parsley, for garnish
1/2 lb whole wheat penne pasta
water
salt

Cooking instructions:
Bring salted water to a boil. Add pasta. Cook until al dente 10-12 minutes.

While pasta is cooking, heat 2 tablespoons olive oil in a non-stick skillet. Add shallots, garlic and chopped red pepper. Add pinch of salt and pepper, oregano and thyme. Cook for 8-10 minutes over medium heat until softened. Add two teaspoons tomato paste and fresh spinach to cooked vegetables and cook for about a minute longer, until spinach is wilted. Add Pacific Natural Organic Creamy Butternut Squash Soup and nutmeg and bring to a slow simmer. Simmer sauce for about 5 minutes until slightly thicker and flavors have combined. Taste for salt and pepper.

In a large bowl, combine cooked and slightly cooled pasta, cooked shrimp, ricotta, Parmesan cheese, spinach, nutmeg, salt and pepper. Gently stir until slightly combined. Add sauce to pasta mixture and continue to combine. Add 3/4 of the amount of sauce.

Pour pasta mixture into a glass casserole dish sprayed with non stick spray. Spread pasta mixture evenly throughout dish and add the remaining amount of sauce to the top of pasta. Sprinkle shredded cheese over top of pasta and place in oven preheated to 375 for 20-25 minutes or until bubbly. (If cheese is not browned and bubbly, turn on the broiler for a few minutes to get the desired effect.) Sprinkle with fresh, chopped parsley and serve immediately.


The Result:
Again, we had a split decision. I thought it was great. The husband, was "meh" about it. I will say that I am a lover of butternut squash; and this is a very squashy pasta dish. I would suggest that if this sounds interesting to you...and you are a squash fanatic like me...then go for it! Overall, I am really pleased with this recipe.

November 7, 2010

Pecan-Crusted Catfish

This is a simple and yummy way to highlight the flavor of one of my favorite fish choices; the humble catfish.

Pecan-Crusted Catfish
From: Martha Stewart Living Everyday Food: Great Food Fast cookbook

Ingredients:
1/3 cup of yellow cornmeal
1/4 cup pecans
salt and pepper
4 skinless catfish fillets, (6 ounces each) rinsed and patted dry
4 tablespoons of vegetable oil (I used grapeseed oil, instead)
lemon wedges, for garnish

Directions:
1.Grind cornmeal and pecans with salt and pepper in a food processor until nuts are finely ground. Transfer to a large shallow container. Dredge catfish in cornmeal mixture, patting it on to coat completely.

2.Heat 2 tablespoons oil in a large nonstick skillet over medium-high heat. Cook 2 fish fillets until golden brown and firm to the touch, 4 to 5 minutes per side. Transfer to a plate; sprinkle with salt, and cover to keep warm.

3.Wipe skillet with a paper towel. Repeat with remaining 2 tablespoons oil and fish. Serve with lemon wedges, if desired.


The Result:
This was really good and easy to make. I served this fish with a side of steamed broccoli and some roasted, seasoned acorn squash wedges. Very yummy and satisfying!

October 4, 2010

Simple Jambalaya with Shrimp & Sausage

I don't think I have publicly proclaimed my love for my new, iPhone 4. Well, here it goes...I LOVE IT!!! I now realize that previous to getting the iPhone 4, my life was just a shallow and empty shell. (Not really.) One of the reasons why I heart my iPhone is the "apps". I freakin' love the apps. The app in which I am particularly fond of this evening, is the Whole Foods Market Recipe app. It is where I found tonight's yummy dinner. I did a quick search for "andouille", and a bunch of yummy stuff popped right up. I had all the ingredients on hand for this dish, so this is the one that I chose. While this dish won't win any awards for the most authentic jambalaya; I am pleased to say that it was really, really tasty, easy, and fast.

This is something that I will definitely make again!

PS-If you do not have an iPhone, Whole Foods Market publishes the same recipes on their website as they have on the app. No deprivation required! The app just makes it easier to get their recipes on the go.

I love technology!

Simple Jambalaya with Shrimp & Sausage
Adapted From: Whole Foods Market Recipes 2.0 app for iPhone --OR-- wholefoodsmarket.com

Ingredients:
2 tablespoons olive oil
1 cup diced onion
1/2 cup thinly sliced celery
1/2 cup diced carrots
Salt and pepper, to taste
6 ounces of chicken andouille sausage, sliced in 1-inch pieces
2 cups of cooked brown rice (I used microwavable par-cooked brown rice)
1 (14 1/2-ounce) can diced Tomatoes with Green Chiles (I used Rotel)
1 1/2 cups low-sodium chicken broth (I used homemade chicken stock)
1 pound (16-20 count) fresh raw shrimp, peeled and deveined (I used frozen)
1 Tablespoon of Tony Chacehere's Creole Seasoning (use more if you like it spicy)

Directions:
Heat oil in 4-quart pan over medium heat. Add onion, celery, carrots; season with salt and pepper. Cover; cook 5 minutes, stirring occasionally. Add sausage; cook 2 minutes. Add rice, tomatoes, broth and shrimp; stir to evenly distribute. Cover; cook 5 minutes. Adjust seasoning with creole seasoning, salt and pepper as desired. Serve immediately.


The Result:
I can't believe how easy and fast this was to construct! Also, the flavor was awesome. Homey and comforting, with just the right amount of spicy heat. Yum!!!

October 2, 2010

Spicy Shrimp Noodle Bowl

A few of my girlfriends and I went out to lunch and shoe shopping today. We deemed the day, "Shoefest 2010". I ended up purchasing 5 pairs of very cute designer shoes, all for a song. Since I knew I would be coming home late and fairly tired from hunting down fabulous shoes all day, I wanted something easy to put together for our family meal. Once again, I turned to my October issue of Cooking Light magazine and found this recipe. I wasn't sure how this was going to turn out, but this dish was another hit! I am so happy to have Cooking Light as a resource for such healthy and yummy food!!!

Spicy Shrimp Noodle Bowl
From: Cooking Light magazine, Oct 2010 issue

Ingredients:
1 pound tail-on peeled and deveined medium shrimp
1 1/2 cups water
1 cup fat-free, lower-sodium chicken broth
1 (8-ounce) bottle clam juice
2 (1/4-inch-thick) slices peeled fresh ginger
1 teaspoon olive oil
3/4 cup thinly sliced red bell pepper
1/4 cup thinly sliced yellow onion
1 garlic clove,minced
1/2 cup sugar snap peas
2 teaspoons chili garlic sauce or 1/2 teaspoon crushed red pepper
1/4 teaspoon salt
3 ounces uncooked rice sticks
2 tablespoons fresh cilantro leaves
Lime wedges

Directions:
1. Remove shrimp tails; set aside. Combine shrimp tails, water, broth, clam juice, and ginger in a saucepan; bring to a boil. Reduce heat, and simmer, uncovered, 10 minutes. Strain broth mixture through a sieve into a bowl; discard solids.

2. Heat olive oil in medium saucepan over medium-high heat. Add bell pepper, yellow onion, and garlic; sauté 3 minutes. Add reserved broth; bring to a simmer. Add shrimp, peas, chili garlic sauce, salt, and noodles; cook 5 minutes or until noodles are done. Ladle 1 1/4 cups soup into each of 4 bowls; top each serving with 1 1/2 teaspoons cilantro. Serve with lime wedges.

Nutritional Information:
Yield: 4 servings
Calories:236
Fat:3.6g (sat 0.7g,mono 1.3g,poly 1g)
Protein:26.5g
Carbohydrate:25.4g
Fiber:1.9g
Cholesterol:174mg
Iron:3.7mg
Sodium:506mg
Calcium:84mg


The Result:
I was skeptical of this one...but it turned out great! It was sooooo good, and my 4 year old son even loved it! The broth totally made this dish; it was drinkable. The whole recipe took about 30 minutes, but tasted much more difficult and complex. I love the flavor-layering that Asian food sometimes infuses within itself, and this dish was no exception. This recipe looked deceivingly simple, but packed a big flavor punch!

September 25, 2010

Broiled Tilapia with Thai Coconut-Curry Sauce

Every year, some of our local restaurants participate in "Arizona Restaurant Week" in which they set a 'prix fixe' three course meal at a great price. It is really fabulous! So my post is going to be short today, since the husband and I are going out to dinner (--happy dance-- without children --happy dance--)in support of this awesome local deal.

So, here is what we had for dinner last night. I love curry flavors, and this was a great way to prepare tilapia!

Broiled Tilapia with Thai Coconut-Curry Sauce
From: Cooking Light, September 2002

Ingredients:
1 teaspoon dark sesame oil, divided
2 teaspoons minced peeled fresh ginger
2 garlic cloves, minced
1 cup finely chopped red bell pepper
1 cup chopped green onions
1 teaspoon curry powder
2 teaspoons red curry paste
1/2 teaspoon ground cumin
4 teaspoons low-sodium soy sauce
1 tablespoon brown sugar
1/2 teaspoon salt, divided
1 (14-ounce) can light coconut milk
2 tablespoons chopped fresh cilantro
4 (6-ounce) tilapia fillets
Cooking spray
3 cups hot cooked basmati rice (I used brown rice)
4 lime wedges

Directions:
Preheat broiler.

Heat 1/2 teaspoon oil in a large nonstick skillet over medium heat. Add ginger and garlic; cook 1 minute. Add pepper and onions; cook 1 minute. Stir in curry powder, curry paste, and cumin; cook 1 minute. Add soy sauce, sugar, 1/4 teaspoon salt, and coconut milk; bring to a simmer (do not boil). Remove from heat; stir in cilantro.

Brush fish with 1/2 teaspoon oil; sprinkle with 1/4 teaspoon salt. Place fish on a baking sheet coated with cooking spray. Broil 7 minutes or until fish flakes easily when tested with a fork. Serve fish with sauce, rice, and lime wedges.

Nutritional Info:
Yield: 4 servings (serving size: 1 fillet, 1/2 cup sauce, 3/4 cup rice, and 1 lime wedge)
Calories:506 (30% from fat)
Fat:17.1g (sat 5.9g,mono 6g,poly 2.5g)
Protein:29g
Carbohydrate:56.6g
Fiber:3.1g
Cholesterol:82mg
Iron:2.7mg
Sodium:616mg
Calcium:47mg


The Result:
I cooked my fish under the broiler for 5 minutes. It turned out perfectly cooked and flaky. This was a great twist on tilapia and one that I will make again. I added herbs,sauteed onions, and almond slivers to our brown rice for a little textural boost. Yum, yum, yum!

September 22, 2010

Tomato-Citrus Salmon and Herbed Couscous Pilaf

Oh, Cooking Light magazine how I love thee! This is the second and third recipe(s) that I have tried from the latest issue, that we have loved. Best of all, the October issue is still jam-packed with tons of goodies that will inevitably grace my table. These were keepers on both accounts!

Tomato-Citrus Salmon
From: Cooking Light magazine, Marge Perry, October 2010 issue

Ingredients:
3 large navel oranges, divided
4 (6-ounce) skinless salmon fillets
1 cup thinly sliced red onion
1 1/2 cups diced plum tomato
1/4 cup chopped pimiento-stuffed green olives

Directions:
Grate 1/2 teaspoon orange rind; squeeze 1/4 cup juice from 1 orange into a sieve over a bowl. Section remaining 2 oranges to equal 1 cup sections. Sprinkle 1/2 teaspoon salt and 1/4 teaspoon freshly ground black pepper over fish. Heat a large nonstick skillet over medium-high heat. Coat pan with cooking spray. Add fish, top side down, to pan; cook 5 minutes. Remove fish from pan. Add onion to pan; sauté 3 minutes or until tender and lightly browned. Add tomato, olives, orange juice, and orange rind to pan; cook for 3 minutes, stirring occasionally. Stir in 1/4 teaspoon salt and 1/4 teaspoon freshly ground black pepper. Arrange fish, browned side up, over tomato mixture in pan. Cover, reduce heat, and simmer 3 minutes. Add orange sections; cook 1 minute or until desired degree of doneness.

Nutritional Info:
Yield: 4 servings (serving size: 1 fillet and 1/3 cup tomato mixture)
Calories:380
Fat:19.8g (sat 3.8g,mono 7.1g,poly 7.3g)
Protein:35.5g
Carbohydrate:13.7g
Fiber:2.7g
Cholesterol:100mg
Iron:1mg
Sodium:663mg
Calcium:57mg

**************************************************

Herbed Couscous Pilaf
From: Cooking Light magazine, October 2010 issue

Ingredients:
1 tablespoon olive oil
1/4 cup finely chopped shallots
1 cup uncooked couscous (I used whole wheat couscous)
1 cup plus 2 tablespoons fat-free, lower-sodium chicken broth
1/4 teaspoon salt
1 tablespoon chopped fresh flat-leaf parsley
1 teaspoon chopped fresh thyme

Directions:
Heat a small saucepan over medium-high heat. Add oil to pan, swirling to coat. Add shallots; sauté 2 minutes or until tender. Stir in couscous; sauté 1 minute. Add broth and salt; bring to a boil. Cover, remove from heat, and let stand 5 minutes. Fluff with a fork. Stir in parsley and thyme.

Nutritional Info:
Yield: 4 servings (serving size: 3/4 cup)
Calories:205
Fat:3.7g (sat 0.5g,mono 2.5g,poly 0.5g)
Protein:6.5g
Carbohydrate:35.6g
Fiber:2.6g
Cholesterol:0.0mg
Iron:0.8mg
Sodium:263mg
Calcium:20mg


The Result:
As I said, both recipes were really yummy. I wasn't sure how the flavors were going to combine with the salmon, but it turned out really well. The tomatoes, onions, olives, and citrus basically turn into a pan sauce that was not sweet at all. The flavor contrast is savory, bright, and well-balanced. Really good! Also, the herbed couscous pilaf was a perfect canvas to showcase the salmon and the sauce. It was very subtle and tasty on it's own, but not overpowering. This was a great dinner choice!

Side Note: The only issue I tend to have with Cooking Light recipes is the amount of salt that the recipes indicate. They always seem under-seasoned to me, and these recipes were no exception. I basically just double the amount of salt the dish calls for, since I use either kosher or sea salt. (Both kosher and sea salt seem to be less "salty" flavored than table salt, in my opinion. Maybe if I was using table salt I would stick to the recipe amounts indicated). I usually always just season to taste, and ignore the recipe amounts.

September 13, 2010

Pan-Seared Mahi Mahi with Lemon Pepper Butter & PW's Crash Hot Potatoes

I typically buy my fish frozen from Trader Joe's or Costco. Frozen fish is not my first choice, but living in Arizona does not afford fresh, local seafood very often. I have found that it is sometimes better to just buy frozen. Thankfully, the frozen fish usually works out pretty well; and my rationale is that frozen fish is better than no fish at all. Anyway, the recipe for the Lemon Pepper Butter was actually on the label of the Trader Joe's frozen mahi mahi that I recently purchased. I did a quick pan-sear on the fish, topped it with this flavorful condiment, and our dinner was complete!!!

Pan-Seared Mahi Mahi with Lemon Pepper Butter

Ingredients:
4 (6 ounce) mahi mahi fillets, thawed from frozen(fresh fish would be better)
olive oil cooking spray
Lawry's Seasoned Salt
juice of 1/2 lemon
1/2 stick(2 ounces)of butter, softened
1 Tablespoon of chopped fresh Italian parsley
1 tsp of lemon pepper seasoning
zest of 1 lemon
salt and pepper to taste

Directions:
In a small bowl, combine the softened butter, lemon pepper seasoning, fresh parsley, lemon zest, and salt and pepper to taste. Set aside.

Coat a large skillet with cooking spray and heat over medium-high. Spray tops of fish fillets with cooking spray and sprinkle Lawry's seasoned salt to taste. Once pan is hot, place fish in skillet seasoned-side down. Cook for 3 minutes and flip the fish over, making sure fish has formed a browned crust. Cook for an additional 3 minutes on other side. Add lemon juice to pan and cook for 20 seconds. Remove from heat and place fish on serving plate. Top with a small spoonful of Lemon Pepper Butter and enjoy!

***********************************************************

PW's Crash Hot Potatoes
From: The Pioneer Woman Cooks! website

12 whole New Potatoes (or Other Small Round Potatoes)
3 Tablespoons Olive Oil
Kosher Salt To Taste
Black Pepper To Taste
Rosemary (or Other Herbs Of Choice) To Taste

Directions:
Bring a pot of salted water to a boil. Add in as many potatoes as you wish to make and cook them until they are fork-tender.

On a sheet pan, generously drizzle olive oil. Place tender potatoes on the cookie sheet leaving plenty of room between each potato.

With a potato masher, gently press down each potato until it slightly mashes, rotate the potato masher 90 degrees and mash again. Brush the tops of each crushed potato generously with more olive oil.

Sprinkle potatoes with kosher salt, fresh ground black pepper and fresh chopped rosemary (or chives or thyme or whatever herb you have available.)

Bake in a 450 degree oven for 20-25 minutes until golden brown.


The Result:
This meal was really yummy and fairly easy to put together. My son proclaimed that it was his "favorite" dinner and I should make it again tomorrow night. I served our fish with a side of steamed broccoli and Pioneer Woman's Crash Hot Potatoes (the recipe is above, but use this link for an instructional pictorial). I ended up cutting the potato recipe in half for our little family, and we had plenty of leftovers. This was a really satisfying dinner that hit the spot, and a perfect use for my mahi mahi.

September 11, 2010

Grilled Lemon Shrimp & Italian Orzo Salad

It is Saturday night, so I am going to keep this post short and sweet. Both of these recipes were winners! Sooooo yummy!

Grilled Lemon Shrimp
Adapted From: America's Test Kitchen Light & Healthy 2010 cookbook

Ingredients:
1/4 cup fresh lemon juice (about 2 lemons)
1 teaspoon of lemon zest
1/4 cup of chopped fresh parsley
2 Tablespoons olive oil
6 garlic cloves, minced
1/2 teaspoon salt
1/8 teaspoon red pepper flakes
1 1/2 pounds extra-large shrimp (21-25 count); peeled, deveined, butterflied
1/2 teaspoon sugar

Directions:
For the marinade: Combine lemon juice, zest, parsley, oil, garlic, salt, and red pepper flakes in a medium bowl. Measure and reserve 2 Tablespoons of marinade for serving.

For the shrimp: Pat the shrimp dry with paper towels, and them to the bowl with the remaining marinade, and toss to coat. Cover and refrigerate for 15 minutes. Remove shrimp from marinade, and thread onto skewers. Sprinkle one side of the shrimp with the sugar. Grill shrimp sugar side down on a preheated grill or grill pan. Cook until lightly charred and then flip to cook on the other side (cook time will depend on grill, anywhere from 1-4 minutes). Cook until second side is no longer translucent. Remove shrimp from the skewers and toss with the reserved 2 tablespoons of marinade. Serve and enjoy!

NOTE: Don't let the shrimp marinate for longer than 15 minutes or the acid from the lemon juice will "cook" the shrimp and turn them rubbery.

Nutrition Info: (Serves 4) Cal: 250; Fat: 10g; Sat fat: 1.5g; Chol: 260 mg; Carb: 5g; Fiber: 0g; Sodium: 550mg

*******************************************************************

Italian Orzo Salad
Adapted From: the Taste of Home website(published in Simple & Delicious June/July 2010, p29)

Ingredients:
6 cups chicken broth
1 package (16 ounces) orzo pasta
1/3 cup olive oil
1/4 cup red wine vinegar
2 tablespoons lemon juice
1 tablespoon honey
1/2 teaspoon salt
1/2 teaspoon pepper
2 cups chopped tomatoes
1 cup fresh basil leaves, thinly sliced
1/2 cup of fresh Italian parsley, chopped
4 green onions, chopped
2 cups fresh baby spinach, chopped
1-3/4 cups (7 ounces ) crumbled feta cheese
1/2 cup pine nuts, toasted

Directions:
In a large saucepan, bring broth to a boil; add pasta. Return to a boil. Cook, uncovered, for 10-12 minutes or until pasta is tender. Meanwhile, in a small bowl, whisk the oil, vinegar, lemon juice, honey, salt and pepper.

In a large bowl, combine the tomatoes, parsley, basil, onions and spinach. Drain pasta; add to tomato mixture. Drizzle with dressing; toss to coat. Chill until serving. Just before serving, stir in cheese and pine nuts.

Nutrition Facts: Yield: 12 servings. 2/3 cup equals 288 calories, 12 g fat (3 g saturated fat), 11 mg cholesterol, 630 mg sodium, 34 g carbohydrate, 2 g fiber, 10 g protein.


The Result:
Not the best photos, but this meal was delicious!!! My only advice is to stick to the 15 minute marinating time, or your shrimp will not turn out right. Other than that, both these recipes are fantastic!