Showing posts with label broccoli. Show all posts

June 16, 2012

Cheesy Chicken Broccoli Noodle Bake


Two nights ago, I defrosted some chicken breasts only to realize that there were only two in the package and that it wasn't enough to feed (what I had planned) my family of five. I wanted to make a stuffed chicken breast meal, but that would have required at least 4 more pieces of chicken for our dinner and leftovers for the husband's lunch the next day. Doh! I had to do some fast thinking, since the chicken was already thawed and it was approaching the "witching hour" (parents, you know what I'm talking about...). I went digging in the pantry and extra freezer to figure out something else at the last minute. I formulated a plan for a casserole, since I knew I could chop my skimpy amount of chicken up and spread it throughout the dish. This meal-in-one ended up being really tasty and worked out perfectly. It really wasn't anything super creative (I know I have at least 3 similar recipes that I've posted in the past...maybe more); but it was a nice spin on classic flavors, and got me out of a dinner crunch. Hooray for casseroles!

Cheesy Chicken Broccoli Noodle Bake

Ingredients:
olive oil
2 chicken breasts
garlic powder
salt and pepper to taste
1/2 large bag of frozen broccoli florets
garlic salt
1/2 box of whole wheat rotini pasta (or your favorite pasta shape)
1 can of cheddar cheese condensed soup
1/2 cup of sour cream
1/3 cup of cream cheese
6 slices of provolone cheese (or your favorite sliced cheese)
1/2 cup of shredded Parmigiano Reggiano cheese
2 tablespoons butter
1/2 sleeve of butter crackers (such as Ritz)
cooking spray

Directions:
Place chicken breasts on cookie sheet and coat both sides with a couple tablespoons of olive oil. Sprinkle both sides of chicken with salt, pepper, and garlic powder. Broil on high for 5 minutes on each side, or until chicken is cooked through. Remove from oven when done, and let cool for 10 minutes. Once cooled, dice into chunks and set aside.

While cooking chicken boil pasta in salted water. Drain and set aside once the pasta is cooked al dente. Reserve 1 cup of pasta water.

Place frozen broccoli in a microwave-safe container with a lid. Splash a couple of teaspoons of water into the container before cooking. Crack the lid, so container is not completely sealed and steam can escape. Cook for 5-6 minutes in the microwave. Drain excess water from broccoli, sprinkle with garlic salt and set aside.

In a large bowl, whisk together soup, sour cream, and cream cheese until smooth and well combined. Use some pasta water to thin out to the proper sauce consistency (you may only need a couple of splashes, not the whole cup of water.) Set aside.

Melt butter in microwave. Crush crackers into crumbs (I used my hands, working with a few crackers at a time) and toss into butter mixture until well-coated. Set aside.

Switch oven setting from broil to bake at 350 degrees.

Coat casserole dish with cooking spray.

Add cooked pasta, cooked/diced chicken, and cooked broccoli to bowl with soup mixture. Toss to coat all ingredients. Season with additional salt and pepper, if needed.

Spread mixture into a casserole dish. Sprinkle with Parmesan cheese. Layer cheese slices on top of Parmesan. Top casserole with buttery cracker crumbs and bake at 350 degrees for 20-30 minutes, or until cheese is melted and bubbly. Remove from oven and let cool for 5 minutes before serving.

March 7, 2012

Casserole Series #4: Creamy Chicken & Broccoli Casserole

A few months ago, I started a casserole series. I haven't updated it for awhile, because I really hadn't found any "worthy" casseroles to post lately. However, this one was pretty darn tasty, so I decided to deem it "Casserole Series-worthy". The flavor profile wasn't really anything new; I know I've made similar casseroles to this in the past. I also remember my mom making a version of this dinner, so it seems that this has been a family staple for years and years. However, even though this dish may not be totally unique, it was still a great example of what this meal-in-one has always embodied...homey, comforting, creamy, cheesy, chicken-y, broccoli-flavored goodness.


Creamy Chicken & Broccoli Casserole
Pearls, Handcuffs, & Happy Hour.blogspot.com

Ingredients:
3 chicken breasts, cooked & shredded
1 cans of cream of chicken soup
1/2 cup of mayo
1 cup shredded cheddar cheese
1 cup colby & Monterey jack cheese
1 bag frozen broccoli,thawed and chopped
salt & pepper to taste
cooked brown rice (optional, for serving)

Directions:
Cook chicken & shred. Meanwhile, chop the broccoli. Now, mix all ingredients together. Transfer mixture to a lightly greased 2 qt. casserole dish & heat oven to 375 degrees.Cook for 30 minutes or until bubbly. Serve with brown rice.


Casserole is never pretty on the plate...casserole photos always make me cringe. Oh well. Despite the tragic look of this meal, it was a crowd-pleaser. I do want to mention that this dish can be low carb if you choose to omit serving it over the brown rice. I did cut back on the amount of Cream of Chicken soup and mayo from the original recipe, and it still was creamy and delicious. My family loves a good casserole!

November 16, 2011

Portobello, Broccoli,and Red-Pepper Melts

This is another Martha Stewart recipe that I found while exploring her website the other day. Truly, this was a fantastic open-faced sandwich...one of the best that we've tried. Martha sure knows her food, that's for sure! If you dig a hearty, vegetarian sandwich this dish is for you.

In other news...

You'll be happy to know that the husband found the camera battery charger and plugged it in. Hooray! The good news doesn't stop there...I also remembered to take a photo of our dinner last night with my iphone. Eureka! Why didn't I think of that before??? I don't know. Thankfully, my normal camera should be up and running the next time I have to take a blog pic. In the meantime, try this recipe and enjoy my shaky iphone photography skills.

Portobello, Broccoli, and Red-Pepper Melts
From: Everyday Food, March 2008

Ingredients:
1 small head broccoli, cut into small florets (stalk discarded)
1 tablespoon olive oil
Coarse salt and ground pepper
4 portobello mushrooms (stems removed), sliced 1/2 inch thick
2 red bell peppers (ribs and seeds removed), sliced 1/2 inch thick
1/4 cup light mayonnaise
1 small garlic clove, crushed through a press
4 thick slices country bread (or 1 loaf of French bread, cut horizontally)
4 ounces Gouda cheese, thinly sliced (or Gruyere, if you like)

Directions:
Heat broiler, with rack set 4 inches from heat. On a rimmed baking sheet lined with aluminum foil, toss broccoli with oil; season with salt and pepper. Broil, tossing once or twice, until broccoli begins to char, 4 to 6 minutes.

Add mushrooms and bell peppers to sheet; season with salt and pepper, and toss to combine. Broil, tossing once or twice, until vegetables are tender, 8 to 10 minutes more; set aside.

Meanwhile, in a small bowl, combine mayonnaise and garlic; season with salt and pepper. Place bread on a work surface. Dividing evenly, spread with mayonnaise mixture, and top with vegetables, then cheese. Place on baking sheet, and broil until cheese is melted and lightly browned, 2 to 4 minutes.


The Result:
These were fantastic! Delicious and satisfying. I goofed and used Gruyere instead of Gouda cheese. Duh. Next time I should read the ingredients list a bit more carefully. Honestly, it didn't really matter; it was still an amazing veggie sandwich.

There were a lot of filling, so I decided to cut my French bread loaf in half horizontally, and hollow out (and discard) some of the bread in the middle. This allowed more room for the yummy, roasted veggies. I thought this would be more efficient than just doing the slices, and this method was reminiscent of the Eggplant Mozzarella Melts recipe that we LOVE. Then, when the cook time was over, I removed the long, loaf halves to a cutting board and just cut the portion sizes we needed (smaller pieces for the kids, etc.). It worked out perfectly, and now we have a new favorite Martha Stewart open-faced "melt" sandwich to make for dinner.

September 21, 2011

Chicken Broccoli Supreme Casserole

Although the title may sound boring, this casserole was very captivating for my family. We all loved it, and it was especially kid-friendly. I just love a peaceful dinner where everyone enjoys the meal that I put in front of them. This casserole produced that desired effect. It's not fancy, but it sure was yummy!

Chicken Broccoli Supreme Casserole
Adapted from: Get Off Your Butt and Bake blog via Pinterest

Ingredients:
1 lb. broccoli (steamed slightly if fresh, thawed if frozen)
3 cups cooked chicken breasts – Break up in small pieces
3 cups Grated Cheddar Cheese, divided
1 tube Ritz Crackers (35-38 crackers total)
1/2 stick melted butter
1 tablespoon poppy seeds
1 tsp garlic powder
1 tsp onion powder

SAUCE:
1/3 C. Butter melted
1/4 C. Cornstarch, dissolved in 1/2 C. COLD Water
1/3 C. Chicken Broth
1/4 tsp. Salt
1/4 tsp Pepper
2 Cups skim milk
1 1/2 cups of the above Cheddar Cheese

Directions:
In greased 13×9 pan, layer the broccoli and chicken, then set aside. In saucepan over medium heat, combine the sauce ingredients--melted butter, cornstarch dissolved in water, chicken broth, seasonings, and milk. Stir well, and continue stirring until sauce has thickened. Turn heat down to low, and add 1- 1/2 cups grated cheddar cheese. Stir until melted. Pour over the chicken and broccoli. Top with 1- 1/2 cups grated cheddar cheese.

Melt the half stick butter, and add the poppy seeds, garlic and onion powders, and stir well. Crush Ritz crackers in large zip-lock bag with a rolling pin. Don’t crush too small. Add crumbs to the melted butter. Sprinkle crumbs over the top of the grated cheese.

Bake uncovered at 350 degrees for about 30 minutes, or until hot & bubbly.


The Result:
This was a darn near perfect casserole...homey, comforting, and thoroughly enjoyable!

March 8, 2011

Broccoli with Garlic Butter, Cashews, & Chicken Over Quinoa

My friend, Claire emailed me this easy recipe a few weeks ago and I finally got around to trying it out. It's originally a concoction that her friend Heather invented and posted on their parenting message board. It was really easy, tasty, healthy, and family-friendly...all the criteria that I love. In fact, it was so easy it almost felt like a non-recipe. Given my lackluster approach to our meals lately, it was exactly the kind of new recipe that I was up for trying out.

As I said in my previous post, we have not been experimenting with very many new recipes and just sticking with old favorites. For example, tonight we are having grilled steak, baked potatoes, and swiss chard. It's not anything that I haven't posted before. I think I am just getting burnt out on always having something to do, so my blog and menu planning has been put low on the priority list. Lately, when I go to the grocery store, I just put the things in my cart that are needed and buy whatever meat is on sale. I got some ground chicken this week on clearance that was 30% off the normal price, so I bought three packages. I have been preparing whatever I have on hand and calling it good. Last night, I made a "casserole" layered out of torn corn tortillas, cooked pulled pork, salsa, canned pinto beans, and shredded cheese. It was good, but I feel like it really was not anything spectacular or note-worthy. I think it was more of a fridge clean-out project more that anything else.

Broccoli with Garlic Butter, Cashews, & Chicken Over Quinoa

Ingredients:
2 cooked chicken breasts, cut into strips
2 cups cooked quinoa, rinsed and prepared according to package directions
1 lb of broccoli, cut into bite sized pieces
1/3 cup of butter (I cut this to about 1/4 cup)
1 teaspoon brown sugar
2 1/2 tablespoons reduced-sodium soy sauce
Several twists of black pepper (to taste)
2 cloves garlic, minced
Chopped cashews, as few or as many as you'd like, but probably no more than 1/3 cup.

Directions:
Prepare the chicken and quinoa and set aside. (I seasoned my chicken with salt, pepper, and olive oil then broiled it in the oven on 'high' for 10 minutes to cook thoroughly.)

Steam the broccoli until tender/crisp.

Melt the butter in a small saucepan over medium heat. Add the garlic and saute for a minute or so. Mix in the soy sauce, brown sugar, and pepper. Bring to bubbling, then reduce heat to low and simmer for a few minutes to thicken a smidge. Add the cashews, pour the sauce over the broccoli and stir to coat.

Combine broccoli and quinoa and stir to coat. Serve with cooked chicken.


The Result:
This was really yummy! As I said, this was a really easy dish to prepare and my family loved it. Thankfully, quinoa is gaining popularity because it is really an awesome grain and it is soooo good for you. I especially love the texture of quinoa. If you don't have it or can't find it, then you could certainly substitute another grain such as whole wheat cous cous or brown rice.

April 18, 2010

Better Burger with Green Olives and Creamy Broccoli Slaw

Here is couple recipes that I found in the Ellie Krieger So Easy cookbook that I recently purchased. Burgers for dinner is always a good choice, and I like the idea of a healthier version.

Better Burger with Green Olives
From: Ellie Krieger So Easy cookbook, 2009

Ingredients:
1 pound lean ground turkey or beef (at least 90 percent lean)
1/2 cup coarsely chopped pitted green olives (2 ounces)
2 tablespoons finely chopped fresh flat-leaf parsley
1/2 teaspoon ground cumin
1/4 teaspoon freshly ground pepper
Cooking spray

Directions:
Combine the turkey or beef, olives, parsley, cumin, and pepper in a mixing bowl and mix until well incorporated. Shape into 4 burgers.

Spray a grill pan with cooking spray and preheat over a medium-high heat or prepare an outdoor grill. Cook for about 5 minutes on each side, until cooked through.

Serving suggestion: Serve on whole-wheat buns, garnished with slices of tomato and lettuce, with ketchup and mustard on the side.

Serving size 1 burger

*********************************************

Creamy Broccoli Slaw

Ingredients:
1 12oz package of fresh broccoli slaw
1/2 cup fat free Greek yogurt
1/4 cup raw sunflower seeds
2 tablespoons lemon juice
3 tablespoons mayonnaise
2 teaspoons honey
1/4 teaspoon black pepper
1/4 teaspoon of salt

Directions:
Preheat oven to 300 degrees F. Place sunflower seeds and 1/4 teaspoon salt on a rimmed baking sheet and shake to combine. Toast seeds until aromatic, about 10 minutes. Cool and reserve.
Combine yogurt, honey, lemon juice, mayonnaise, and pepper. Whisk to incorporate and reserve. Mix with broccoli slaw and garnish with sunflower seeds. Serve immediately.


The Result:
This was really good and super-easy. The only substitution I used was that I put these burgers on sandwich thins instead of buns. Otherwise, both recipes are great and this burger/slaw combo is another healthy hit!!!

February 22, 2010

Jen's Beef and Broccoli Surprise

My freezer is stocked with a ton of round steak that I bought on sale a couple of months ago. Round steak is not something I usually cook with, but I decided to try it out. Honestly, I was sick of opening my chest freezer and seeing it in there (it was starting to mock me). Anyway, I had a hankerin' for Asian-style Beef with Broccoli. The only problem was that I am running low on, well...everything. Seriously, from staple items to fresh foods, my stores are low. Real low. Also, I needed easy. Real easy. I wanted to give the husband a cooking break, but I am not up for anything elaborate. So, I started sniffing around my pantry and fridge and formulated this dinner. I must say, it turned out yummy (but more on that later in my results). This dinner was not traditional Beef with Broccoli, but it certainly fulfilled my craving and was something that everyone at my table really liked.

Jen's Beef and Broccoli Surprise

Ingredients:
1 Tablespoon of sesame oil
1 lb. of beef round steak (or your choice of meat), cut into strips
1/2 teaspoon of salt
1/2 teaspoon of pepper
1 teaspoon of garlic powder
1 teaspoon of ground ginger
1/2 teaspoon of dry mustard
2 cloves of garlic, minced
1/4 cup of orange juice
2 Tablespoons of rice vinegar
1/2 cup of beef broth
1/4 cup of soy sauce
2 Tablespoons of Worcestershire sauce
1 teaspoon of honey
1 teaspoon of Sambal Oeleck chili paste
1 Tablespoon of flour
1 Tablespoon of butter
Sesame seeds for garnish
steamed broccoli (I cook mine separately, from frozen, in the microwave)
white rice of your choice (We used instant white rice...don't judge)

Directions:
In a 8 x 8 glass casserole dish, place beef strips and top with sesame oil, salt, pepper, garlic powder, ground ginger, and dry mustard. Mix with tongs or hands until beef is well coated with spices and oil. Set aside.

In a small bowl, combine minced garlic, orange juice, rice vinegar, beef broth, soy sauce, Worcestershire sauce, honey, and Sambal Oeleck. Whisk until mixed, and pour over beef in the casserole dish.

Cover with foil and bake at 350 degrees for 30 minutes. Remove foil and bake for an additional 20-30 minutes.

When cook time is complete, remove from oven. Remove beef to a plate and set aside. (There should be quite a bit of liquid left in the casserole dish.)

In a small sauce pan, melt butter on the stove top. Once butter is melted, whisk in flour to make a paste and cook for 1 minute. Add liquid from casserole dish, and bring to a simmer while whisking. Once sauce is thickened to proper consistency, remove from heat and add the beef back into the pan.

Plate by topping rice and broccoli with meat and sauce, then garnish with sesame seeds. Serve and enjoy!

Jen's Notes:
All measurements are approximate.


The Result:
Yum! This was really good and something that I will make again. We all enjoyed it and it was fairly easy. Hooray for surprise concoctions that work out well!

January 22, 2010

Loaded Broccoli Cheese Baked Potatoes

We went out to dinner last night, so my scheduled meal got pushed back a day. We are having these potatoes for dinner with a simple side salad. I am not feeling very verbose today, so I think I will leave my commentary at that. :)

Loaded Broccoli-Cheese Baked Potatoes
Adapted From: Eat At Home

Ingredients:
Kosher salt
olive oil
4 large baking potatoes, scrubbed
fresh broccoli, cut into florets
4 slices bacon, cooked and crumbled
3 Tbs. butter
3 Tbs. flour
1 1/2 cups warm milk
1 cup sharp cheddar cheese, shredded
salt and pepper to taste
2-3 dashes of Worcestershire sauce
1 tsp of Dijon mustard
butter (optional)

Directions:
Clean and scrub potatoes, dry with a kitchen towel. Rub outside of potatoes with olive oil and a sprinkle Kosher salt (this will get the skin flavorful and slightly crisp). Wrap each potato in foil packet individually. Bake them at 400 degrees for an 1 – 1 1/2 hours, or until tender.

Cut the broccoli in florets and steam in a pan until tender-crisp. Cook bacon until crisp, crumble and set aside for garnish.

In a skillet, melt the butter. Whisk in the flour and cook for a minute. Gradually whisk in the warm milk. Let it cook over medium heat until it begins to thicken a bit. Stir in the cheese, letting it melt into the sauce. Season with salt and pepper, add a couple dashes of Worcestershire sauce, and mix in the Dijon mustard until combined.

Split the baked potatoes open. Season with more salt and pepper to taste. Mash butter into potato if desired (optional). Top with broccoli, bacon and cheese sauce, then serve and enjoy!


The Result:
This was another hit...these turned out perfect! These potatoes rivaled any good restaurant baked potato that I have had, and they were easy to put together. The total cook time for our spuds took about an hour and fifteen minutes, and they were light and fluffy inside with a crisp and seasoned skin on the outside. Yum! Also, these were quite filling so they didn't just feel like a side dish. These are main coarse potatoes, for sure. I couldn't even eat my whole potato and I was stuffed. Once again, this recipe is a keeper. I am on a roll this week!

July 25, 2009

Jen's Broccoli Cheese Chicken Bake

It seems that lately that I don't know what I am going to be in the mood for from day to day. I haven't been planning my dinners, since I will make a set plan and then discover later that I don't feel like what I have planned at all. For example, I have had fish tacos slated now for the past two days; only to bump them once again for this casserole. Go figure!

Jen's Broccoli Cheese Chicken Bake

I think I will serve this yummy and simple casserole with a side salad and call it good!

June 16, 2009

Jen's Broccoli Cheese Chicken Bake

This casserole is starting to become my standard "have a new baby" casserole. My friend, Angela from my MOMS Club just had her third baby, and I am participating in meal support for her. Since I am completely out of any other creative casserole ideas, I think I will just make this dish again. So far, I have sprung it on two other sets of unsuspecting new parents, with positive results. Hopefully, Angela and her brood will be the third family to enjoy it. It is easy enough to make, fairly tasty, and all the food groups are well represented. Really, what more could you ask for in a casserole????

I think I will just make a big batch and serve it to my family, too. It is easy to adjust the quantity for the crowd that you need to feed. Overall, this dish is versatile and comforting...perfect for tired parents!

Jen's Broccoli Cheese Chicken Bake

Once in awhile, I just need a good old fashioned casserole to warm my belly and lift my spirits!

June 11, 2009

Jen's Pesto Chicken and Gnocchi with Broccoli

This is the meal that I slated for yesterday, but changed at the last second. The gnocchi would have been a little too filling right before my Bunco game...considering all the snacks and drinks that I consumed.
This is an easy meal to put together and one of our family favorites! We haven't had this dish in a while, so I am happy that I put it back on the menu. I will pair this with a spinach side salad to round out the meal.

Jen's Pesto Chicken and Gnocchi with Broccoli

This recipe is always a hit at our house!!!

June 6, 2009

Jen's Roasted Shrimp & Broccoli Pasta with Lemon Cream Sauce Surprise

So, I have been crazy busy. Apparently, blog neglect is the first symptom of a crazy schedule. I don't know if the new week will be any quieter, but I am hoping to at least stay caught up. That's the dream, anyway. I am going to plan some easy dinners, so I can keep my head above water. That should help, and I think I am now up to date on my meal posts. Whew!

Yesterday, I was out all day and forgot to thaw out a protein item for our dinner. Yikes! At 5 pm, I made a quick decision to use shrimp since I knew they could be thawed/cooked relatively quickly. I wanted an all in one type of dish, and what better way to get that then to throw some shrimp into some pasta with a veggie of some sort. I spied some lemons sitting out on my counter; which helped me formulate an idea. Pasta, shrimp, broccoli...in a lemon cream sauce. Eureka!!! I did not use a recipe, but instead made one up on the fly. I did not write it down as I was cooking, so I will just recreate it now. As with my curry dish a few night's ago, this was definitely one of my surprise concoctions. I really did not have a clear idea of where I was going or how I was going to get there. Thankfully, all worked out well. This pasta dish turned out super-yummy! This will become a dish that I make again, especially since it came together fairly quickly (only 1/2 hour to 45 minutes max; including thaw time).

Jen's Roasted Shrimp & Broccoli Pasta with Lemon Cream Sauce Surprise

Ingredients:
1 lb. of fresh or frozen raw shrimp, peeled and deveined
pasta of your choice (I used pappardelle)
2 heads of broccoli, florets only
6 cloves minced garlic
1/2 of a large white or yellow onion, diced finely
2 Tablespoons of capers, drained
1 Tablespoon of red pepper flakes
1/2 cup of dry white wine
2 medium sized lemons, juiced
zest of 2 lemons
1/2 cup of sour cream
1-2 cups half and half
1 cup of water or chicken broth
4 Tablespoons butter, divided
2 Tablespoons of flour
salt and pepper, to taste
olive oil
chopped fresh parsley, for garnish

Directions:
Preheat oven to 400 degrees. Bring a large pot of salted water to a boil for pasta.

If shrimp is frozen, place in colander under stream of running water, tossing ever minute or so until thawed (this takes approximately 5 minutes total). Dry thawed shrimp well with paper towels, and place on a baking sheet. Season shrimp liberally with salt and pepper. Pour approximately 1 Tablespoon of olive oil over shrimp. Toss seasoned shrimp with clean hands on baking sheet, making sure all shrimp is evenly coated. Roast in oven for 5-10 minutes, depending on how large the shrimp are. Be careful not to overcook. Once shrimp are roasted, remove from baking sheet to a platter and set aside.

On the same baking sheet, place broccoli florets and season with salt and pepper. Again, coat with approximately 1 Tablespoon of olive oil, then toss seasoned florets with oil by using clean hands. Make sure all florets are evenly coated. Roast broccoli in oven for 15-25 minutes, or until florets are slightly browned at the tops, and still crisp. Remove from oven and set aside.

Meanwhile, cook pasta according to packaged directions. Drain and set aside.

In a large skillet, heat 2 Tablespoons of olive oil over medium-high heat. When pan is ready, add onions and a big pinch of salt. Saute onions until soft and translucent. Add garlic and cook for 1-2 minutes. Do not burn garlic. Add red pepper flakes and cook for another minute. Add white wine and lemon juice and let it reduce by half. Reduce heat to medium-low. Add water (or chicken broth), half and half, and sour cream. Stir to combine, making sure dairy items do not curdle. Season with salt and pepper. Bring to a boil reduce to simmer for 10 minutes. Sauce should be watery at this point.

In a microwaveable bowl, melt 2 Tablespoons of butter. Once melted, add flour and mix until paste is formed. Whisk into sauce for thickener. Repeat if necessary, until desired sauce consistency is achieved. Once sauce ready, adjust seasoning if needed. Add in roasted broccoli, roasted shrimp, capers,lemon zest, and chopped parsley. Stir to combine. Melt in last 2 Tablespoons of butter. Serve over cooked pasta.

Jen's Notes:
All measurements are approximate.


The Result:
Keeper!!! This was delish!

May 29, 2009

Jen's Baked Buffalo Chicken Tenders with Ranch Dipping Sauce & Beth's Broccoli Slaw

I love Friday! It is all about the promise of a fun weekend that I look forward to with child-like enthusiasm. Also, I really look forward to having the husband home for a couple days. Since Friday night is typically fun, I like to serve something for dinner that reflects the mood. I think Buffalo Chicken Tenders does just that. After all, it is a fun dish and not too much of a hassle to make. Hooray for Friday!

Jen's Baked Buffalo Chicken Tenders with Ranch Dipping Sauce

I think I will serve this dish with my friend, Beth's Broccoli Slaw recipe. Yum!!!

Beth's Broccoli Slaw

Both dishes are Friday night winners, for sure.

April 20, 2009

Sour Cream Chicken Enchiladas and Roasted Broccoli

Here is a recipe I picked up from the $5 Dinners website. This site is dedicated to cheap, family-friendly, healthy meals. All things that are right up my alley!!! I love this frugal-cooking website, and I check it daily to see what the author has up her sleeve. I think it is great that there are so many resources out there now for ways to live more economically. I really try to be a good steward of our household income, and sites like this definitely help!

I have a surplus of tortillas, so I thought I would give this recipe a go. Normally, my enchiladas are always made with red or green sauce. My friend, Claire has a couple similar versions to this dish, where she uses a creamy white sauce. Since I have all the ingredients on hand for this meal, and the method is a little different than my normal stand-by,I am excited to try these thrifty enchiladas. I am very interested to see how they turn out! Really, can you ever go wrong with that much cheese and sour cream??? I think not!

I think I will serve these with a side of beans (not sure what kind yet), salad, and a vegetable (probably roasted broccoli). It makes a good-sized batch, so there should be enough food for dinner tonight, lunch tomorrow, and then some. Also, I need to modify the original recipe a wee bit. I am looking forward to dinner already!

Sour Cream Chicken Enchiladas
adapted from: $5 Dinners

Ingredients:
8 ounces of low fat sour cream
8 ounces of low fat Greek-style plain yogurt
1 diced medium onion
2 cloves fresh garlic
1 can of green chiles
1-2 cups of homemade chicken stock
1 Tablespoon of olive oil
2 cooked boneless/skinless chicken breasts, shredded (1 1/2 cups needed)
1/2 tsp garlic powder for sauce
1/2 tsp garlic powder for chicken
Salt and Pepper, to taste
tortillas (about 10)
1-2 cups shredded cheese
fresh, chopped cilantro and/or green onion tops; for garnish

Directions:
On a sheet pan coat chicken breasts in olive oil and sprinkle with 1/2 tsp of garlic powder, salt and pepper to taste. Turn chicken on pan to make sure all sides are coated with oil and seasonings. Broil on high for 7-9 minutes, or until chicken is no longer pink in the middle. Pull chicken out of oven and let it rest for 5 minutes, or until it is cool enough to handle. Shred the chicken with two forks and set aside. Switch oven over from 'broil' to 'bake', and preheat to 350 degrees.

In a large skillet, saute the onions until soft and translucent. Add garlic and green chiles and cook for another minute or two. Remove mixture to a plate and set aside. Do not clean skillet.
In the same large skillet, whisk sour cream, yogurt, and 1 cup of chicken stock. Add more chicken stock until it comes to the consistency you want for your sauce. Add garlic powder and salt and pepper to taste. Save 1 cup of the sour cream sauce (remove it from the pan and save seperately, before adding the chicken and onion mixture). Stir shredded chicken and onion mixture into the sauce and let simmer about 10 minutes, allowing the flavors time to infuse.

Spoon sour cream chicken sauce into tortillas. Roll and place “seam down” into a baking dish. (Note: 10 enchiladas fit comfortably in a 9×13 dish.) Take the sour cream sauce that you removed and spread it over the tortillas. Sprinkle cheese over the top and bake about 15-20 minutes at 350 degrees. Before serving, garnish with cilantro and/or green onion tops. Enjoy!

Jen's Notes:
I don't have as much sour cream on hand as the original recipe calls for, so I am substituting plain low-fat Greek-style yogurt. I have made the yogurt/sour cream switcharoo in the past, and it has always worked out fine. Hopefully, this time will be no exception.


The Result:
These enchiladas were really yummy. We loved them! For me, they needed an extra spicy element. I ended up putting some really spicy salsa on them, to balance out the creaminess of the sauce. However, keep in mind that I am a spicy food freak. When I was pregnant with my son, I actually craved 'set-your-hair-on-fire' spicy food (now my son loves spicy food, too). The husband and boy loved them, as-is, and the creamy sauce was very flavorful on it's own. My yogurt substitution worked out perfectly, too!
I did improvise on some of the other aspects of the recipe, as well. I ended up adding a diced onion and two cloves of minced, fresh garlic. The onion was actually a mistake. I could have sworn I read that there were onions in the recipe. Turns out that there wasn't. Ugh. Once I realized my error, I thought "I might as well add some garlic, too". I don't know exactly how that is logical, but it worked.

Next, I noticed that my tortillas were not average-sized, run-of-the-mill tortillas. They were more of the size and shape of a manhole cover. These babies were so big, I only ended up making four total enchiladas...that were more like the size of four large burritos. The funny thing was that four burritos/enchiladas fit comfortably in the 9 x 13 pan. I skipped the beans, since the enchiladas ended up being so gynormous. Otherwise, we would have had way too much food! Our side dishes ended up being just salad and roasted broccoli. To finish it all off, I ended up garnishing our meal with some fresh chopped cilantro and chopped green onions. Yum!!! As I said, these were really good!

Now, I want to talk about the roasted broccoli for a second. Broccoli is probably our favorite veggie. We all love it, including my little guy. I usually buy frozen, steam it in the microwave, and call it an evening. Fresh broccoli finally went on sale, so I bought some for our dinner. Then, last night I roasted the fresh broccoli instead of using my frozen/steamed broccoli method. Let me tell you....roasted broccoli kicks steamed broccoli's butt! Oh man!!! I think the best part of our dinner (for me) was the broccoli! The roasted, toasty, blackened bits turned crunchy are caramelized. Seriously, it was awesome! Also, it is totally simple!!! I heart fresh, roasted broccoli. Here is what I did, for the record:

Roasted Broccoli

Ingredients:
2 heads of fresh broccoli, florets only
salt and pepper to taste
1/4 cup of olive oil

Directions:
Place cut broccoli florets on a cookie sheet. Drizzle oil over top of all broccoli. Sprinkle with salt and pepper. Toss with clean hands, so all pieces are well coated. Roast in the oven for 25 minutes at 425 degrees. Enjoy!


See!!!! The broccoli is so incredibly easy!!!! Overall, this was a great meal and we really enjoyed it.

April 10, 2009

Jen's Easy BBQ Pulled Pork Sandwiches & Favorite Mac and Cheese

We have a busy weekend planned for Easter and my son's birthday, so I need a couple easy slow cooker meals for the next couple days. My mom is visiting again, and I know she loves BBQ. I thought I would make these sandwiches with some broccoli slaw, and some homemade mac and cheese since I know she will enjoy it. I know I will enjoy it...I think I crave BBQ on a permanent basis!
These are all recipes that I have made before, so I think I will just post the sandwich recipe and link back to the other two recipe posts. Yum! Again, this is an easy and tasty meal that will use my pork shoulder leftovers.

Jen's Easy BBQ Pulled Pork Sandwiches

Ingredients:
1 pork loin (mine is about 2 lbs.) OR pork shoulder roast leftovers
1/2 bottle of your favorite beer (I used Foster's)
1/3 cup of water
Salt and pepper to taste
3-4 shakes of Worcestershire sauce
2 smashed fresh garlic cloves
1 bottle of your favorite BBQ sauce

About 1 teaspoon of the following spices:
paprika
onion powder
minced onion
garlic powder
Cajun blackening seasoning (I use Paul Prudhomme's Steak Magic)

Directions:
Place pork in slow cooker, fat side up. Sprinkle pork with spices, including salt and pepper. Add beer, water, and garlic cloves. Add Worcestershire sauce. Cook on low for 6-8 hours, or high for 4 hours (depending on how fast/hot your slow cooker runs). With a large spoon, baste pork with juices every two hours (this step is optional--if you decide to do it, work quickly and get the lid back on fast). When cooking is complete, pull pork out of slow cooker. Pour slow cooker liquid into a separate bowl and set aside. Place pork back into slow cooker and shred the meat with fork or pull it apart with fingers. Pour 1/4 cup of the cooking liquid back into the meat (maybe more depending on how much meat you have and how saucy you like your pulled pork). Mix shredded meat with 1/2 to 1 full bottle of BBQ sauce (once again,the quantity will depend on how saucy you like your meat). Mix thoroughly. Cook on high for an additional 1/2 hour with lid on (if you need it thicker, leave the lid off). Serve mixture on buns and enjoy!

Here are the other two recipe links:

Beth's Broccoli Slaw

Favorite Mac and Cheese

I am really looking forward to our dinner tonight! I love homey, comforting food and this meal will certainly satisfy my BBQ craving.


The Result:
Fan-freakin'-tastic! That about sums it up!!! The photo of the mac and cheese looks a little wonky. My crumb crust kinda slid and got all mixed in with the rest of the macaroni. It tasted awesome, but did not photograph all that well. Sigh. So much for presentation. Luckily, everyone loved our meal and didn't notice that the crumb crust wasn't perfect. Overall, this was a yummy, yummy dinner!!!

March 30, 2009

Jen's Cheddar Broccoli Chicken and Homemade Salad Dressing

This recipe is really not that much of a recipe...but really, a trick that I learned from my mother in law. When I was pregnant with my son I decided that I wanted to start making some of the meals that my husband grew up having for dinner. A lot of the meals that I love come from old family recipes, and I wanted our son to grow up having favorites from both sides of the family. I asked my mother in law to show me how to prepare some of the traditional dishes that they all loved to eat. She was always a busy, working mom so she told me that her main priority was getting dinner on the table fast. This was one of the first meals that she taught me, and it conforms to her philosophy. It could not be any easier. (I think she was trying to size up my prowess in the kitchen, because she later moved on to more difficult recipes.) By now, it has turned into comfort food at our house and we all love this dish.

I should also mention that I have a weird love/hate relationship with condensed canned soups, and this recipe totally feeds into my psychosis. I love that they are so easy to use and to cook with, but I hate the fact that they are so unhealthy. Every time I use them in one of my recipes I am plagued with all sorts of conflicting feelings-pleasure, guilt, despair, euphoria, heartburn-you get the idea. I always promise myself that if I use canned soup in a recipe, I will try and make the rest of the meal as healthy as possible. Tonight, I am going to pair this dish with some brown rice and some steamed broccoli. I may even throw in a side salad with a homemade vinaigrette for good measure. Those healthy side items should allow me to enjoy my dinner guilt-free.

Jen's Cheddar Broccoli Chicken

Ingredients:
3 or 4 Boneless skinless chicken breasts
1 (15 oz.) can of condensed broccoli cheddar cheese soup, undiluted
salt and pepper to taste
cooking spray


Directions:
Spray a 8 x 8 glass casserole dish with cooking spray. Place chicken in the dish and season with salt and pepper. Pour a can of broccoli cheddar cheese soup on top of the chicken breasts. Using the back of a spoon, spread the undiluted soup in an even layer over all of the chicken. Bake at 375 degrees for approximately 30-40 minutes (or until chicken is cooked and juices run clear when pierced).


The Result:
I always forget how much I love this dinner, until I have it again. This meal was so satisfying and yummy! Perfect!!! This will remain a family favorite for a long, long time.

I also took a picture of our salad, because I don't think I have ever posted my recipe for salad dressing. I never buy bottled salad dressing, because I am super-picky and I can never find a variety that I like. Instead, I just make a quick vinaigrette that takes less than 5 minutes to put together. It always turns out way better than bottled dressing and it is always made with stuff that I have on hand. I make small quantities and store what I don't use right away in the fridge. Typically I save mine in a plastic container and it will stay fresh for about a week (it always gets eaten quickly, so it is never around for very long). Before serving, I just give the whole container a quick shake to re-combine everything, and it is as good as new!

Jen's Homemade Salad Dressing

Ingredients:
1/4 cup of walnut oil to taste, drizzled into mixture (use more if needed)
2 Tablespoons of white wine vinegar (use more if needed)
1/2 teaspoon of Dijon mustard
1/2 teaspoon of Whole Grain mustard
1 1/2 teaspoons of honey
Salt and pepper to taste

Directions:
In a small bowl combine the honey, salt, pepper, white wine vinegar, Dijon mustard, whole grain mustard. Whisk to combine. Keep whisking vigorously, while drizzling in a thin, continuous stream of oil; until all the oil has been used. Store in a plastic container, and use as needed.

Alternate method:
Combine all ingredients, except for oil, in a food processor or blender. Pulse to combine. Take lid insert out while blender or food processor is still running and drizzle in oil (in a thin continuous stream) until well combined. Store in a plastic container, and use as needed.


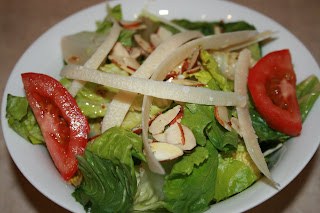
My favorite weeknight salad is just romaine lettuce, Parmigiano-Reggiano cheese shavings, sliced tomato wedges, and sliced almonds, topped off with my salad dressing. Yum!!!

March 24, 2009

Ginger Grilled Salmon

I am a little late posting today, because I have been doing laundry all morning (in between naps...yes, I am still sick). My new washer and dryer arrived safe and sound, and I have been catching up on all the clothes-cleaning that I refused to do while I still had my old set. Actually, I couldn't use my old ones. We pulled that set out of the house and stored them in our garage, when we discovered the mold problem. Any-who... I am very much in the honeymoon-phase with my new appliances. I promise I will stop talking about them soon. Really, you only probably have a day or two more of me going on and on about my washer and dryer. Maybe. Okay...I am just kidding. I will stop. I think.

Soooooo.....dinner. I returned The Red Hat Society Cookbook back to the library promptly after having that last disastrous meal. However, I had already copied this recipe down and put it on my menu plan for the week. I thought about skipping it or finding something else to do with my salmon, but I decided to just stick with it. Hopefully, this recipe will be much better than that last horrid dish I tried from that book. It sounds reasonably good, but I am very skeptical. That last recipe was so terrible, it tainted all the other recipes in that cookbook...just by association! I really don't like taking chances with salmon, since it is a little pricey. Sigh. I will be brave and just try it. Hopefully, it will be hard to goof up grilled salmon. It really all comes down to the sauce; and the ingredients sound normal. At least we have plenty of leftovers from the last two nights to piece together another meal; if this recipe does happen to go south. Can you tell I am really confident???? You see, it is that darn cookbook bringing me down! It's the whole "one bad apple theory".
I think I will serve this with some soba noodles and some steamed broccoli. I think we have enough romaine for a salad, too. Please just keep your fingers crossed for me. Sigh. Here we go...

Ginger Grilled Salmon

Ingredients:
1 1/2 Tablespoons of butter
3 shallots, minced
6 Tablespoons fresh lemon juice
5 Tablespoons of brown sugar
1/2 teaspoon Tabasco
3 Tablespoons of fresh, peeled ginger; minced
1/4 cup of red wine vinegar
3 teaspoons of soy sauce
3 teaspoons of finely chopped cilantro
4 (6-8 ounce) salmon fillets
parsley for garnish

Directions:
Melt butter in sauce pan over medium heat. Add shallots and saute until soft. Add lemon juice, brown sugar, Tabasco, ginger, vinegar, and soy sauce; stir until well combined. Remove from heat and add cilantro. Baste salmon liberally with sauce and grill 3 inches from flame (7-10 minutes per side, depending on thickness). Baste frequently while cooking. Remove from grill and serve. Garnish with parsley and serve with remaining sauce on the side.

Jen's Notes:
Yikes!!! 7-10 minutes per side seems excessive for salmon, doesn't it??? I don't know about the cook time on this one. I would say use your best judgement for the actual cook time, depending on your grill and your fish. I think 7-10 minutes per side may turn the fish into charcoal...but that is just my opinion. I will let you know how long ours actually cooks in my 'results' post.


The Result:
This was just okay. The husband really liked it, but I found it to be a little bland. I ended up putting some hoisin sauce on my fish to dress it up a bit. I don't think I will make this again, because there are a lot more salmon recipes out there, with a lot more flavor. Like I said...it was decent; but not anything that blew my socks off.
I used an indoor grill pan and the fish only took about 4 minutes per side (not 7-10 as recommended in the recipe). Again, I am really not impressed with this recipe or this cookbook. I am glad that I returned it to the library, and did not purchase it for part of my collection.

March 8, 2009

Broccoli-Cauliflower Casserole

Last time I made this recipe, I combined it with another dish in my post. I wanted to separate it out, so it is easier to link back to in the future. This is the side dish we are having with our Pork Schnitzel. I am hoping that it pairs well with the flavors of the pork. I love that this dish is a all-in-one starch/vegetable combo. That means I only have to make one side items to fill both requirements, instead of two!

Broccoli-Cauliflower Casserole

Ingredients:
* 1 head cauliflower, cut into florets
* 1 head broccoli, cut into florets
* 2 eggs
* 1 large onion, peeled and coarsely chopped
* 1 can (10.75 ounces) condensed cream of mushroom soup
* 1/2 cup light mayonnaise
* 2 cups shredded sharp Cheddar cheese
* 1 box (6 ounces) chicken-flavored stuffing mix
* 4 tablespoons unsalted butter

Directions:
1. Heat oven to 350°F.

2. In a large pot, steam cauliflower for 7 to 8 minutes and broccoli for 5 minutes, or until fork-tender. Set aside.

3. In a food processor or blender, mix together eggs, onion, soup and mayonnaise until smooth.

4. In a 13 x 9 x 2-inch baking dish, spread cauliflower in an even layer. Sprinkle with half the cheese and top with half of the soup mixture. Repeat layering with broccoli and remaining cheese and soup mixture.

5. Prepare stuffing mix following package directions. Spoon stuffing over top of casserole. Bake at 350°F for 45 minutes. Serve warm.

The Result:
Did you see the photo below???? This looked good, didn't it??? Let me assure you, it tasted good, too! I really like this dish. It went nicely with our pork, so I am finding that it is pretty versatile. It goes well with a variety of main courses, and I still think it could be a stand-alone vegetarian meal all by itself. I will certainly be turning to this casserole recipe whenever I find fresh broccoli and cauliflower for a good price. It is both easy and yummy!

February 15, 2009

Cheeseburgers on Whole Wheat Buns and Broccoli-Cauliflower Casserole

It has been awhile since we have had old fashioned, grilled, no-frills cheeseburgers at our house. I think the last time was when I was sick...about a month or so ago. Even then, I felt really crappy and I could not enjoy them at all. (How sad for me!)
The husband had requested burgers again a week or so ago, but I forgot to work them into the menu. Since I took a freezer inventory last Tuesday, I realized that we needed to use up some of the ground beef that we have stocked. Based on the beef surplus I have in my freezer, I will be breaking my self-imposed "beef once a week...vegetarian three times a week rule" again. (I have really fallen off the wagon with that lately!) I am slowly trying to cut back on red meat by only having it once a week. However, frugality is my main priority and I don't want to be wasteful. Until I can get a good balance of protein items going in my freezer, I need to set my plans aside and be a little more flexible with our menu planning. Keeping our budget in check is what I need to work on the most right now.

I thawed some of my homemade whole wheat buns to have with our cheeseburgers and I am making a new veggie side dish, too. I found this casserole recipe in Family Circle magazine recently. I have both fresh broccoli and fresh cauliflower on hand, and all the other ingredients I found lurking in my pantry. Yes, it employs the use of some processed ingredients...sigh...processed stuff makes me cringe. Again, I am trying to stay flexible and keep what is budget-friendly in mind. At least the veggies are fresh.

The burgers and buns are 'been there/done that' so I won't bore you with re-typing the recipes. However, below is the new recipe for the casserole. I will let you know how it turns out!

Broccoli-Cauliflower Casserole

Ingredients:
* 1 head cauliflower, cut into florets
* 1 head broccoli, cut into florets
* 2 eggs
* 1 large onion, peeled and coarsely chopped
* 1 can (10.75 ounces) condensed cream of mushroom soup
* 1/2 cup light mayonnaise
* 2 cups shredded sharp Cheddar cheese
* 1 box (6 ounces) chicken-flavored stuffing mix
* 4 tablespoons unsalted butter

Directions:
1. Heat oven to 350°F.

2. In a large pot, steam cauliflower for 7 to 8 minutes and broccoli for 5 minutes, or until fork-tender. Set aside.

3. In a food processor or blender, mix together eggs, onion, soup and mayonnaise until smooth.

4. In a 13 x 9 x 2-inch baking dish, spread cauliflower in an even layer. Sprinkle with half the cheese and top with half of the soup mixture. Repeat layering with broccoli and remaining cheese and soup mixture.

5. Prepare stuffing mix following package directions. Spoon stuffing over top of casserole. Bake at 350°F for 45 minutes. Serve warm.


The Result:
The casserole was really, really good. It could actually stand alone as a vegetarian meal. It was both flavorful and filling; after tasting it, I didn't mind so much about the "processed" ingredients. What can I say, I am fickle...especially when the dish tastes good! The casserole itself kinda reminded me of the Strata I made, but with different veggies. Overall, this casserole is a total keeper...considering it is made with all ingredients that I usually have on hand anyway.
Our burgers turned out awesome, and my homemade buns held up well to freezer storage. You could not even tell that they had been frozen and then thawed. I am still ridiculously pleased with the whole wheat bun recipe. Our dinner was super-yummy and fairly simple...perfect for a Sunday night meal!

December 19, 2008

Jen's Broccoli Cheese Chicken Bake

This was such a hit with our friends Pete and Michelle, I thought I would make it again for my friend Danielle. Danielle just had her second child, and I volunteered to bring her family dinner tonight, through my MOMS Club meal support program. I love this dish since it an all-in-one, well-balanced meal. The best part is that it is really easy. I will just make a double-batch to get two meals (one for us and one for Danielle's family) with the same amount of effort as it would take for me to cook just one. Hooray! I love easy, yummy dinners that pull double duty!


Jen's Broccoli Cheese Chicken Bake


I hope that Danielle and her family will like this dish as much as I do!