Showing posts with label dessert. Show all posts

August 29, 2012

Chewy Caramel Popcorn and Pretzel Bars

(Cutting my pan of pressed caramel/popcorn/pretzel goodness into ooey-gooey bars...)

(Then, I wrapped each one in foil and stored in a zip top bag in the pantry. It makes it easy to just grab one and throw it in the boy's lunch box in the morning.)

I made and packaged these bars up in foil so my son could take them to school in his lunch. I will admit, I probably ate about three of them in the process! They are so tasty. It's like a salty, sweet, pretzel-y, popcorn-y, Rice Krispie treat...without the Rice Krispies. Does that make sense? No??? Well, you'll have to try 'em to understand what I mean, I guess.

Chewy Caramel Popcorn and Pretzel Bars
From: Martha Stewart, Everyday Food October 2010

Ingredients:
Nonstick cooking spray
12 cups plain popped popcorn (from 1/2 cup kernels or 2 microwave packages)
4 cups coarsely chopped small salted pretzels (7.5 ounces)
2 cups sugar
Coarse salt
2/3 cup heavy cream
2 cups miniature marshmallows

Directions:
Coat a 9-by-13-inch baking dish with cooking spray. In a large bowl, toss together popcorn and pretzels. In a medium saucepan, bring sugar, 1/2 teaspoon salt, and 1/2 cup water to a boil over medium-high. Boil, undisturbed, until mixture is amber in color, 8 to 12 minutes. Remove pan from heat and slowly pour in cream (mixture will sputter). Immediately add marshmallows; stir until melted.

Pour caramel mixture over popcorn and pretzels and quickly stir with a rubber spatula to coat. Transfer mixture to dish and use a piece of plastic wrap coated with cooking spray to press evenly into dish. Sprinkle with coarse salt if desired. Let cool completely before cutting into 12 bars.

April 14, 2012

Chocolate Sheet Cake and Chocolate Frosting


My baby boy turned 6 years old this past week! Six!!!! I can hardly believe it! (Okay, I'll stop with the exclamations.)

We had a small family party with one of the boy's favorite dinners (spaghetti and meat sauce) and I had him help make and decorate this cake as his official birthday cake. He loves helping me bake, and he was so excited to decorate his cake all by himself. The Pioneer Woman website describes this cake as "the best chocolate sheet cake ever" and I agree. It was the BEST chocolate sheet cake ever. Moreover, it made a huge cake so we had a lot of leftovers. When this moist, delicious, chocolaty wonder-dessert was stored in the fridge the texture turned into the consistency of a cake brownie. YUM! It was seriously like have both cake and brownies from one recipe. Awesome!

Chocolate Sheet Cake and Chocolate Frosting
From: The Pioneer Woman website

Ingredients:
FOR THE CAKE:
2 cups Flour
2 cups Sugar
1/4 teaspoon Salt
4 Tablespoons (heaping) Cocoa (I used dark chocolate cocoa powder)
2 sticks Butter
1 cup Boiling Water
1/2 cup Buttermilk
2 whole Beaten Eggs
1 teaspoon Baking Soda
1 teaspoon Vanilla
_____
FOR FROSTING:
1/2 cup Finely Chopped Pecans
1-3/4 stick Butter
4 Tablespoons (heaping) Cocoa (I used dark chocolate cocoa powder)
6 Tablespoons Milk
1 teaspoon Vanilla
1 pound (minus 1/2 Cup) Powdered Sugar

Directions:
Note: I use an 18x13 sheet cake pan.

In a mixing bowl, combine flour, sugar, and salt.

In a saucepan, melt butter. Add cocoa. Stir together.
Add boiling water, allow mixture to boil for 30 seconds, then turn off heat. Pour over flour mixture, and stir lightly to cool.

In a measuring cup, pour the buttermilk and add beaten eggs, baking soda, and vanilla. Stir buttermilk mixture into butter/chocolate mixture. Pour into sheet cake pan and bake at 350-degrees for 20 minutes.

While cake is baking, make the icing. Chop pecans finely. Melt butter in a saucepan. Add cocoa, stir to combine, then turn off heat. Add the milk, vanilla, and powdered sugar. Stir together. Add the pecans, stir together, and pour over warm cake.

Cut into squares, eat, and enjoy!

(Here is the cake with just the pecan-chocolate frosting.)


(We topped our cake with candy and sprinkles and toys; just to make it more birthday-appropriate.)

(Here is the boy posing by his cake masterpiece. Notice the spot of chocolate on his chin...)

April 9, 2012

Cherry Almond Crisp

I brought this Pioneer Woman dessert over to my in-law's house for our Easter dinner. It was a big hit, and the husband actually said that this was the second cherry dessert I have surprised him with; meaning, he was surprised at how good it tasted. (The husband is a skeptic when it comes to cherry desserts for some reason. He explained that he usually finds them way too tart, but this one wasn't and he really liked it!) Silly, skeptical husband aside...all the kids and adults loved this crisp. The Pioneer Woman does it again!

Cherry Almond Crisp
From: foodnetwork.com, Ree Drummond 2012

Ingredients:
1 cup all-purpose flour
1 cup packed light brown sugar
1/2 cup granulated sugar
1/2 teaspoon ground cinnamon
1/4 teaspoon salt
Dash nutmeg
1 1/2 sticks cold butter
1/2 cup slivered almonds
Four 12-ounce bags frozen tart cherries
1/4 cup cornstarch
2 teaspoons almond extract

To Serve:
2 cups heavy cream
2 tablespoons granulated sugar
--OR--
***Vanilla ice cream, optional*** (We skipped the whipped cream and just served it warm with vanilla ice cream.)

Directions:
Preheat the oven to 350 degrees F.

Start with the crumb mixture. In a medium bowl, combine the flour, brown sugar, 1/2 cup granulated sugar, cinnamon, salt and nutmeg.

Cut the cold butter into pieces. Add the butter to the bowl and use a fork or pastry blender to cut it into the flour mixture. The mixture should resemble a moist, coarse meal. Add the slivered almonds and combine thoroughly.

Place the still-frozen cherries in a bowl, add the remaining 1/2 cup granulated sugar, cornstarch and almond extract and gently stir the cherries to combine.

Divide the cherries between 8 ramekins (about 1/2 cup each). Top with the crumb mixture, evening out the surface.

Bake until the topping is crisp and golden brown, about 45 minutes. If the topping appears underdone, continue baking in 10 minute increments until it's done.

To serve: Add the heavy cream and granulated sugar to the bowl of an electric mixer fitted with the whisk attachment and whip. Keep in the fridge until ready to serve.

Serve the individual crisps warm or at room temperature with a dollop of freshly whipped cream or vanilla ice cream.

December 21, 2011

Saltine Toffee (dubbed "Christmas Crack")

I can't believe it's been so long since I've last update my blog! I actually started this post back on December 21st, 2011 and I am now finishing it on January 8th, 2012. Yeesh! With all the parties, Christmas, my son's school concert and winter break, New Year's, two visits from the Tooth Fairy, and my husband's vacation, really cut into my "alone" computer time. While it was nice to have everyone home for a plethora of good ol' fashioned family fun, I'm actually glad to be getting back into the swing of a normal routine again.

So this past holiday season was all about survival-mode for me. I really didn't cook anything new, and I was basically trying to keep everyone fed and happy amongst the busyness. I had to look back on my camera to see if I had any recipe photos, and I only had two new ones from December since the last post. Just two...that's it!!! However, I am glad to report that what I lacked in quantity, I made up for fully with quality. The two recipes that I did try out were pretty darn great (this one included).

My friend, Claire passed this easy recipe on to me and I tweaked it a little based on what I had on hand. Here is my version of this delicious "cookie", although I guess it falls more under the heading of a toffee or bark. Either way, Claire and I decided to call it "Christmas Crack" since it is soooo freakin' awesomely addicting. I had to stop myself several times from going to the store and purchasing more ingredients for making additional batches. If you have a hankerin' for something easy to make and a little naughty, this recipe is for you!

Saltine Toffee (dubbed "Christmas Crack")
Adapted From: The Girl Who Ate Everything website

Ingredients:
1-2 sleeves of saltine crackers
2 stick (4 oz) butter
2 cup packed brown sugar
2 cups chocolate chips (I used 1 bag)
2 cups butterscotch chips (I used 1 bag)
crushed or slivered raw almonds
sea salt

Directions:

1. Preheat the oven to 350 degrees. Prepare a baking sheet by lining it with aluminum foil and spraying the foil with nonstick cooking spray.

2. Arrange the crackers in a single layer on the baking sheet so that there are no empty spaces in between them. Crush any remaining crackers into small crumbs and set aside for now.

3. Place the butter and brown sugar in a small saucepan over medium-high heat. Stir while the butter melts, and bring the mixture to a rolling boil. Once boiling, carefully pour the sugar-butter mixture over the crackers on the baking sheet in an even layer, trying to cover most of the crackers. If you miss some spots, don’t worry as the toffee will spread in the oven.

4. Bake the toffee crackers at 350 degrees for five minutes, until the toffee is bubbling all over. Carefully remove the pan from the oven and allow to cool for one minute.

5. Sprinkle the chocolate chips on top of the hot toffee, and allow them to sit for one minute to soften and melt. Once softened, use an offset spatula or knife to spread the melted chocolate over the entire surface of the toffee in an even layer. While the chocolate is still sticky, sprinkle the top with the reserved crushed crackers.

6. Refrigerate the pan to set the toffee and chocolate for about 30 minutes. Once set, break into small uneven pieces by hand, and enjoy! Store uneaten saltine toffee in an airtight container for up to a week.


The Result:
I gained a few pounds over the holiday break, and I think I owe it mostly to this toffee. I'm not exaggerating; it's that good and shockingly easy to put together.

October 9, 2011

Pretzel Dessert

This is one of my favorite "old fashioned" dessert recipes from my childhood. My mom and grandma used to make this all the time, and I would request it for my birthday in lieu of cake. It's very simple to make, and it is a great "take along" dessert for a potluck.

Pretzel Dessert

Ingredients:
1 1/2 sticks butter
3 tbsp. sugar
8 oz. chopped pretzels
8 oz. cream cheese, softened
1 c. sugar
2 pkgs. Dream Whip, prepared
Cherry pie filling

(NOTE: The Dream Whip will require vanilla extract and low-fat or fat-free milk, according to package directions.)

Directions:
Melt 1 1/2 sticks butter; add sugar. Pour over pretzels in 9x13 pan. Bake 10 minutes at 400 degrees. Cool. Blend cream cheese with 1 cup sugar. Whip Dream Whip according to package directions; add to cheese mixture. Spread cherry pie filling over pretzels. Cover with cream cheese mixture. Top with whole pretzels in a decorative pattern. Keep refrigerated until ready to serve.

The Result:
Simple. Classic. Delicious. I heart pretzel dessert!

December 14, 2010

Chocolate Caramel Cookies with Sea Salt

I am in full holiday baking mode. I love making Christmas cookies,so I usually go a little overboard with the amount of cookies I end up churning out. Normally I make the traditional assortment that my family always had during the season, and then add one or two different variations. What can I say, I like to keep things interesting! This year, I selected this cookie as my "wild card". Oh boy, I am glad that I did...it was fantastic!

Chocolate Caramel Cookies with Sea Salt
From: The Two Peas and Their Pod blog

Ingredients:
1 1/4 cup all-purpose flour
¼ teaspoon baking soda
1/4 teaspoon salt
5 tablespoons butter
7 tablespoons unsweetened cocoa (I used dark cocoa)
2/3 cup granulated sugar
1/3 cup packed brown sugar
1/3 cup plain yogurt
1 teaspoon vanilla extract
Soft caramel candy chews
Sea salt

Directions:
Preheat oven to 350ºF; line 2 baking sheets with baking paper, lightly coated with cooking spray. Lightly spoon flour into a dry measuring cup; level with a knife. Sift together flour, soda, and salt; set aside.

Melt butter in a large saucepan over medium heat. Remove from heat; stir in cocoa powder and sugars (mixture will resemble coarse sand). Add yogurt and vanilla, stirring to combine. Add flour mixture, stirring until moist. Wrap the chocolate dough around the caramel candy pieces. Place balls on cookie sheets and sprinkle with sea salt.

Bake for 10-12 minutes or until almost set. Cool on pans 2 to 3 minutes or until firm. Remove cookies from pans; cool on wire racks.

(This recipe yields about 2 dozen cookies.)

The Result:
I love the combo of salt and chocolate and/or caramel. Yum! These. were. awesome.

November 2, 2010

Chocolate Chocolate Chip Cookies

I brought dinner to a friend last night, and decided to bake some cookies to go along with their meal. I have the allrecipes.com Dinner Spinner app on my iPhone, so I did a search for cookies and came up with these beauties. I had everything on hand, so I didn't even need to take an extra trip to the store (I love it when that happens). Of course, we saved some cookies for ourselves and they were a big hit with my family. Really, there is so much chocolate...what is not to love!?!?!?!

Chocolate Chocolate Chip Cookies
Adapted From: allrecipes.com; Chocolate Chocolate Chip Cookies I by Kathy

Ingredients:
1/2 cup butter, softened
1/2 cup of shortening
1 1/2 cups white sugar
2 eggs
2 teaspoons vanilla extract
2 cups all-purpose flour
2/3 cup cocoa powder
3/4 teaspoon baking soda
1/4 teaspoon salt
1 1/2 cups semisweet chocolate chips
1/2 cup of white chocolate chips
1/2 cup chopped walnuts

Directions:
1.Preheat oven to 350 degrees F (175 degrees C).

2.In large bowl, beat butter, shortening, sugar, eggs, and vanilla until light and fluffy. Combine the flour, cocoa, baking soda, and salt; stir into the butter mixture until well blended. Mix in the chocolate chips and walnuts. Drop by rounded teaspoonfuls onto ungreased cookie sheets.

3.Bake for 8 to 10 minutes in the preheated oven, or just until set. Cool slightly on the cookie sheets before transferring to wire racks to cool completely.

The Result:
These cookies are definitely not to be considered as "health food", but they're oh sooooo good. They are really decadent and rich and chocolaty and yummy. Ohhhh, coooookies!

October 13, 2010

Bunco!

I recently hosted Bunco night for a bunch of my girlfriends. Since there are so many Pioneer Woman recipes that I have been meaning to try, I decided to make it a themed menu of sorts. All of my recipes, except for one, came from the Pioneer Woman website/cookbook. Let me tell you...everything turned out amazing, and I think my guests had a great time!

Here are the recipes that I made with some accompanying photos. On the night of the party, I forgot to take a pic of the pumpkin cake recipe. Oops! So, I just made myself a piece just now to have as a little afternoon snack...just so I could photograph it. Oh, how I suffer for my art! ;)

Bunco!

Olive Cheese Bread
From: The Pioneer Woman website

Ingredients:
1 loaf French Bread
6 ounces, weight Pimiento-stuffed Green Olives
6 ounces, weight Black Olives
2 stalks Green Onions (scallions)
1 stick Butter, Room Temperature
½ cups Mayonnaise
¾ pounds Monterey Jack Cheese, Grated
Preparation Instructions
Roughly chop both black olives and pimiento-stuffed green olives. Slice green onions into thin pieces.

Directions:
Combine butter, mayonnaise, cheese, olives and green onions in a mixing bowl. Stir together until thoroughly combined. Spread mixture onto French bread that has been sliced lengthwise. Bake at 325ºF for 25 to 30 minutes or until cheese is melted and browning.

Mixture can also be refrigerated (up to two days) and used as a dip. Great with crackers.


The olive cheese bread was probably my favorite!

***************************************************

Baba Ghanoush
From: The Pioneer Woman website

Ingredients:
3 whole Medium Eggplants
4 Tablespoons Tahini
4 cloves Garlic, Finely Minced
¼ cups Lemon Juice
3 Tablespoons Extra Virgin Olive Oil (good Quality)
⅓ cups Fresh Parsley, Minced

Directions:
IMPORTANT: Prick the surface of each eggplant several times with the tines of a fork.

On the grill or under the broiler (set to high) blacken/char the eggplant for 25 minutes or so. You want the skin to be completely shriveled and dark, and the eggplant almost fall-apart tender. Just when you think it’s shriveled, let it go another five minutes. Set them aside to cool slightly.

When cool, peel off skin enough to get a spoon into each eggplant and scrape out the flesh into a bowl. Try to get as much as you can, even the stuff that’s stuck to the inside of the skin. (This process is a total mess, so don’t worry.)

Mash eggplant with a fork. A few large chunks are fine, but try to get it to a relatively smooth texture without being totally pureed.

Add in all other ingredients, stirring and tasting before adjusting seasonings or other ingredients. Don’t undersalt!

Serve with pita triangles, baguette slices, chips, crusty French bread…or with a spoon.


My four year old helped me make this recipe. It was fantastic, and he loved saying "Baba Ghanoush!"... it was so freakin' cute!

*******************************************************

Mushrooms Stuffed with Brie
From: The Pioneer Woman website

Ingredients:
1 package White Button Mushrooms, Washed And Stems Removed
4 cloves Garlic, Minced
¼ cups Flat-leaf Parsley, Chopped
4 whole (to 5) Green Onions, Sliced (up To Middle Of Dark Green Part)
Splash Of White Wine (optional)
1 slice (wedge) Of Brie Cheese

Directions:
Preheat oven to 350 degrees

Melt butter in large saucepan. Add mushroom caps and toss to coat in butter. Sprinkle lightly with salt and cook for 1 minute. Remove mushrooms from pan and place upside down in a baking dish.

In the same saucepan (without cleaning it) throw in garlic, parsley, and green onions. Sprinkle very lightly with salt and splash in wine, if using. Stir around until wine evaporates, about 1 minute. Remove from heat.

Cut rind off of brie wedge, then cut pieces of brie to fit each mushroom cap. Place inside, lightly pressing to anchor each piece of brie.

Top mushrooms with parsley/garlic mixture.

Place into the oven for 15 minutes, or until brie is melted.

Note: Mushrooms are best when they’ve been allowed to cool slightly.


I ended up tripling this recipe, and I could have actually made more. These little mouthfuls of joy disappeared quick!

*********************************************

Cinnamon Cookies


This is the only non-Pioneer Woman recipe in the bunch. These are my families' favorite cookies, so I had to share them with my Bunco buddies!

*****************************************************

Pumpkin Cake with Whiskey Whipped Cream
From: The Pioneer Woman website

Ingredients:
1 cup Golden Raisins (*I used regular raisins*)
1 cup Whiskey (optional)
2-½ cups Flour
1 teaspoon Salt
1 teaspoon Baking Powder
½ teaspoons Baking Soda
2 teaspoons Cinnamon
⅛ teaspoons Ground Nutmeg
1 stick Softened Butter
1-½ cup Sugar
3 whole Eggs
1-¼ cup Plain, Unflavored Yogurt
1 cup Canned Or Fresh Pumpkin Puree

WHISKEY WHIPPED CREAM:
1 cup Heavy Cream, Very Cold
2 Tablespoons (to 3 Tablespoons) Sugar
2 Tablespoons Whiskey

Directions:
Preheat over to 325 degrees.

Spray 9×13 inch pan with baking spray. Combine whiskey and raisins in a bowl and allow to soak for awhile.

Sift together flour, salt , baking powder, baking soda, cinnamon, and nutmeg. Set aside.

Add butter to a mixing bowl and beat. Add sugar and beat. Add in eggs one at a time, beating after each egg.

Add yogurt and pumpkin and mix gently until just combined. Add flour mixture in increments, beating until just combined. Drain raisins and stir in by hand.

Pour batter into pan and bake for 35-40 minutes, or until set. Remove from oven and allow to cool completely.

Whiskey Whipped Cream:
Combine ingredients and begin mixing immediately on high speed until stiff, about 4 minutes. Spoon over cooled cake.

Eat extra cream with a spoon, if desired.


I love booze in desserts!!! (Please don't judge me.)

July 3, 2010

Nutella Caramel Hazelnut Brownies

I am not much of a dessert person, but I recently made these brownies and found them to be decidedly decadent. They were sooooo ooey, gooey, chocolaty and rich! If you want to spoil yourself, these brownies would be a good place to start.

Nutella Caramel Hazelnut Brownies

I think I am going to go eat the last one right now...

July 4, 2009

Cinnamon Cookies

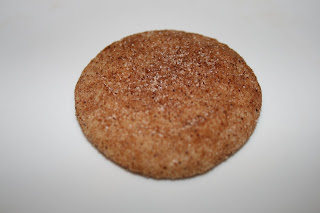
My little guy got a new, hand-made apron from his honorary grandmother, Gaga. I promised him that we would make cookies this weekend so that he could try it out. Every morning since he got his new apron he has asked "is today cookie day?". Really, how can I refuse??? I perused Recipezaar.com and came up with these babies. I had everything on hand for them, and the reviews were excellent. They are very similar to Snickerdoodles, and are the perfect texture of crisp edges and chewy centers. So far, I have eaten 5 of them straight off the cooling rack (I am pretty certain that they are laced with crack)...(self control has never been my strongest attribute).

Cinnamon Cookies
From:RecipeZaar.com-recipe #48241/By: PetesNina

Ingredients:
1 cup sugar
1/2 cup butter
1 large egg
1 teaspoon vanilla
1 1/2 cups flour
1 1/2 teaspoons cinnamon
1 teaspoon baking powder
1/4 teaspoon salt
Extra cinnamon sugar mixture for topping

Directions:
1. In a mixer bowl, cream together sugar and butter; beat in egg and vanilla.
2. Combine flour, cinnamon, baking powder and salt.
3. Add to butter mixture.
4. Blend well.
5. Cover and refrigerate 2 hours or till firm enough to roll into balls.
6. Shape dough into small balls about 3/4-inch in diameter.
7. Roll in cinnamon sugar to coat.
8. Set cookies 1-inch apart on lightly greased cookie sheets.
9. Bake at 350° for 10 minutes or till the edges are lightly browned.
10.Cool slightly on pans for about 1 minute, then remove to racks to cool completely. Sprinkle tops with additional cinnamon sugar mixture, if desired.


The Result:
These cookies are easy and delicious; they certainly lived up to all the hype from the reviews. Best of all "Mommy's Star Helper" loved helping me make them!

June 10, 2009

Ina's Ultimate Ginger Cookie

I have a Bunco game tonight which is always potluck style, so I need to bring either a dessert or an appetizer. Dessert is always a good idea, and everyone loves a good cookie. I decided to try this recipe, since Ina usually delivers delicious food. I saw her demonstrate them on her show, and they looked quite simple to prepare...which is a bonus. I love ginger cookies, so I am looking forward to sampling these beauties. With a title like "Ultimate Ginger Cookie" I am sure they will be a huge hit!

Ultimate Ginger Cookie
2006, Barefoot Contessa at Home, All Rights Reserved

Ingredients:
2 1/4 cups all-purpose flour
1 teaspoon baking soda
2 teaspoons ground cinnamon
1 1/2 teaspoons ground cloves
1/2 teaspoon ground nutmeg
1/2 teaspoon ground ginger
1/4 teaspoon kosher salt
1 cup dark brown sugar, lightly packed
1/4 cup vegetable oil
1/3 cup unsulfured molasses
1 extra-large egg, at room temperature
1 1/4 cups chopped crystallized ginger (6 ounces)
Granulated sugar, for rolling the cookies

Directions:
Preheat the oven to 350 degrees F. Line 2 sheet pans with parchment paper.

In a large bowl, sift together the flour, baking soda, cinnamon, cloves, nutmeg, ginger, and salt and then combine the mixture with your hands. In the bowl of an electric mixer fitted with the paddle attachment, beat the brown sugar, oil, and molasses on medium speed for 5 minutes. Turn the mixer to low speed, add the egg, and beat for 1 minute. Scrape the bowl with a rubber spatula and beat for 1 more minute. With the mixer still on low, slowly add the dry ingredients to the bowl and mix on medium speed for 2 minutes. Add the crystallized ginger and mix until combined.

Scoop the dough with 2 spoons or a small ice cream scoop. With your hands, roll each cookie into a 1 3/4-inch ball and then flatten them lightly with your fingers. Press both sides of each cookie in granulated sugar and place them on the sheet pans. Bake for exactly 13 minutes. The cookies will be crackled on the top and soft inside. Let the cookies cool on the sheets for 1 to 2 minutes, then transfer to wire racks to cool completely.


The Result:
These cookies turned out exactly how they were supposed to...delicious! They were crisp on the outside, chewy on the inside, and very ginger-y. I will make these again, for sure. Ina rocks!!!

June 8, 2009

Double Chocolate Pudding Pie (CEiMB)

I spied this dessert on my Craving Ellie in My Belly group website, and my first reaction was raised eyebrows. Healthy chocolate pie does not compute. It seems very incongruent...sort of like someone being just "a little pregnant". Dubious. Very dubious.

I set my doubts aside and decided to try it. My friend, Jenny's birthday party is tomorrow and I need to bring something, anyway. This pie will fit that requirement, and I can't think of a better bunch to test it out on. I will let my mommy friends judge if a "healthy chocolate pie" makes sense or not. I trust that a group of women with children all under the age of 6 will know what is or isn't a good chocolate pie. After all, chocolate is how many of us get through the day.

(Hopefully, it won't taste like chocolate flubber.)

Double Chocolate Pudding Pie
Eating Healthy in 2009. Copyright 2006 Ellie Krieger, All rights reserved

Ingredients:
14 graham cracker squares (7 full sheets)
2 tablespoons butter, melted
1 tablespoon water
1 tablespoon unflavored gelatin
1/3 cup boiling water
2/3 cup sugar, plus 1/2 teaspoon
1/3 cup cocoa
1/4 cup cornstarch
1/8 teaspoon salt
3 cups 1 percent low-fat milk
2 ounces bittersweet chocolate, chopped
2 teaspoons vanilla extract
1/4 cup heavy cream

Directions:
Preheat the oven to 350 degrees F. Spray a 9-inch pie plate with cooking spray.

In a food processor, process the graham crackers until finely ground. Add butter and water and process until the crumbs clump together. Press the crumb mixture into bottom of pie plate and about 1-inch up the sides. Bake for 10 minutes, then let cool.

In the meantime, make the pudding. Put the gelatin in a small bowl, add the boiling water and stir until dissolved. Set aside.

In a medium sauce pan mix the 2/3 cup of sugar, cocoa, cornstarch and salt. Gradually add half of the milk, whisking until smooth. Whisk in the rest of the milk. Turn the heat on to medium and cook, whisking constantly, until the mixture thickens and comes to a boil, about 10 minutes.

Remove from the heat. Add the chocolate and stir until melted. Stir in the vanilla and reserved gelatin. Pour the mixture into the pie crust and let set for 3 hours in the refrigerator.

Whip the cream and remaining 1/2 teaspoon of sugar. Before serving, garnish the pie with the whipped cream.


The Result:
Sometimes, I love being wrong. There is no flubber to report here!!! I am sooooo glad I decided to try it. It was fan-freakin'-tastic! Seriously, delicious!!! My doubts were totally unfounded, because this pie is soooo satisfying. Chocolaty and creamy with the crunchy crust...yum. Now, I am on the horns of a dilemma. I don't know if I should take this pie to Jenny's party today, or hoard it for myself. It is that good!!!

May 9, 2009

White Chocolate Chip Cranberry Oatmeal Cookies

Here are some more cookies for San Diego. (I enjoy eating cookies while on the beach).

White Chocolate Chip Cranberry Oatmeal Cookies From: recipezaar.com/recipe #112683

Ingredients:
3/4 cup sugar
1/4 cup packed brown sugar
1/2 cup butter, softened
1 large egg
1/2 teaspoon vanilla extract
1/2 teaspoon cinnamon
1/2 teaspoon baking soda
1/4 teaspoon salt
1 cup all-purpose flour
1 1/2 cups quick-cooking oats (not instant)
3/4 cup dried cranberries
6 ounces white chocolate chips

Directions:
1. Preheat oven to 375°F.
2. In a large bowl using an electric mixer combine the sugar, brown sugar and butter; mix well to cream together.
3. Add in egg and vanilla extract and mix until combined.
4. Add the cinnamon, baking soda, salt and flour and mix well.
5. Fold in the oatmeal, dried cranberries and white chocolate chips- making sure that all ingredients are uniformly distributed.
6. Roll dough into 1-inch balls and place 3 inches apart onto a greased cookie sheet and bake at 375° for 10-12 minutes, just until the edges are lightly golden.
7. Remove from oven and let cool for 2-3 minutes on the cookie sheet, then transfer cookies to cooling rack.

May 1, 2009

Chocolate Cherry Bars

I have limited baking ingredients on hand, so I had to really scrounge for a "cookie" recipe today. After checking all the usual recipe spots, I finally went to the Hershey's website to see if they had anything interesting. The major ingredient I had in my pantry was Hershey's Cocoa Powder. I was dying for something chocolaty, but I didn't have any chocolate chips on hand. I needed a chocolate recipe that used the powder and not the chips. Combined with all the other ingredients that I either did or did not have, this was actually quite a challenge. Finally, I found this recipe. These bars sounded really good, and I pretty much had all the items needed to make them. Thankfully, the major component in these bars was the cocoa powder and I could make substitutions for the ingredients I did not have. For example, I didn't have mini-kiss pieces and I didn't have maraschino cherries; so creative baking was definitely in order. I ended up using dried, sweet & tart cherries, in place of the maraschinos, and leftover, pastel-colored, M & M's from Easter, instead of the mini-kisses. What can I say...I am resourceful. Hopefully, these bars will still turn out yummy!

Chocolate Cherry Bars
Adapted from: Hershey's Kitchens: Recipes

Ingredients:
1 cup (2 sticks) butter
3/4 cup HERSHEY'S Cocoa Powder
2 cups sugar
4 eggs
1-1/2 cups plus 1/3 cup all-purpose flour, divided
1/3 cup chopped almonds
1 can (14 oz.) sweetened condensed milk (not evaporated milk)
1/2 teaspoon almond extract
1 cup HERSHEY'S MINI KISSES Brand Milk Chocolates (OR substitute M & M's)
1 cup chopped maraschino cherries, drained (OR substitute dried cherries)

Directions:
1. Heat oven to 350°F. Generously grease 13x9x2-inch baking pan.

2. Melt butter in large saucepan over low heat; stir in cocoa until smooth. Remove from heat. Add sugar, 3 eggs, 1-1/2 cups flour and almonds; mix well. Pour into prepared pan. Bake 20 minutes.

3. Meanwhile, whisk together remaining 1 egg, remaining 1/3 cup flour, sweetened condensed milk and almond extract. Pour over baked layer; sprinkle chocolates and cherries over top. Return to oven.

4. Bake 20 to 25 minutes or until set and edges are golden brown. Cool completely in pan on wire rack. Refrigerate until cold, 6 hours or overnight. Cut into bars. Cover; refrigerate leftover bars. About 48 bars.


The Result:
These are basically brownies. Yummy, almond-y, cherry brownies...but brownies. These are really good, and I totally loved the almond/chocolate/cherry combo. Delish! The added M & M's don't bring a whole lot to the party, so next time I think I will add chocolate chips and extra dried cherries. (I definitely think the dried sweet & tart cherries are the way to go with this recipe.) This was an easy dessert to make, and it turned out really good. I will add these bars to my 'keeper' file, for sure!

March 5, 2009

No-Guilt Pumpkin Cookies

I still had some pumpkin leftover from bread-making, so I thought I would try this recipe for cookies. My friend, Claire found it on recipezaar.com when she was looking for pumpkin ideas. After a glowing review from Claire, I decided I just had to make these babies. Oh man! She was quite right to brag about these cookies...they are great! Light, fluffy, cake-like. Not too sweet, but nice and buttery. Yum! I heart them very much. Also, the recipe should come with a warning label...these cookies are highly addictive! You cannot eat just one!

No-Guilt Pumpkin Cookies
Recipe #169079

Ingredients:
1/2 cup sugar or Splenda granular
1/2 cup brown sugar, packed
1 cup margarine or butter, softened
1 cup canned pumpkin
1 teaspoon vanilla
1 egg
2 cups whole wheat flour
1/4 cup ground flax seeds
1 teaspoon baking powder
1 teaspoon baking soda
1 teaspoon cinnamon
1/4 teaspoon salt


Directions:
Preheat oven to 350 degrees. In large bowl, beat sugars and margarine until light and fluffy. Add pumpkin, vanilla, and egg; blend well. Add dry ingredients and mix well. Drop dough by rounded teaspoonfuls 2 inches apart on ungreased cookie sheets.
Bake at 350 degrees for 10-12 minutes or until light golden brown around the edges.

Jen's Notes:
I added a teaspoon of nutmeg, too. What can I say??? I love nutmeg. Also, I think that cinnamon should not be without nutmeg. It is just such a classic pairing.


The Result:
Is it wrong to have cookies for breakfast??? I hope not, because this is precisely what my son and I ate this morning. In fact, it was his idea! Who am I to say that we should not have delicious, No-Guilt Pumpkin Cookies for breakfast???? After all, you are not allowed to feel guilty while eating them...it says so right in the title! I assume that includes breakfast, too.

December 24, 2008

Panettone Bread Pudding

What is a holiday meal without a Barefoot Contessa recipe???? I don't think you can actually consider it a holiday! This is my one "new" recipe that I am experimenting with this evening. I saw it demonstrated on Ina's show, and then found a Panettone at Trader Joe's. How fortuitous! Panettone is not easy to find in Arizona; I only see them around Christmastime. Obviously, I was meant to try this dish!!!
Panettone is an Italian eggy, cake-like, sweet bread that is usually studded with dried, candied fruit...but it is not a fruit cake! I think the one I have has raisins and candied orange peel in it. I think it originated in Norther Italy, and is a very traditional treat this time of year. It is light and flavorful and it makes great French Toast, too. I am looking forward to trying this new application.

Panettone Bread Pudding

Ingredients:
1 Italian panettone, about 1.2 pounds
Unsalted butter, for greasing the dish
3 extra-large whole eggs
8 extra-large egg yolks
5 cups half-and-half
2 teaspoons pure vanilla extract
2 teaspoons pure almond extract
1/2 cup sugar
1/3 cup sliced almonds


Directions:
Preheat the oven to 350 degrees F.
Trim the dark brown outer crust from the panettone. Cut the rest of the loaf in 1-inch cubes and place on a sheet pan in a single layer. Toast the panettone for 10 minutes, until lightly browned.
Grease a 9 by 12 by 2-inch baking dish with the butter. Place the panettone cubes in the baking dish.
In a large bowl, whisk together the whole eggs, egg yolks, half-and-half, vanilla and almond extracts and sugar. Pour this custard mixture over the panettone. Set aside for 10 minutes so the bread soaks up the custard. Scatter the sliced almonds over the top of the pudding.
Place the baking dish into a larger pan and add very hot tap water to the larger pan until it's halfway up the side of the baking dish. Cover the larger pan with aluminum foil, tenting the foil so it doesn't touch the pudding. Cut a few holes in the foil to allow steam to escape. Bake the pudding for 45 minutes. Uncover and bake for 40 to 45 more minutes, until the custard is set and the top of the pudding is light golden brown. Allow to cool for 15 minutes. Serve warm or at room temperature.


December 16, 2008

Mom's Christmas Cookies

I started feeling better yesterday, so my mom and I decided to do our annual Christmas Cookie Bonanza. We ended up making 6 different kinds of cookies all on Monday afternoon...which was a personal cookie making record for me. These are my favorite cookie varieties that we do every year. Quite a few of them are drenched in powdered sugar...I think that Christmas is really the only time that you can consume mass amounts of sweets drenched in powdered sugar without feeling much guilt. It is the most wonderful time of the year!

Mom’s Christmas Cookies

Nut Cups

Ingredients:
Dough:
1 small (4 ounce) package of cream cheese
1 cup of AP flour
¼ cup of margarine (not butter)

Filling:
1 cup of ground nuts (pecans)
1 egg beaten
¾ cup brown sugar
1 Tablespoon butter
1 teaspoon vanilla

Directions:
Dough:
Mix all ingredients together, wrap in foil, then chill overnight or freeze. Make into 24 balls and line small muffin tins with dough.

Filling:
Distribute filling to 24 lined cups until all is used. Bake 20 minutes @ 350 degrees. Reduce oven to 250 degrees and cook an additional 10 minutes (total cook time will be ½ hour). Cool and sprinkle tops with powdered sugar.


Fudge Scotch Squares

Ingredients:
1 ½ cups graham cracker crumbs
1 can of Eagle Brand sweetened condensed milk (not evaporated milk)
1 cup semi sweet chocolate chips
1 cup butterscotch chips
1 cup coarsely chopped walnuts

Directions:
Mix well and press into well greased 9 inch pan. Bake at 350 degrees for 30-35 minutes. Cool for 45 minutes, then cut into 1 ½ inch squares.


Aunt Marilyn’s Crescents

Ingredients:
1 cup of butter or margarine
¾ cup of powdered sugar
2 ½ cups of AP flour
1 ½ teaspoons vanilla
1 cup ground nuts (pecans or almonds)

Directions:
Knead to smooth dough and shape about 1 teaspoon of dough at a time into small crescent shapes. Bake on ungreased cookie sheet in 350 degree oven until slightly brown; about 15 to 17 minutes. Cool 1 minute. While still warm roll cookies in powdered sugar.


Lemon Squares

Ingredients:
1 cup of melted butter
2 cups plus 4 Tablespoons of AP flour
1 cup powdered sugar
1 teaspoon baking powder
6 Tablespoons lemon juice
4 eggs
2 cups white granulated sugar

Directions:
Combine melted butter with 2 cups flour and 1 cup of powdered sugar. Pat into a buttered 9 x 13 pan and bake 20 minutes at 350 degrees.

While crust is baking, beat 4 eggs well, then add 2 cups granulated sugar, baking powder, remaining 4 Tablespoons of flour, and lemon juice. Mix well and pour over baked crust. Bake 30-35 minutes at 350 degrees. When cool, sprinkle with powdered sugar lightly.


Toffee Squares

Ingredients:
1 cup butter, softened to room temperature
1 cup brown sugar
1 egg yolk
2 teaspoons vanilla
1 7/8 cups AP flour
10 oz. milk chocolate or semi sweet chocolate chips, melted
1 cup chopped pecans or almonds


Directions:
In mixing bowl, cream together butter and brown sugar until light-colored and fluffy. Add egg yolk and vanilla; gradually beat in flour until smooth and blended. (Dough will be thick.) Spread evenly on ungreased 16 x 14 x 1 inch baking pan. Bake at 350 degrees for 15 minutes or until crust is golden brown and puffy. Remove from oven. Pour melted chocolate over crust and spread evenly. Sprinkle with chopped nuts. Cool; Cut into squares. Yield 40 squares.


Cherry-Pistachio Italian Wedding Cookies

Ingredients:
1 1/2 cups cake flour (about 6 ounces)
2/3 cup all-purpose flour (about 3 ounces)
1 1/4 cups powdered sugar, divided
2 teaspoons cornstarch
1/4 teaspoon salt
1/2 cup chilled butter, cut into small pieces
3 teaspoons ice water
1 1/2 teaspoons vanilla extract
1/2 cup dried tart cherries
1/4 cup finely chopped salted dry-roasted pistachios
Cooking spray

Directions:
1. Preheat oven to 350°.
2. Lightly spoon flours into dry measuring cups; level with a knife. Combine flours, 3/4 cup powdered sugar, cornstarch, and salt in a food processor; pulse to combine. With food processor on, add butter through food chute a few pieces at a time; process 1 minute or until mixture is the texture of sand.
3. Combine 3 teaspoons ice water and vanilla in a small bowl. With food processor on, slowly add ice water mixture through food chute; process 1 minute or until very well combined. (Mixture will remain crumbly.) Add cherries and pistachios; pulse 10 times or just until combined. Transfer mixture to a bowl. (Mixture will be crumbly.) Gently press mixture into a level tablespoon; pack lightly with the heel of your hand. Turn out onto a baking sheet coated with cooking spray. Repeat with remaining dough to form 32 cookies.
4. Bake at 350° for 15 minutes or just until bottoms are golden. Remove from oven; cool 10 minutes on baking sheet.
5. Place remaining 1/2 cup powdered sugar in a large bowl. Add cooled cookies; toss gently to coat with powdered sugar. Transfer cookies to wax paper to cool completely.


December 3, 2008

Barefoot Contessa's Hot Chocolate

The husband and I made hot chocolate from scratch tonight, for our after-dinner dessert. It was fan-freakin'-tastic! Thank you again, Ina!

Barefoot Contessa's Hot Chocolate

Ingredients:
2 1/2 cups whole milk
2 cups half-and-half
4 ounces bittersweet chocolate, chopped
4 ounces milk chocolate, chopped
1 tablespoon sugar
1 teaspoon pure vanilla extract
1 teaspoon instant espresso or coffee powder
4 to 5 vanilla beans or cinnamon sticks, for garnish

Directions:
Heat the milk and half-and-half in a saucepan on medium heat to just below the simmering point. Remove the pan from the heat and add both chocolates. When the chocolates are melted, add the sugar, vanilla extract, and espresso and whisk vigorously. Reheat gently and serve immediately. Use a vanilla bean or cinnamon stick to garnish each serving.

November 17, 2008

(Claire's Friend, Benah's) Pumpkin Crumb Cake

The nice thing about having a friend with a cooking blog, is that you can steal...I mean get inspiration from...recipes that she has collected from her other friends. This cake is a recipe from Claire's friend Benah, which Claire posted on her blog a couple weeks ago. It is really, really good. I had a chance to sample a piece of this cake at a playgroup that Claire hosted, and let me tell you, it is definitely worth recreating. I found some frozen pumpkin puree from about the time of the Mesozoic Era in my freezer (carbon dating analysis will confirm exactly how long it was in my freezer...ugh), so I thought that this cake would be perfect for using that up. My house is going to smell so yummy!

Pumpkin Crumb Cake

Crust:
1 pkg (18 oz) yellow cake mix (take out one cup for topping)
1 egg
1 stick butter, melted

Filling:
1 lb can pumpkin
3 eggs
½ c granulated sugar
¼ c brown sugar
1 ½ tsp cinnamon (or 1/2 tsp each of cinnamon, nutmeg, ginger)

Topping:
1 cup cake mix
½ c granulated sugar
½ c chopped nuts (optional)
3 tbsp butter

Directions:
Preheat oven to 350. Mix crust ingredients; pat into greased 9x13 pan.

Beat filling ingredients; pour over crust.

Combine topping and crumble over filling.

Bake for 45-55 minutes.


The Result:

Dear Claire and Benah,
Thank you for bringing this cake into my life. It is so amazingly delicious and easy. I love it! I would sing you a song about how much I L-O-V-E this cake, but I am tone deaf. It is better if I just write you this love letter. XOXO.

Warm Regards,
Best Wishes,
Hopelessly Devoted,
Forever Yours,

Jen B.

October 31, 2008

Pioneer Woman's Cake Balls

Baking is the bane of my existence. I hate it. I suck at it. It is very frustrating for me to bake anything, even something as seemingly easy as Cake Balls. I found this recipe on the Pioneer Woman website, and I was seduced by the promise of fun while baking. Also, I sometimes have Martha Stewart baking fantasies. I dream that my baked goods will always turn out delicious and be picture perfect. In reality they usually only pass as edible, and they look like an old Michelin tire. Cake Balls were no exception.

Once again, I had baking delusions of grandeur. I felt that I could just whip these little beauties up in an hour or two, and then take them to my MOMS Club Halloween party. Oh man, did things not go according to plan. First of all, they were not as easy as you would imagine. I was in the kitchen all day. They took a really, really, really, long time. Not so much the cake balls themselves, but the decorating. The decorating was nightmarish. For the dipping, I could not find the fancy colored chocolate. I had to improvise with some white chocolate chips and some regular semi-sweet chocolate chips. I had an issue with the white chocolate melting in the double-boiler, and I almost scraped the whole concoction into the trash. The white chocolate was just gooey and gloppy, and did not coat the cake balls very well. But I pushed forward. I did have better luck melting the regular chocolate. I cut a couple wooden skewers to make lollipop sticks, but the balls just broke and fell apart when I tried to put them on the sticks. Needless to say, my dreams of having cute,little cake ball lollipops deteriorated before my eyes. I wanted to delight all the children at the party with my cake ball pops, but I soon realized that my vision was unrealistic. So, the cake balls stayed in 'ball' format. Sigh.

At this point, I was ready to decorate with icing. I had purchased a ton of cake decorating supplies about two years ago, when I had similar delusions about Christmas sugar cookies. That little episode ended with me in tears and cursing Santa. One of my cookies did look like the proverbial Christmas tire (okay, maybe there is no such thing as a 'proverbial Christmas tire', but it makes me feel better to think my cookies looked like something holiday-related and festive).
Anyway, I took out all my cake decorating supplies and put them on the counter to admire. Once again, I was caught up in the fantasy of cake ball decorating. I started with the orange icing. I was trying to make the white chocolate balls look like little pumpkins. Yeah, that didn't work. I ended up just putting ugly orange stripes on three cake balls, before giving up. I got the black icing out to make cute little pumpkin faces...again, it just looked like globs of black icing on my cake balls. Not pretty. Not decorative. Not Martha Stewart-ish. From that point, I just gave up and used orange and chocolate sprinkles. I didn't even try to put icing on the regular chocolate cake balls. I just coated them with multi-colored party sprinkles. Ugh. Okay, I was not hyperventilating at this point...but close. I started to freak out when I tried to move my cake balls off of the wax paper into containers. They stuck. They tore. They made a mess, and I had ruined at least 6 cake balls.

This was the point where I freaked out and vowed never to bake again.

I was able to salvage most of them, and bring them to the party. They were okay, for the most part...but they did not live up to my expectations at all. Sigh.

If you are interested in years of therapy and a drinking problem, here is the link for the Cake Balls recipe.

Pioneer Woman's Cake Balls

Godspeed, my friends.